The Definitive Focusrite Scarlett 2i2 4th Gen Review
Top quality sound straight out of the box

Reviewed by: Daren Banarsë
Review date: January 2024
Current price: Under $200

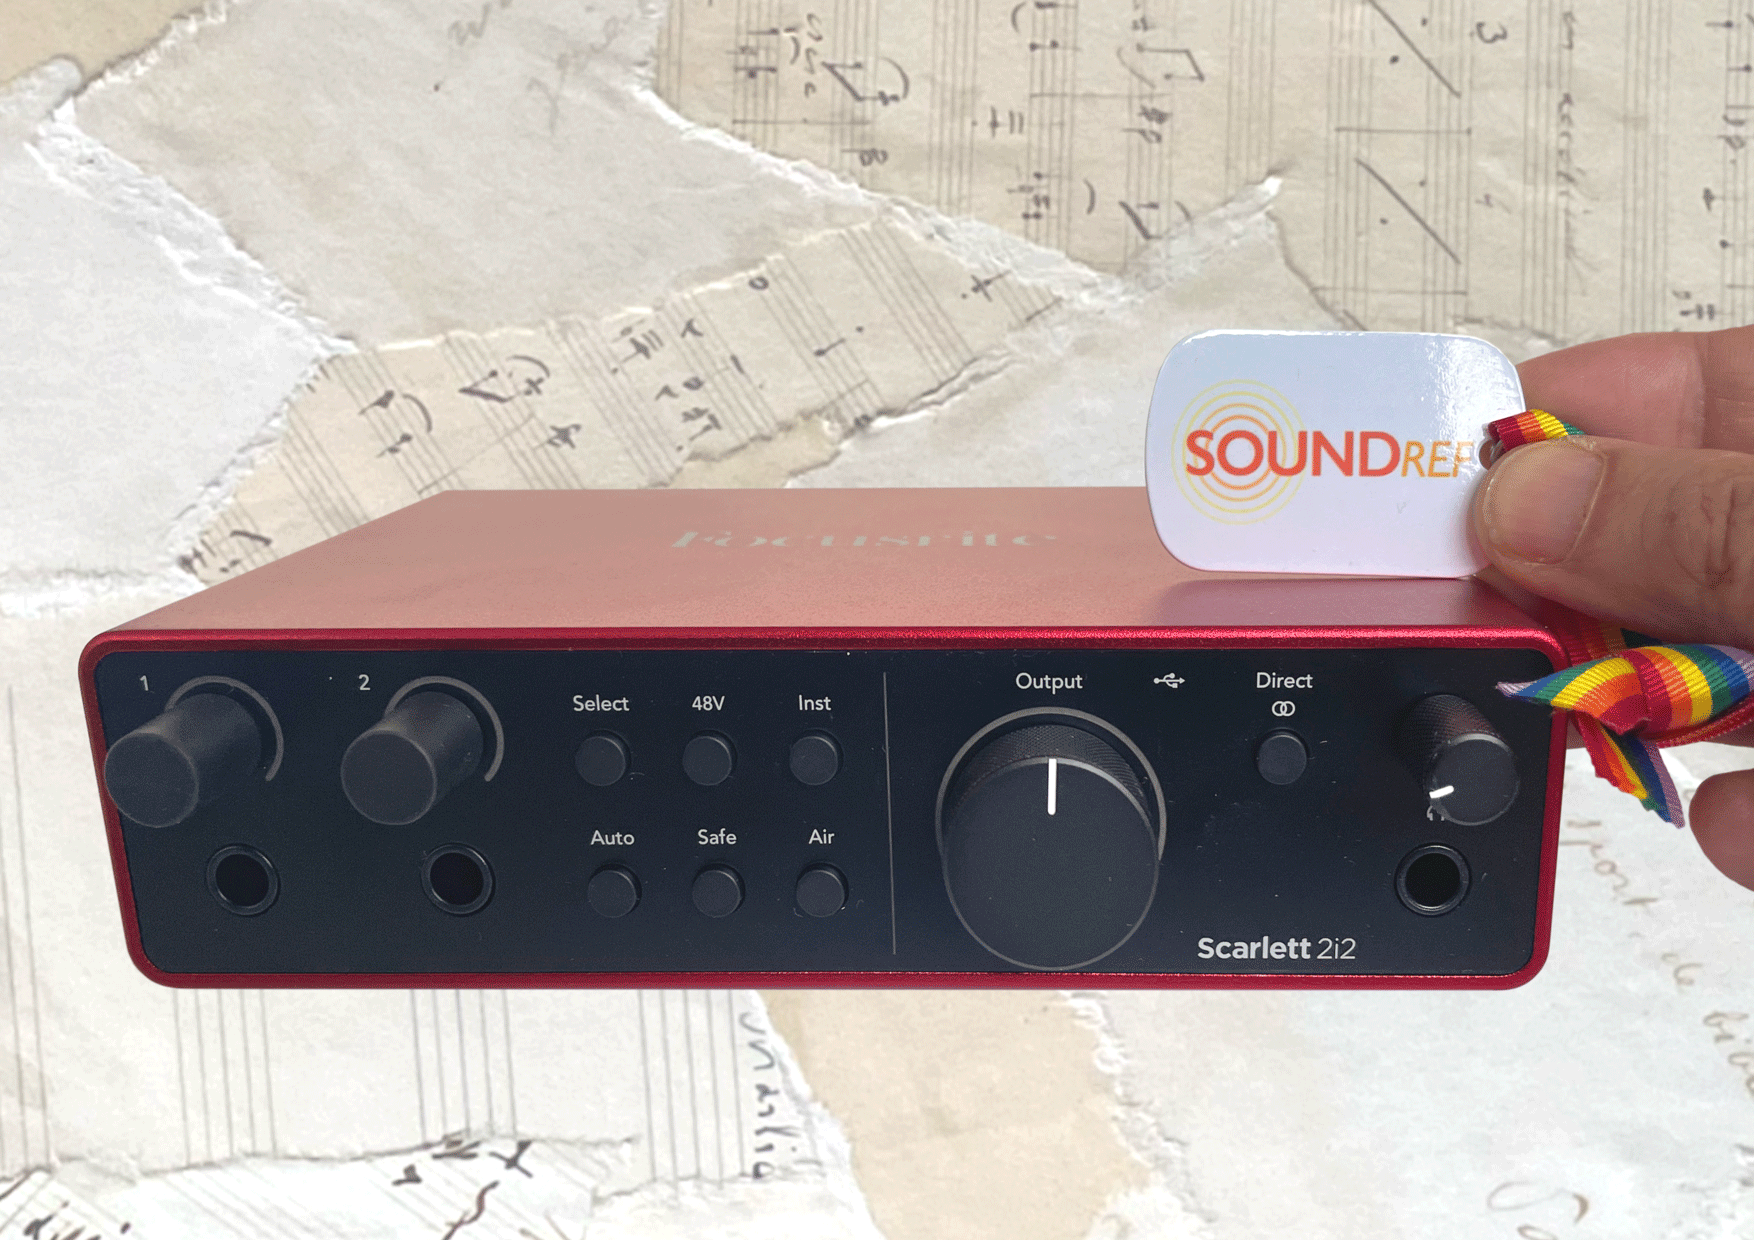
Focusrite Scarlett 2i2 4th Gen Review
| Pros: | Cons: |
| High spec preamps and convertors Value for money Simple to use, with intuitive layout Auto Gain, Clip Safe and Loop | No 5-pin MIDI socket |
Focusrite Scarlett 2i2 Review (4th generation)
The Focusrite Scarlett 2i2 (4th generation) is a 2-input 2-output high quality audio interface for musicians and creators requiring good quality audio at an affordable price. Connecting via USB-C, the 2i2 simplifies the recording process with intuitive use and features.
What is it?
Focusrite was founded by Rupert Neve in 1985, when he made a custom mixing console for George Martin. Since then, the product range has expanded exponentially, embracing both professionals and the home studio market.
The first generation Scarlett 2i2 arrived in 2012, with an improved 2nd version following in June 2016. With the third generation in 2019, the 2i2 became the world’s best selling audio interface, with a combination of pristine audio and budget friendly price.
Compare specs from all past Scarlett 2i2’s here
In August 2023, the 4th generation Scarlett 2i2 was unveiled, with a raft of user friendly features, and a super intuitive layout, making it ideal for beginners. Being class compliant, the 4th gen 2i2 works with Macs, iPads and iPhones.
But what’s it like to work with, and how does the new generation sound quality compare to previous generations? Discover all in the Focusrite Scarlett 2i2 4th generation review.
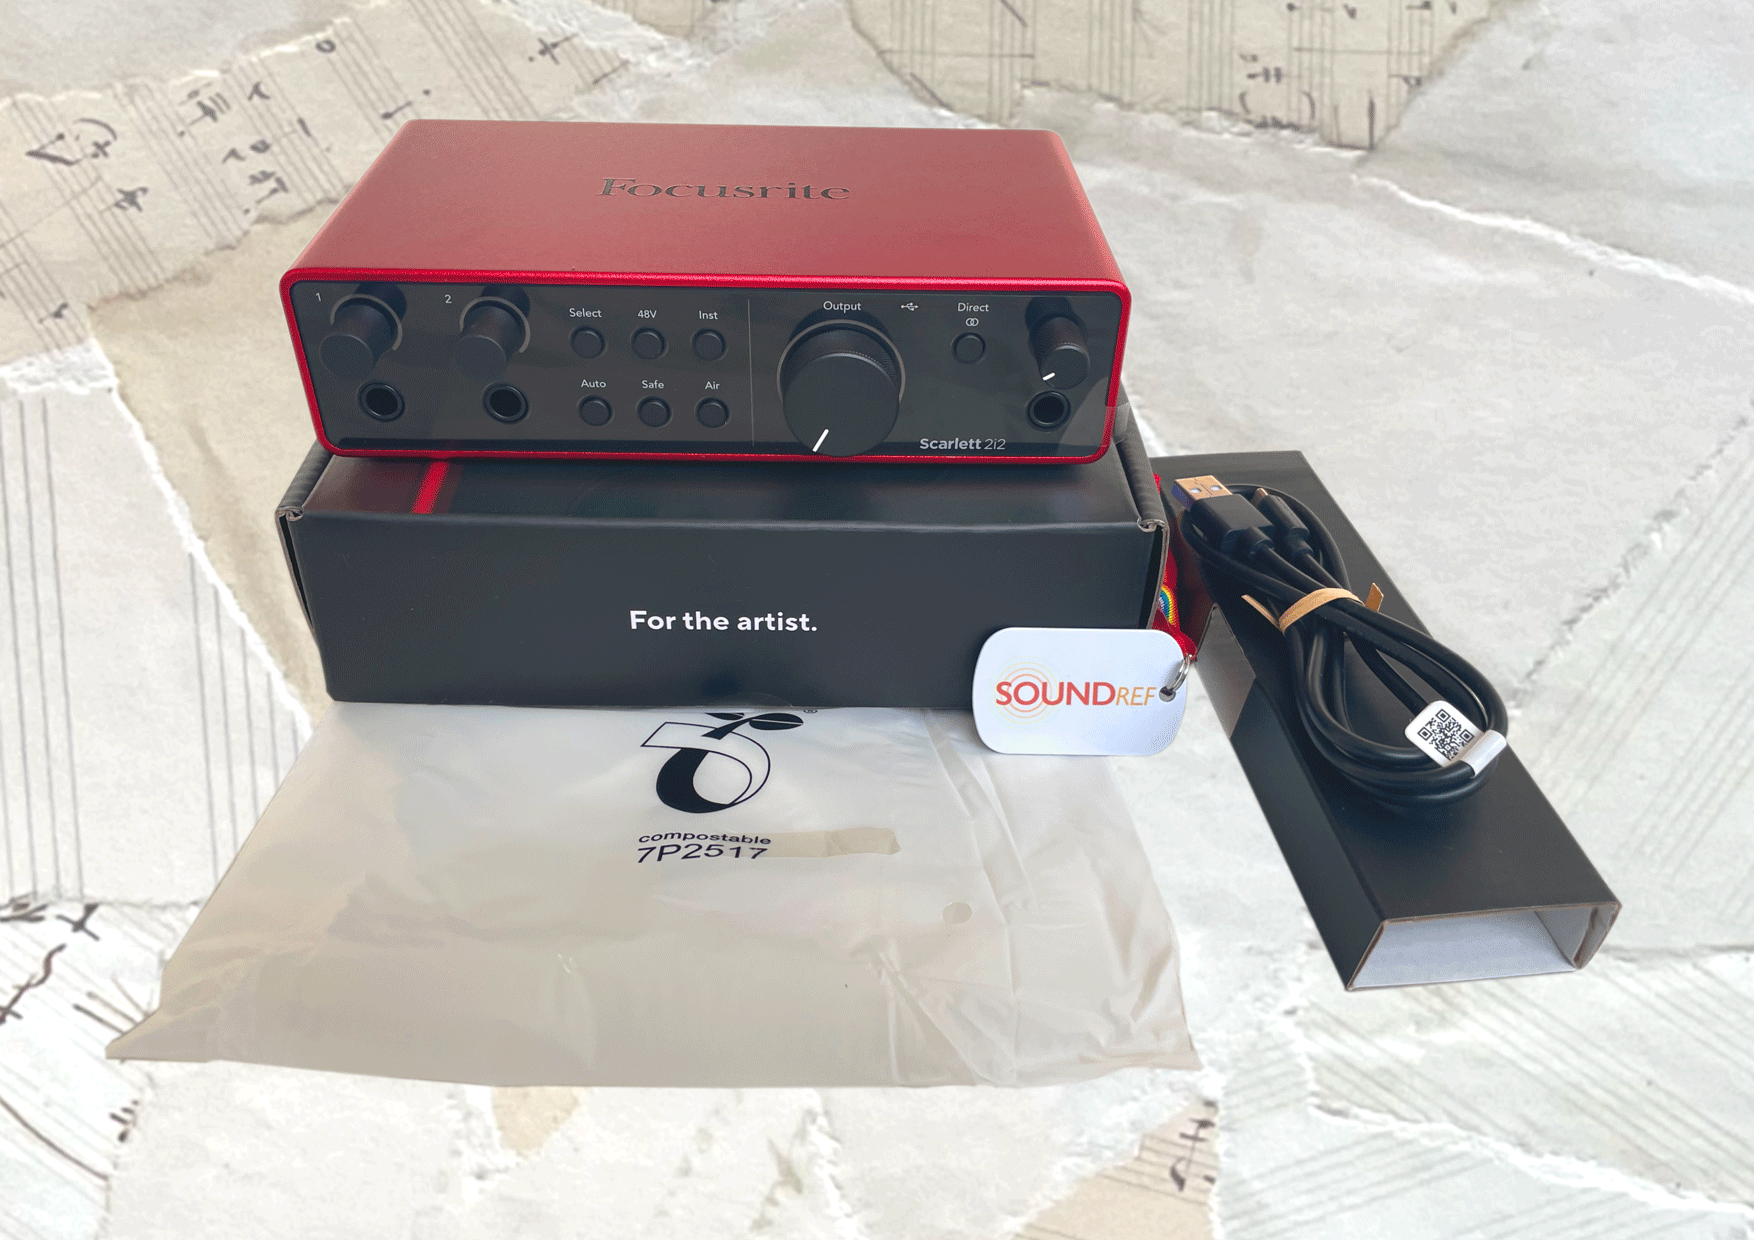
In the box
- 1 meter (3 foot) USB-C to USB-A cable
- Scarlett 2i2 in a compostable bag
- Quick start Info in the box lid
Design and Build Quality
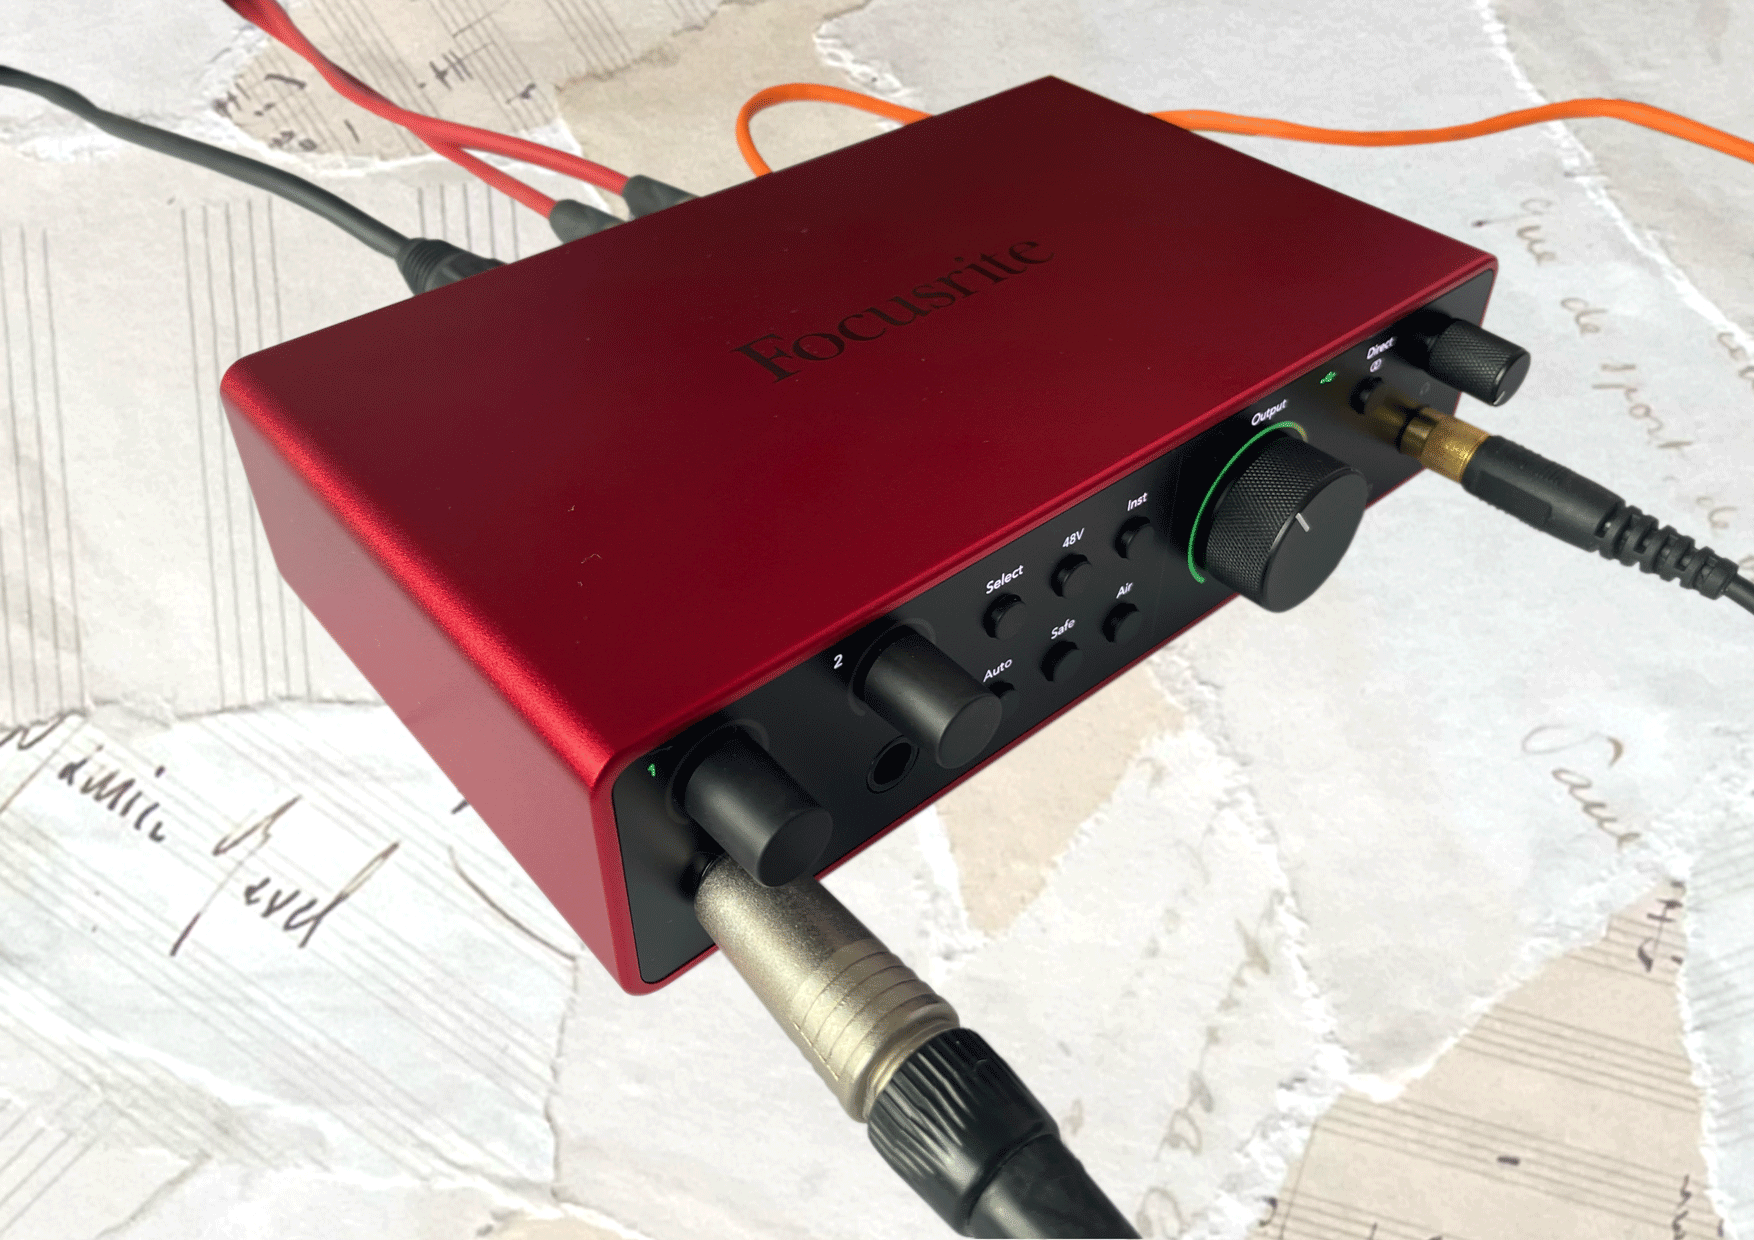
The Focusrite Scarlett 2i2 has an attractive compact design, with an instantly recognisable red brushed aluminium shell wrapping the top, bottom and sides. The back and sides are black plastic, this time in a mat finish – a nice improvement on the gloss black of the 3rd gen, which tends to attract fingerprints.
Just like the 2i2 3rd generation, the Malaysian manufactured gen 4 is a strong and sturdy interface, equally useful for live performances or remote recording sessions. All the knobs are solid, with no wobble, and the cable connections are secure and tight.
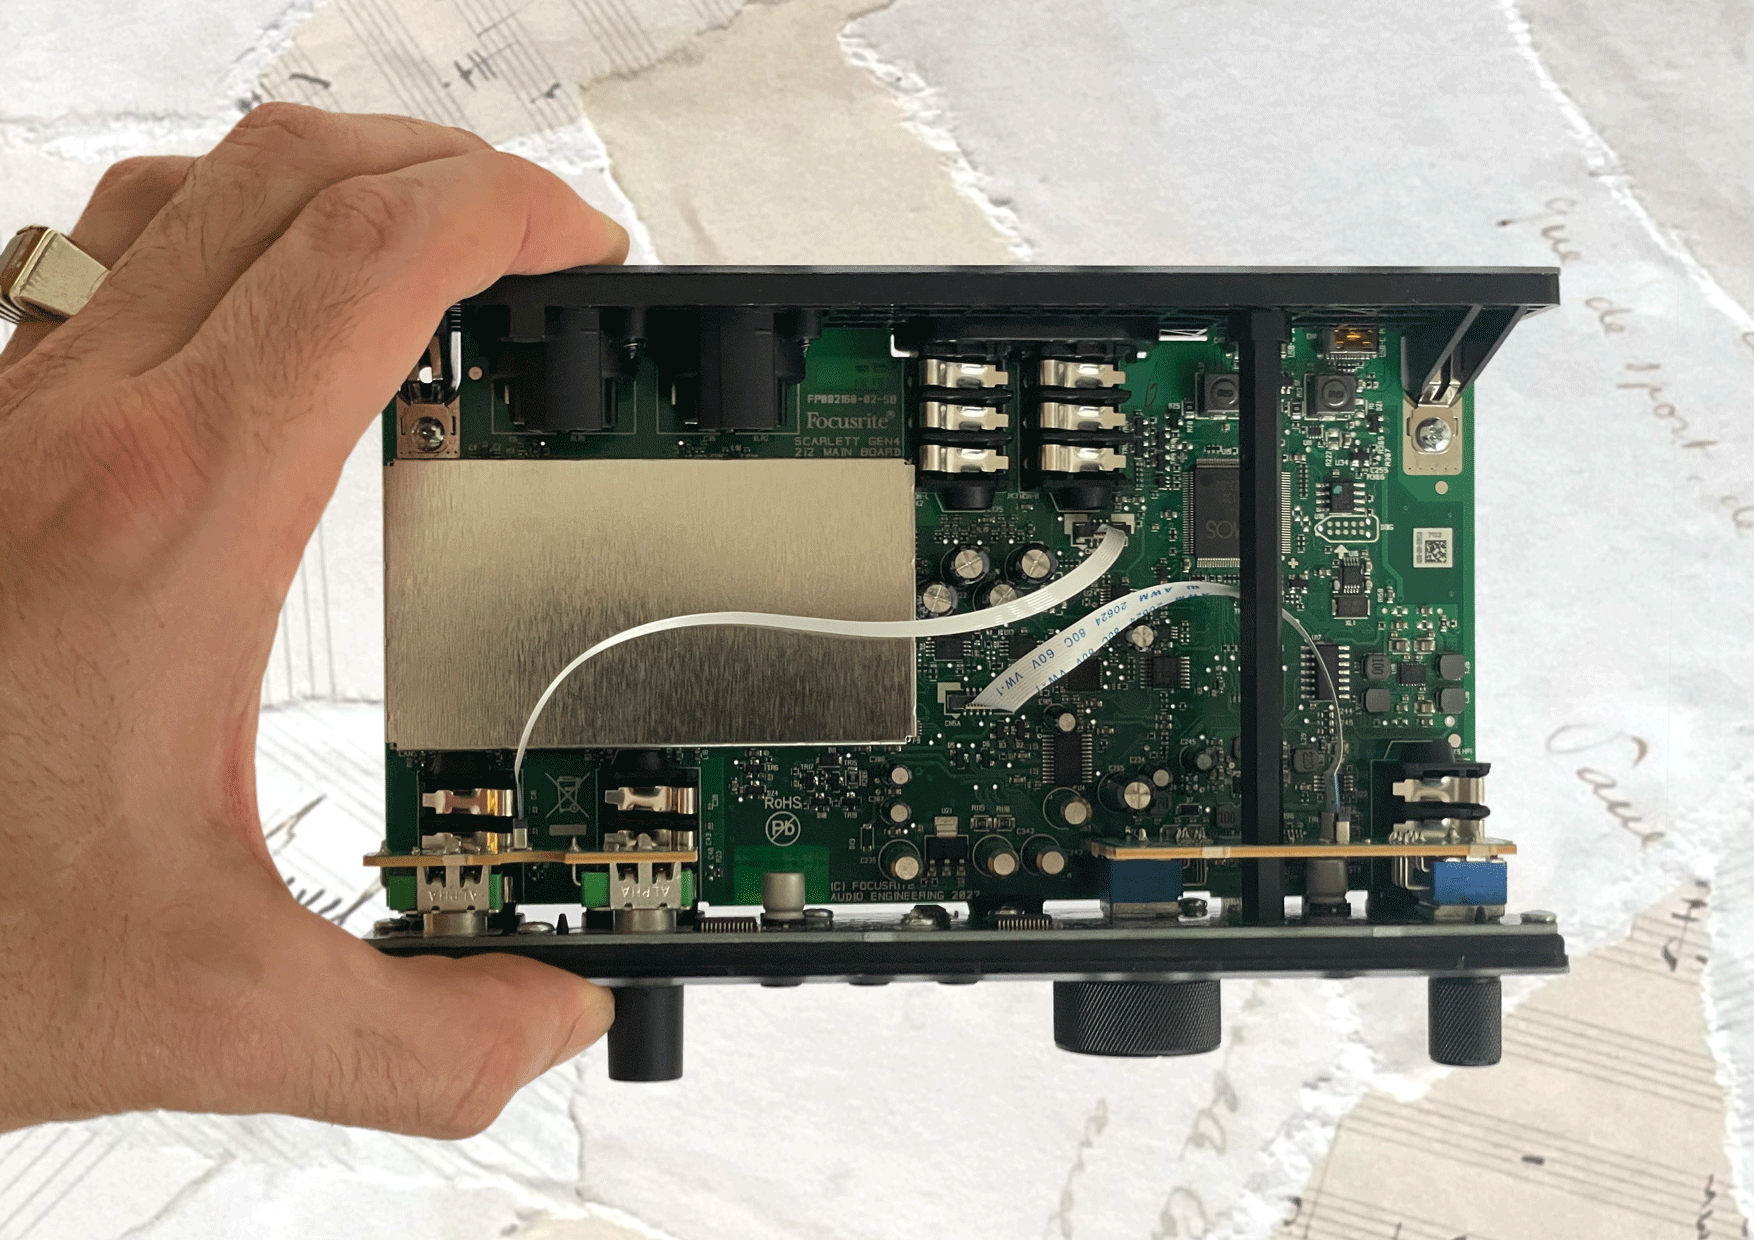
There’s 4 rubber feet which serve the dual purpose of gripping the desk surface, and hiding 2 little screws from which you can open and inspect the unit. Much of the insides are glued in place, so there’s limited scope for repairability.
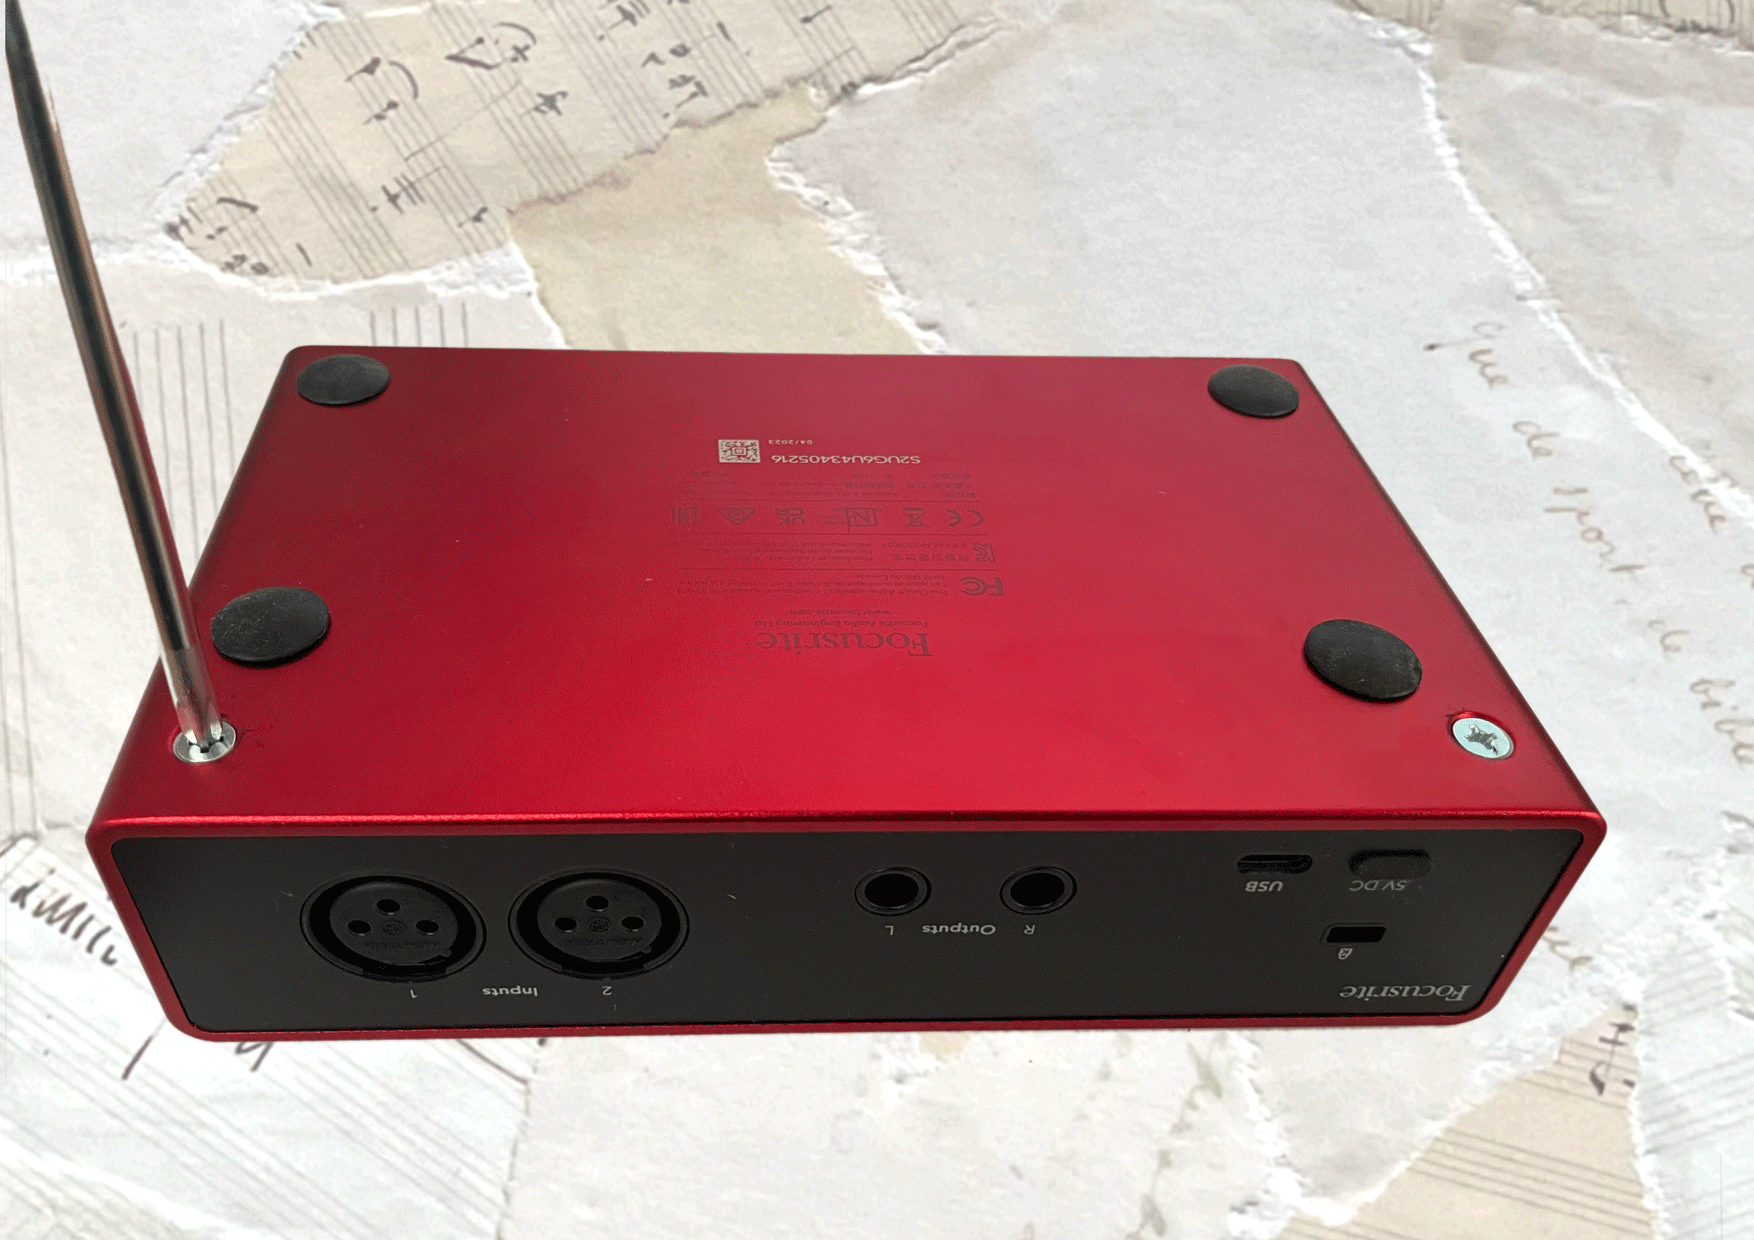
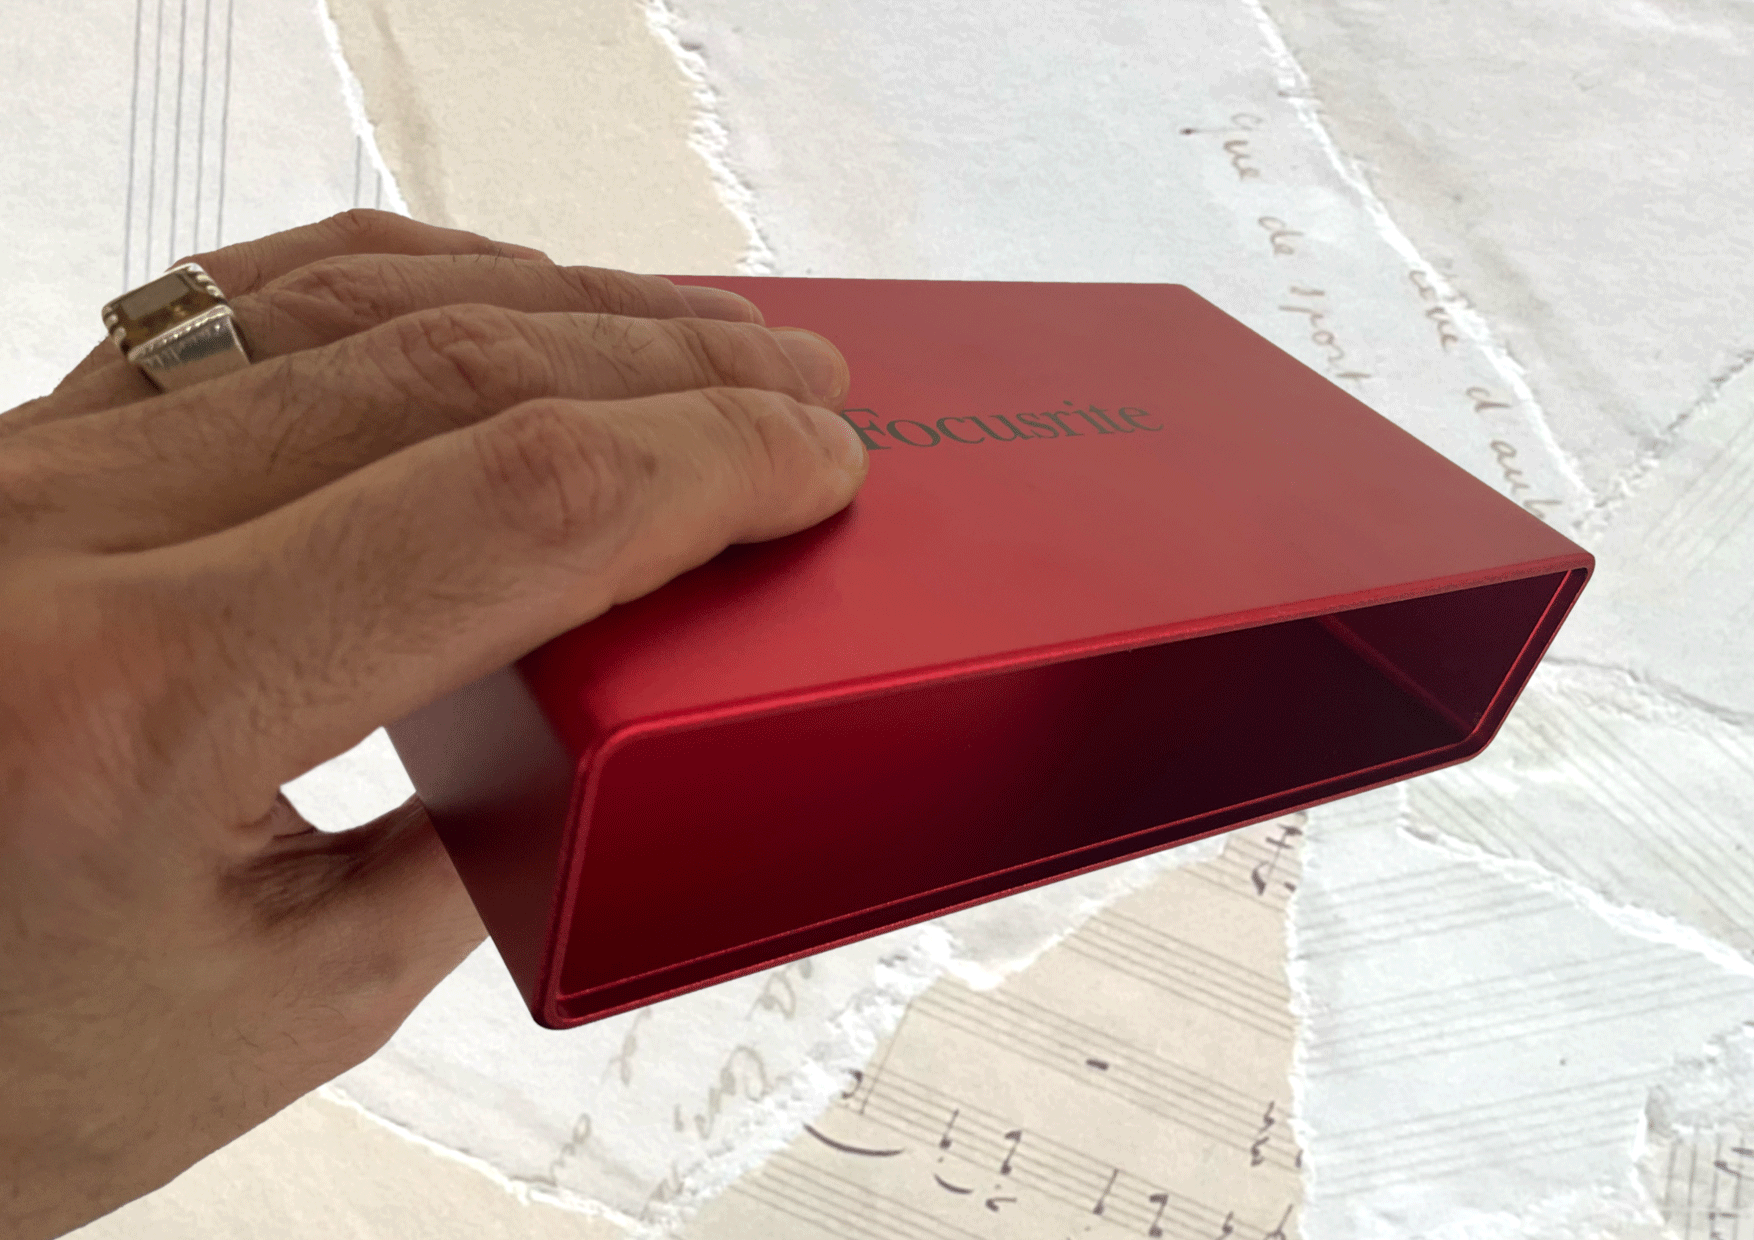
The plastic internal section easily slides, leaving a thick, weighty aluminium shell which would provide the level of protection I’d associate more with automobile safety!
One interesting update is the inclusion of separate 1/4″ jack and XLR mic inputs as opposed to the singular combined sockets of the 3rd generation models.
While the old XLR and 1/4 inch combo jacks were convenient for being able to change cables at the front, the 4th generation has a distinct advantage. You can leave microphones plugged in at the back, and plug in instruments at the front as and when you need to, as the back XLR mic inputs are automatically disabled.
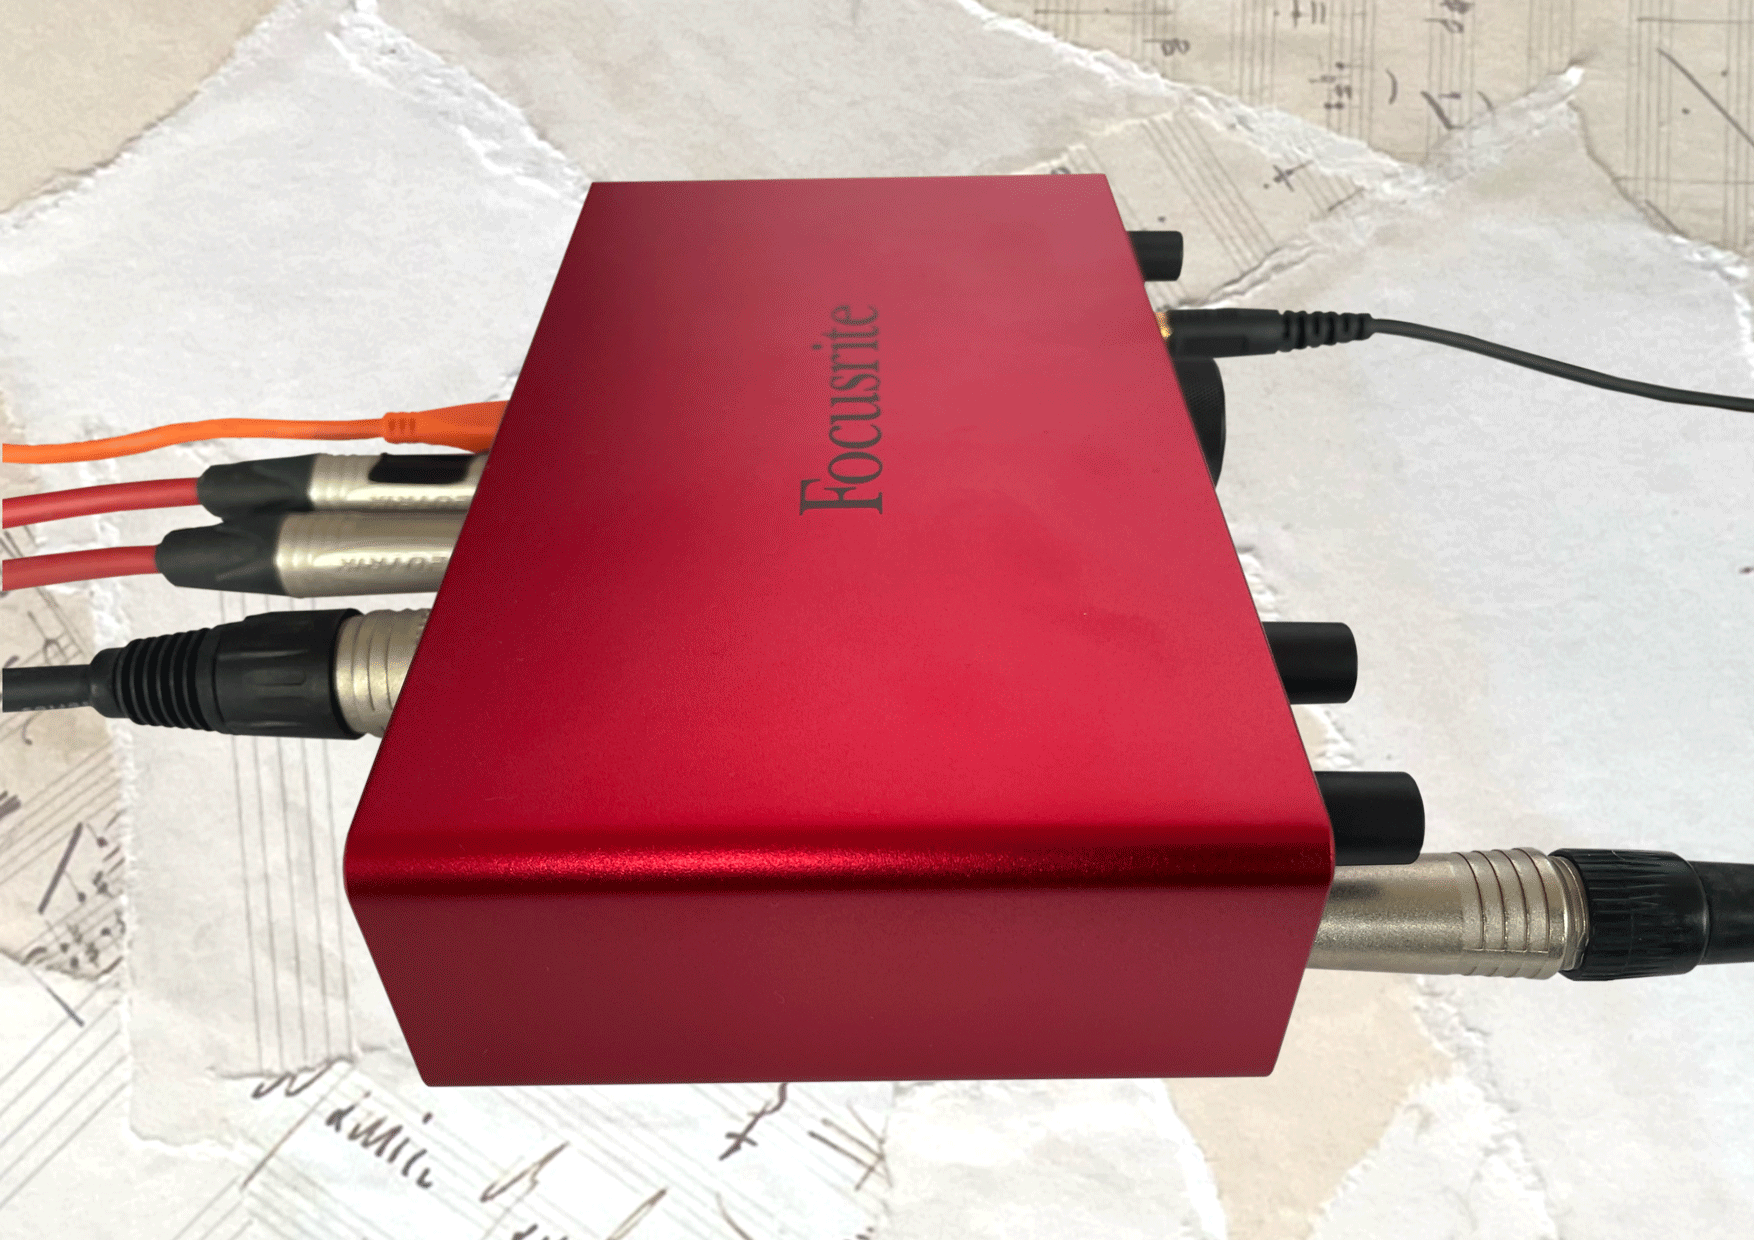
Perhaps Focusrite could’ve gone one step further and allowed you to plug in 4 cables at a time, with a selector to choose which ones are active. It would certainly cut down on the amount of plugging in and unplugging. Bear in mind – even though there’s 4 inputs on the 4th gen 2i2, you can only ever use two at a time.
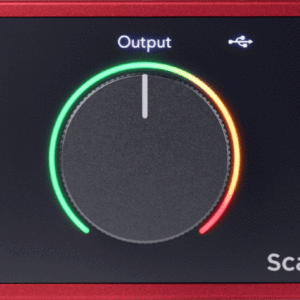
There’s new style LED rings around the encoder style gain knobs, and an extra one around the chunky monitor volume dial, making a total of three ‘halo’ displays . The dial shows a ‘pre fade’ LED reading, showing the level coming from your computer rather than the level of the monitors.
Another useful feature new to the 4th generation Scarlett 2i2 is the extra optional USB power socket. This makes the 4th gen 2i2 suitable for use with devices that don’t have the sufficient power for it, like an iPhone or iPad.
Connecting the Focusrite Scarlett 2i2
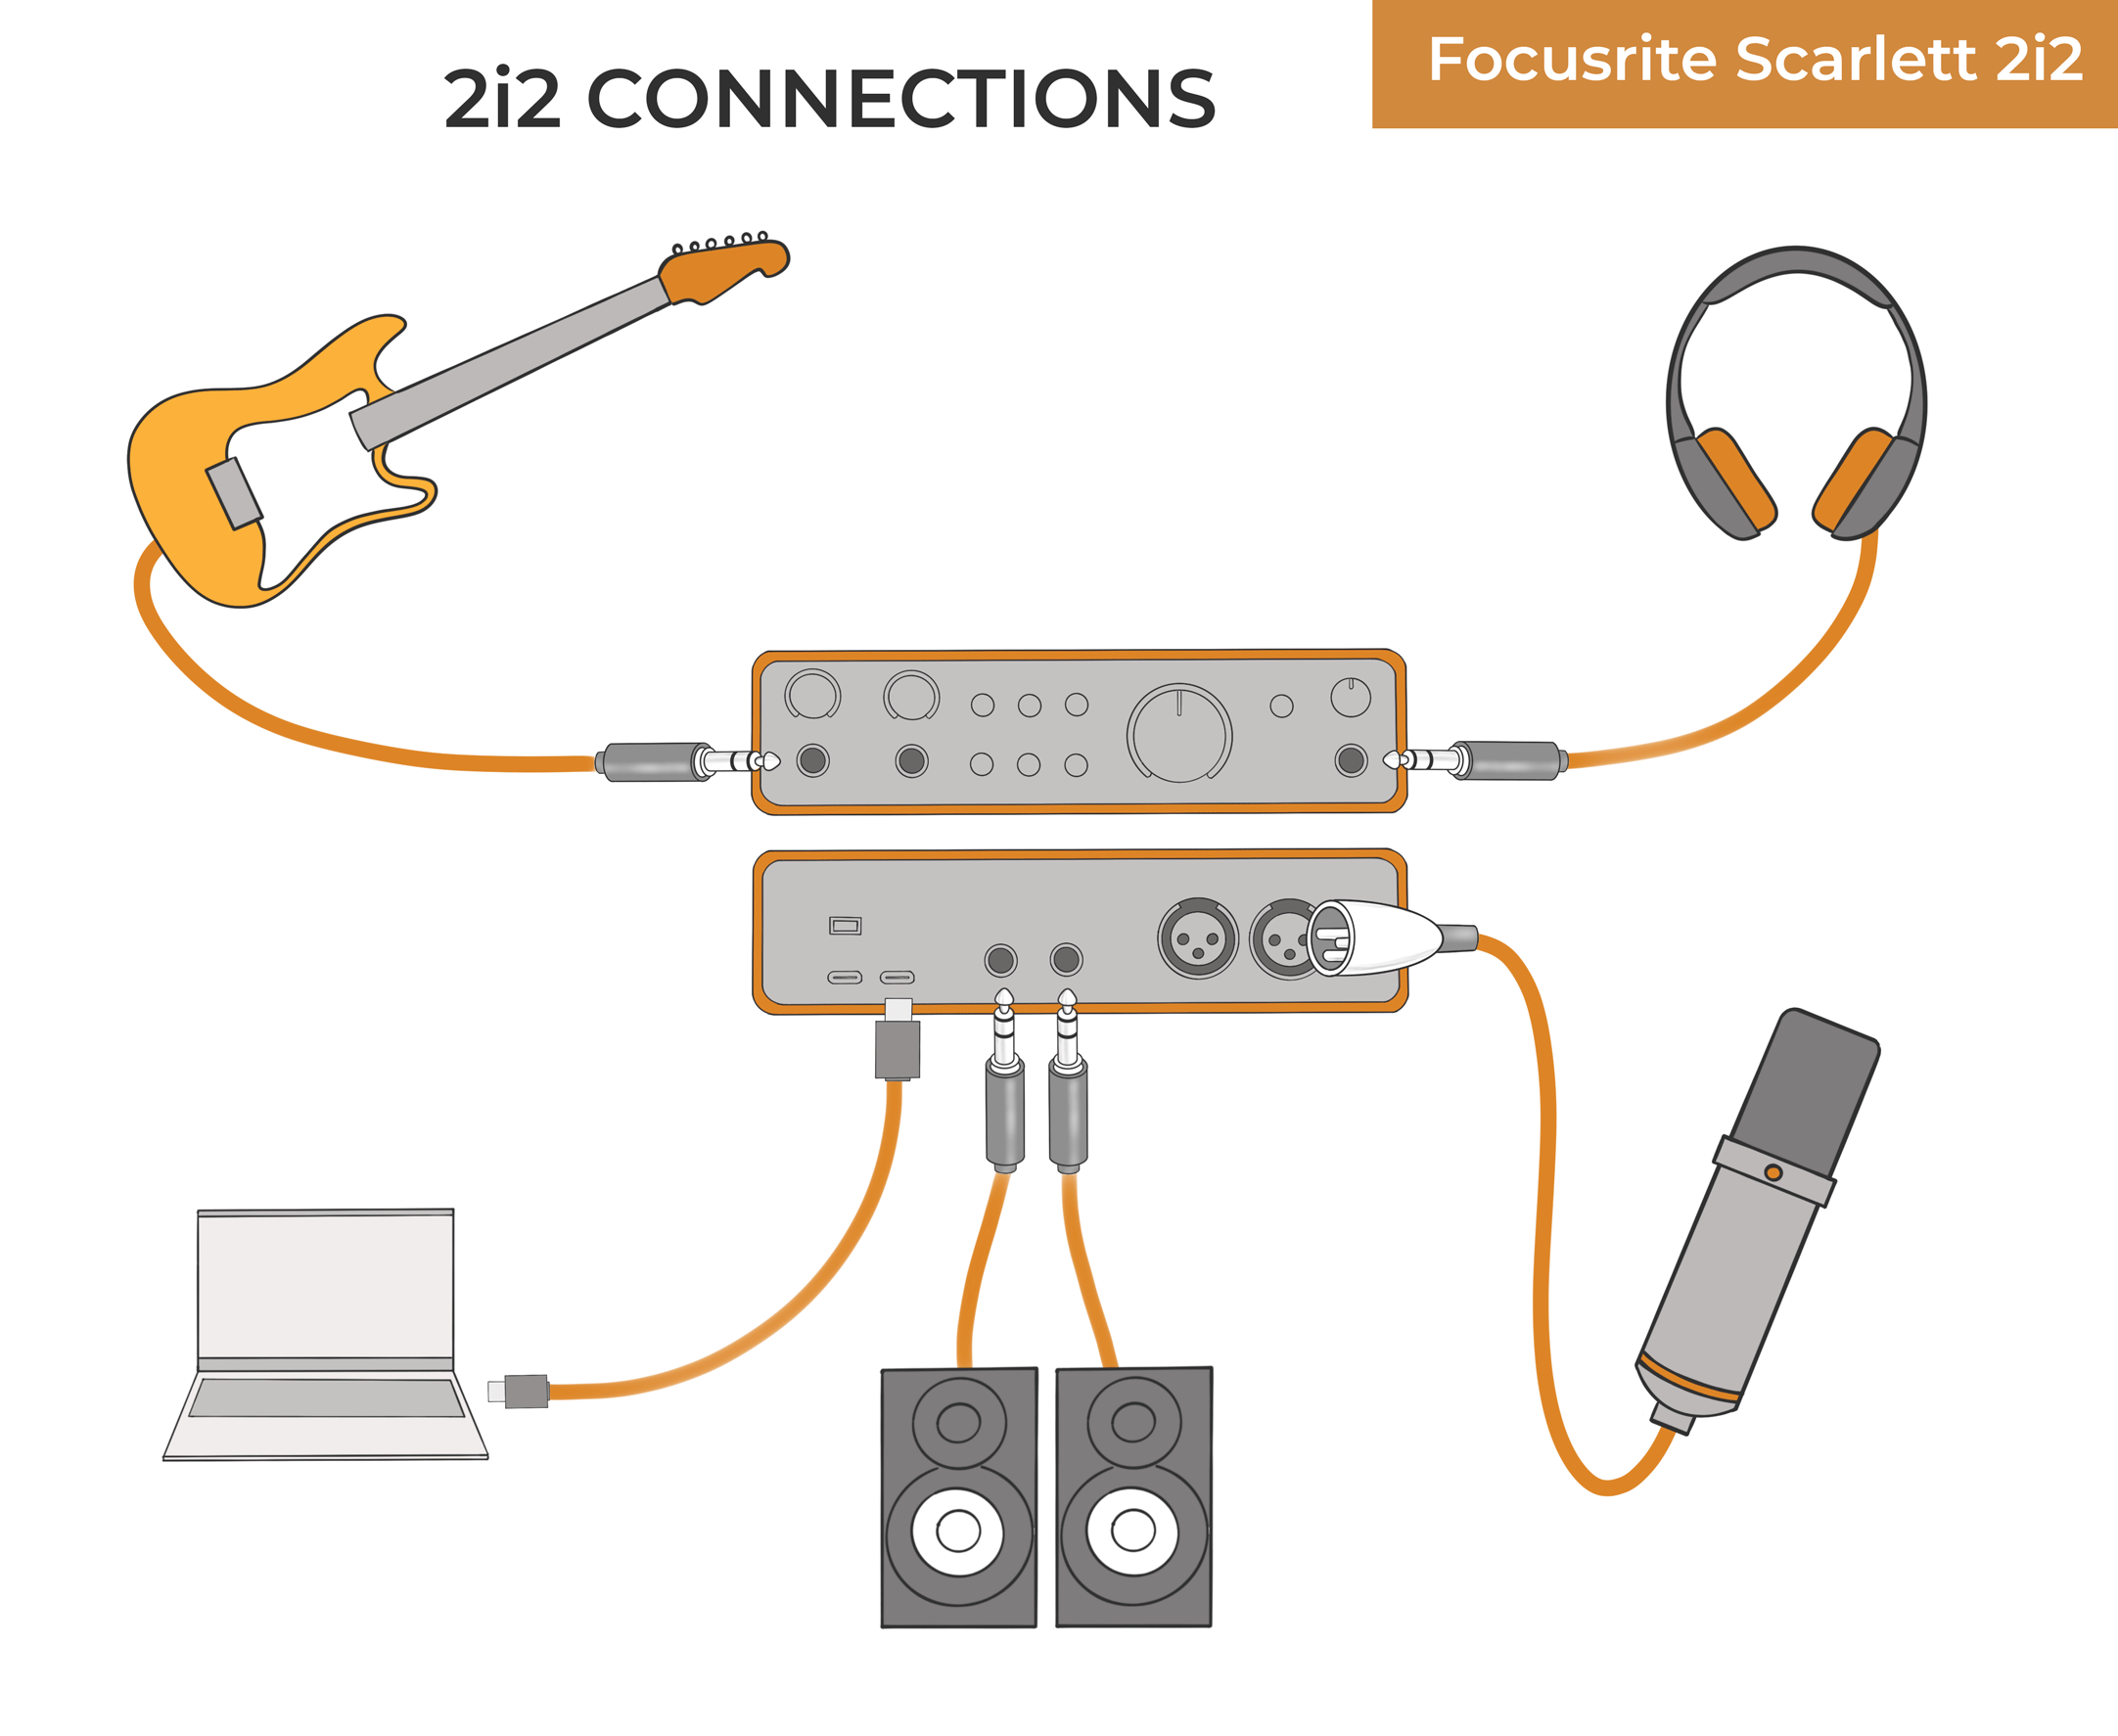
Use balanced cables (TRS) wherever possible to connect devices to you 2i2 interface. This includes your microphones and studio monitors. Balanced cables are a bit more expensive, and have 2 rings rather than one ring. They’ll pick up less magnetic or electrical interference. This can show up as a constant hum, buzzing, or even radio signals.
Keep the volume on the audio interface at zero while you’re making any connections, and then turn it up to avoid any loud clicks or pops.
Front panel
The front panel is simple and uncluttered with all the controls available for easy access. There’s two 1/4” (6.35mm) Neutrik jack sockets, each with their own gain control knob, which rotate indefinitely, as they’re digital encoders.
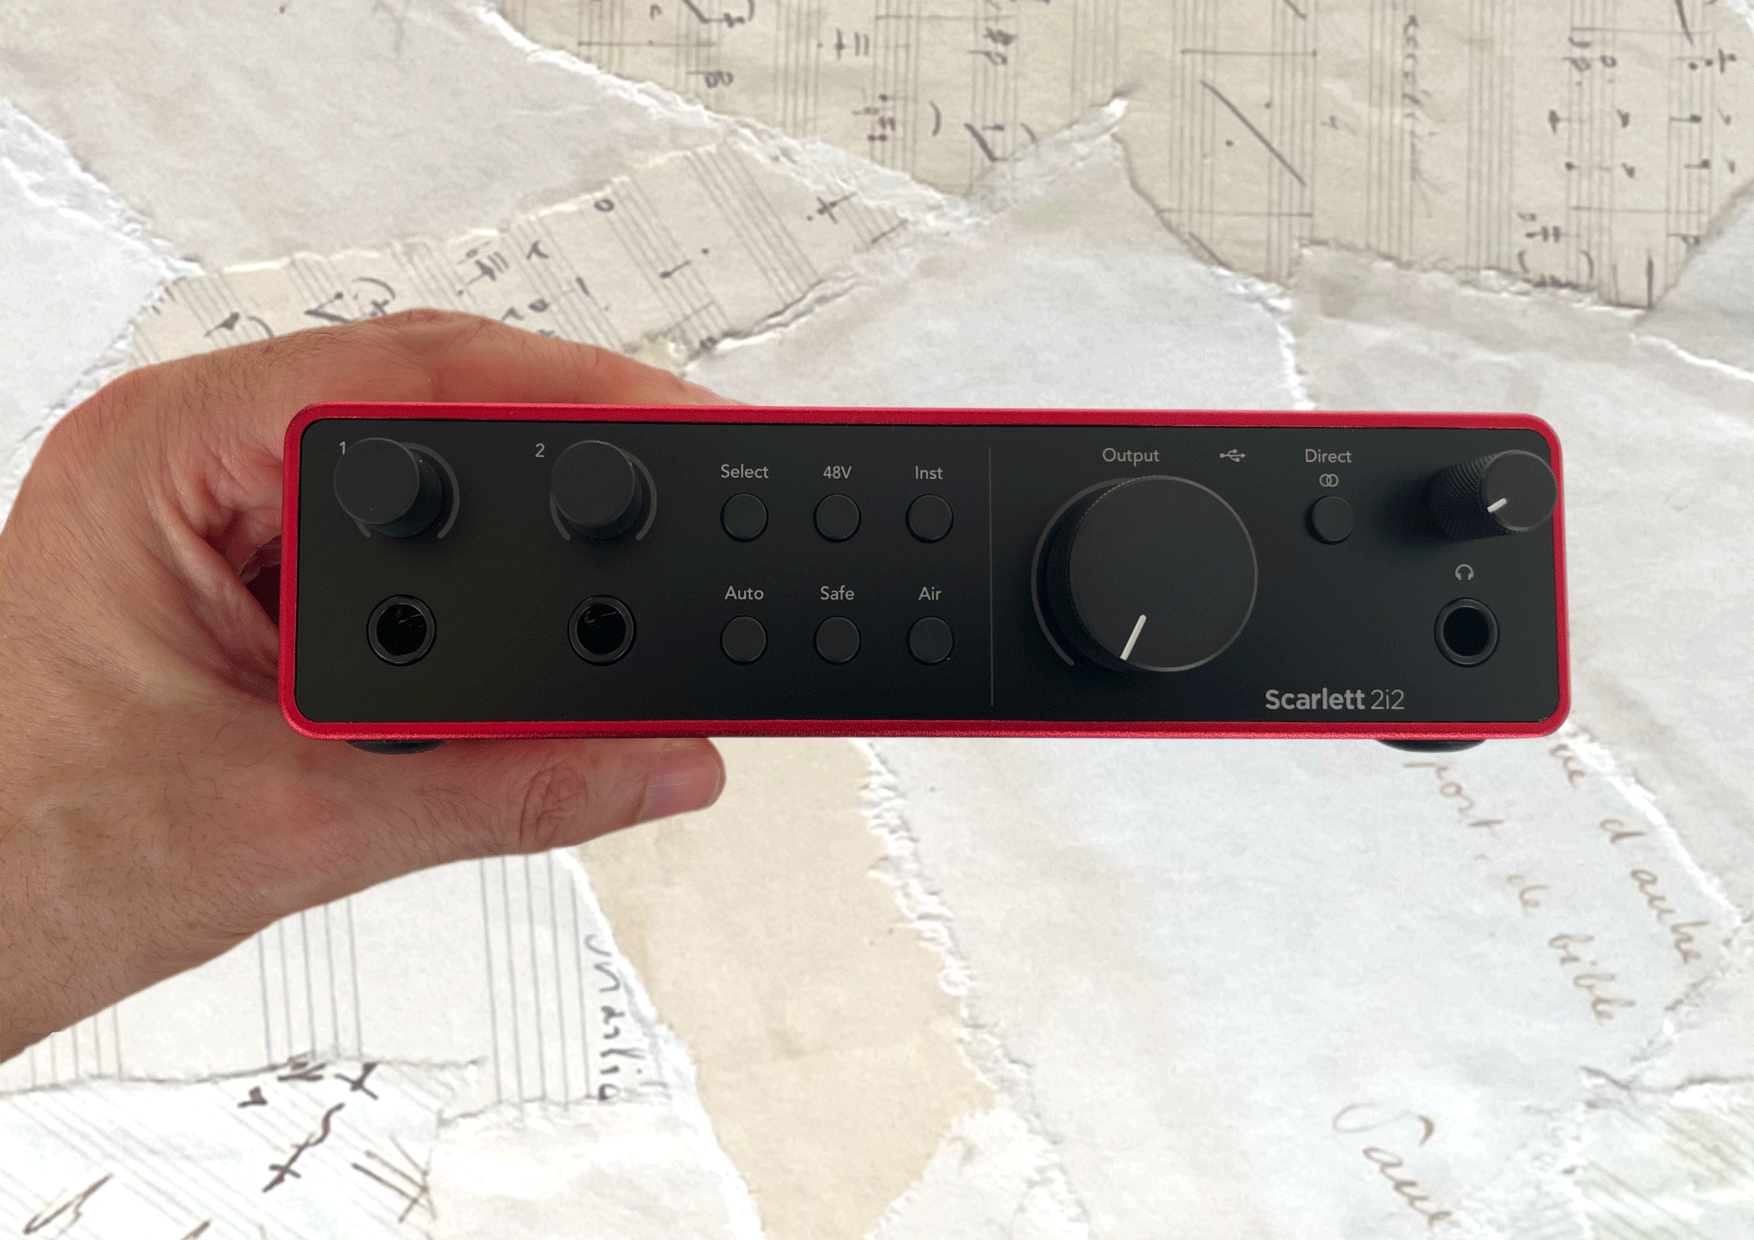
Each knob has a circular wrap-around LED display, called the ‘gain halo’. They’re similar to the 3rd gen gain halos, but show more detailed information, moving around the dial from green to amber, with the whole display turning red on clipping. They’re also used for setting gain, in which case they light up in white to give you a reading.
There’s a lot of flexibility in these inputs, with both accepting audio signals from balanced (TRS) or unbalanced (TS) cables, at line level or instrument level. There’s an LED on the front panel which illuminates white when the interface is connected to your computer but not recognised, and green when it is recognised. It will blink red if the interface isn’t receiving enough power.
There’s another 6 buttons on the middle and one to the right:
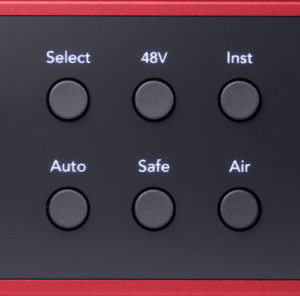
- Select switches between the 1st and 2nd channel
- 48v turns on phantom power
- Inst toggles between line and hi-Z inputs
- Auto allows automatic gain level setting
- Safe protects the audio from clipping
- Air accesses the two air modes
- Direct allows you to record in time with the music
Select button

To save space on the limited front panel, the select button assigns all of the buttons to wither channel one or channel two. It would be nice to have another set of buttons, to avoid having to select between channels, but it’s not realistic in an interface of this size and budget.
48v button
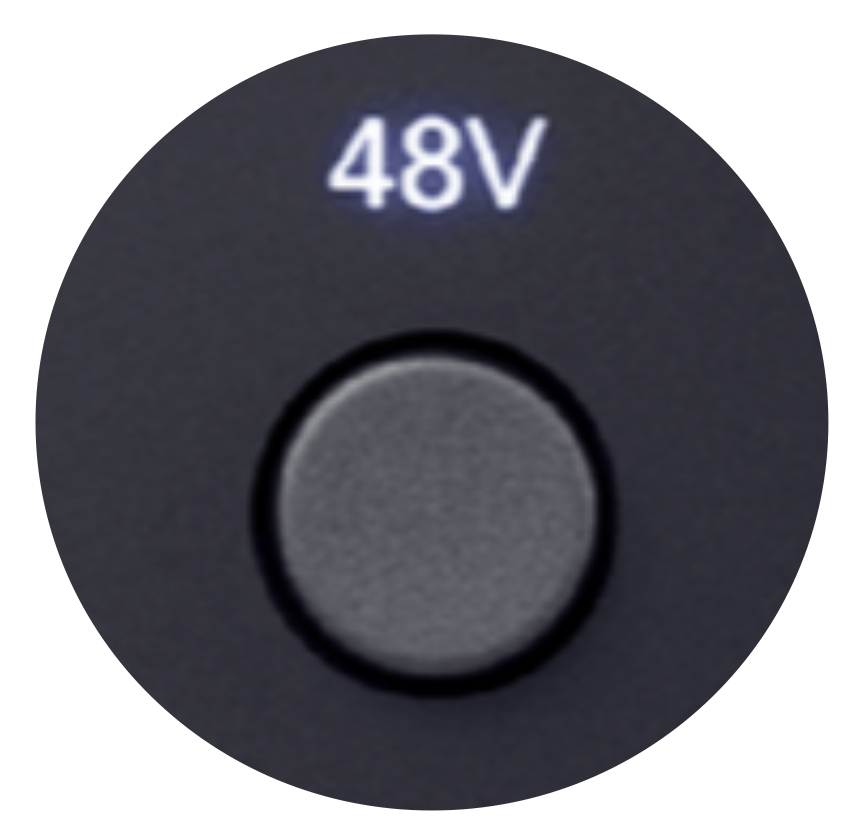
The 48V button turns phantom power on for both of the XLR inputs on the front. You can’t unlink this feature – they’re either both on or both off. This isn’t as limiting as it might first appear. There’s no harm in using most mics with phantom power turned on, as they’ll simply reject the power. The exception is with ribbon mics, which can be destroyed with phantom power.
Instrument button

You can toggle between line and instrument by pressing the ‘Inst’ button on the front panel. Line level is for connecting keyboards or studio equipment, while instrument mode turns it into a hi-Z input, which accepts a weaker audio signal from the pickups on electric guitars or basses. This is a great improvement on the 3rd generation 2i2, where it had to be set within the software.
Auto Gain Button

Adjusting the gain of your input signal is always necessary to make sure you send just the right amount of level without overloading and causing distortion. The Scarlett 2i2 makes this a simple process by automatically adjusting the gain for you. By pressing the Auto button on the front panel, and singing or playing for 10 seconds, the 2i2 will detect and set the optimal gain level.
On testing, the signal sets to around 18dB, never peaking above 12dB. As the 2i2 records at 24 bit, this is actually an optimal level to aim for. This is a useful feature for beginners who already have enough to think about while recording.
Clip Safe Button

The Clip Safe feature protects you from distortion caused by a spike in the input level. This can happen if a narrator unexpectedly raises their voice, or a singer gets carried away, raises the volume in the heat of the moment. Clip safe is easily activated by pressing the Safe button on the front panel.
The clip safe feature simply turns down the gain if the signal becomes too loud and gets close to clipping, by using a DSP (digital signal processor) monitoring the sound up to 96,000 times per second. It’s a handy feature, and worth leaving on just on case of accidental overload.
Bear in mind though, that the gain stays at the low volume for the rest of the recording – it doesn’t go back up. It’s great for emergencies, but perhaps a compression or limiter feature would be good to see in the 5th generation Focusrite Scarlett.
Direct monitoring button
This is designed to avoid the common problem the sound entering the interface and computer, to become delayed by the time it comes out. It’s only ever a slight delay (called latency), but can cause problems when you’re trying to record in time with the music from your headphones.
The Direct button addresses this by routing the sound directly to your headphones, eliminating the latency. If there was more room on the front panel, it would’ve been nice to have a corresponding knob to control the direct output.
4th Generation 2i2 Air Modes
There was already an air mode on the 3rd generation 2i2, which attempted to model Focusrite’s transformer-based ISA microphone preamps. There’s other budget audio interfaces from Neve, SSL and Universal Audio with similar features, each drawing on their pedigree and vintage sound. The 4th generation Scarlett 2i2 has been updated to provide 2 Air modes: Air Presence and Air Presence & Drive.
Both of these modes introduce a subtle colouring of the sound while you’re recording. While this may enhance the audio quality of your vocals or recordings, bear in mind that the effect can’t be taken off or adjusted at a later stage.
For that reason, many producers prefer not to use them, instead relying on the effects in their DAWs to get the sound just right at the mixing stage. Having said that, there are also advantages to committing to a particular sound at the source – it can start building your sound, cut down on extra work later, and save you from the dreaded decision paralysis while mixing.
The Air modes are undoubtedly useful for live streaming, or using the 2i2 in stand alone mode (more below), where you need a simple way of enhancing your voice or instrument in real time.
Air Presence
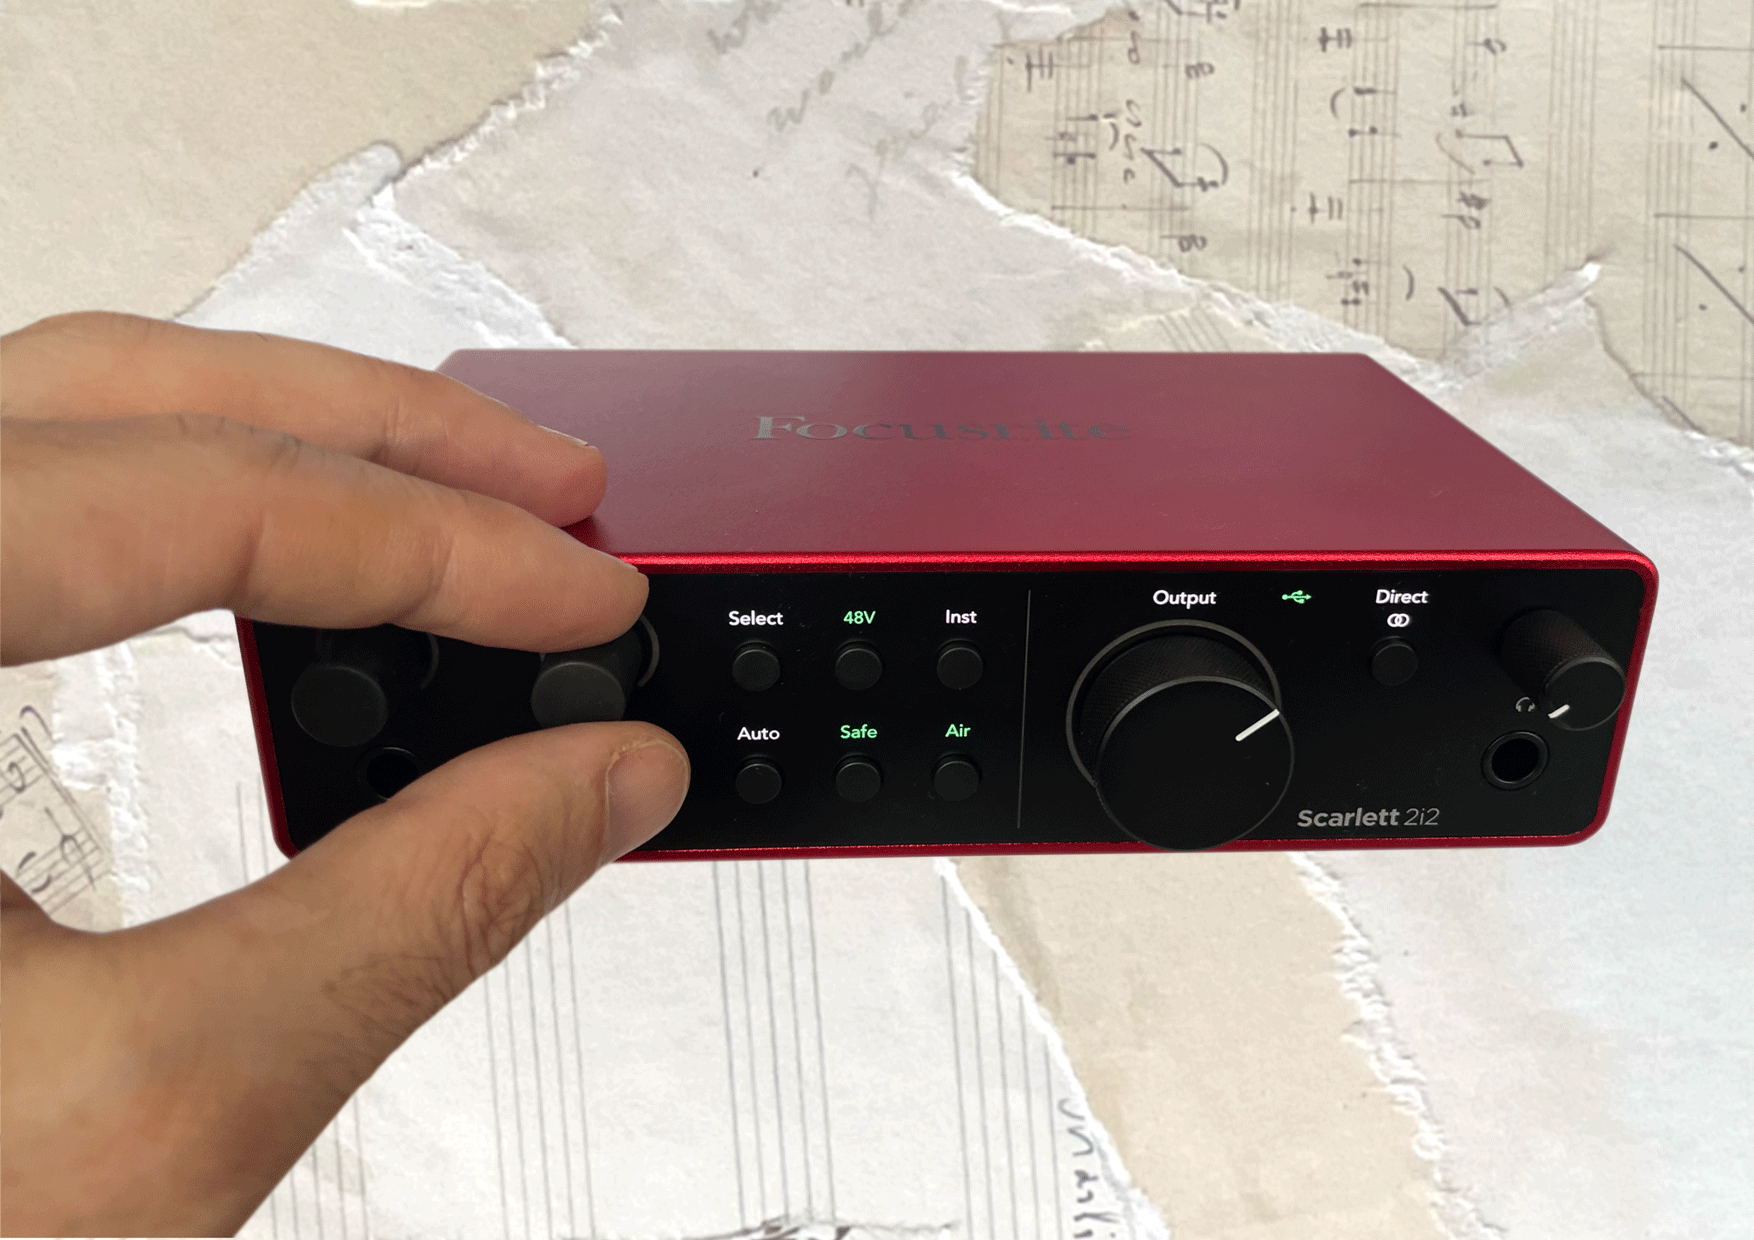
Pressing the Air button once turns it green. This takes you into Air Presence mode, where analogue circuitry is activated to boost the higher frequencies. This sound lovely on vocals and acoustic guitars, but should be avoided if the sound source is already very bright sounding.
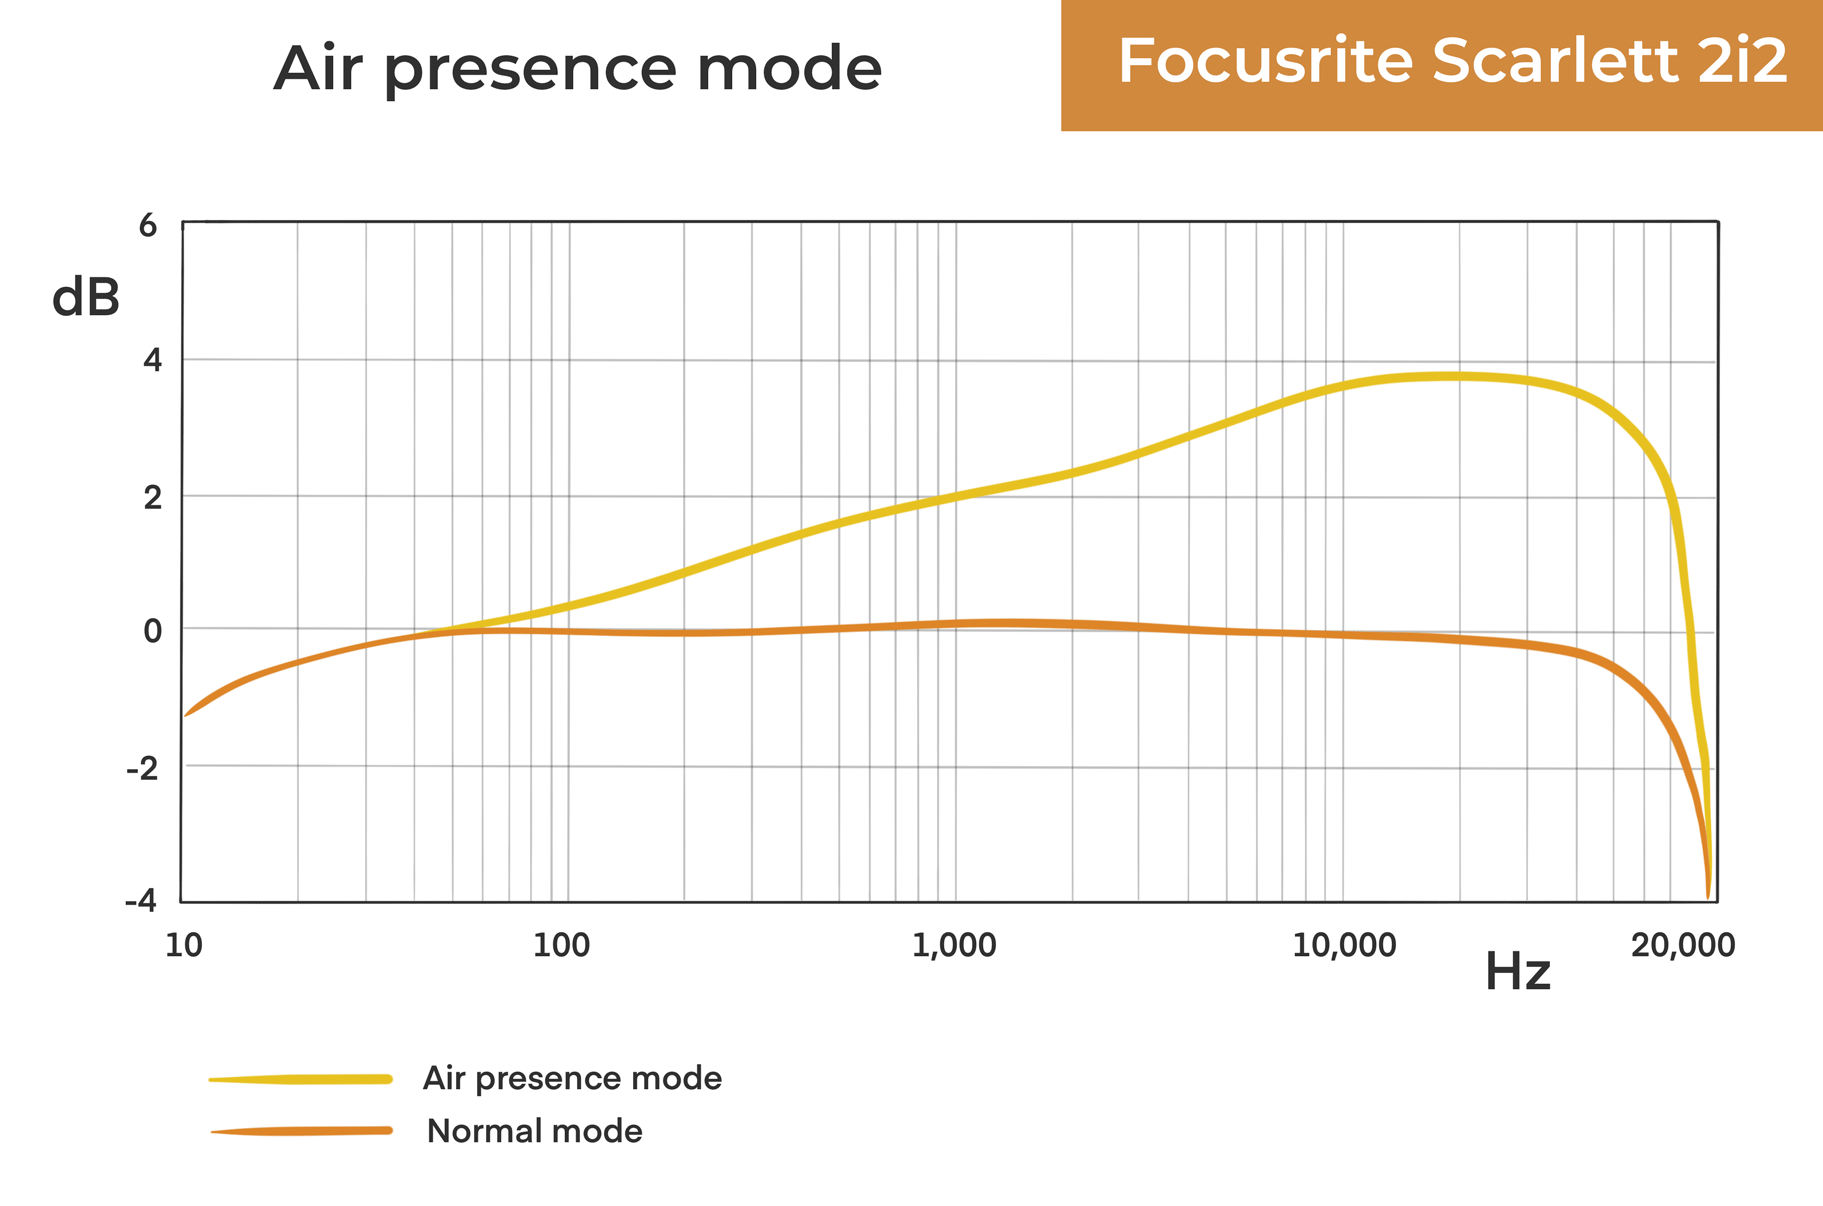
You can see from the chart that there’s a gentle frequency ramp starting around 50 Hz and peaking at 7kHz at around 4 dB. The Air Presence sounds more ‘excited’ and ‘in your face’, which could be very useful for standing out in a mix, or against competing audio in a stream.
Air Presence and harmonic drive
By pressing the Air button twice, it turns yellow to activate the Presence and Drive mode. Unlike the analogue Air Presence mode above, this feature is DSP based, and digitally applied.
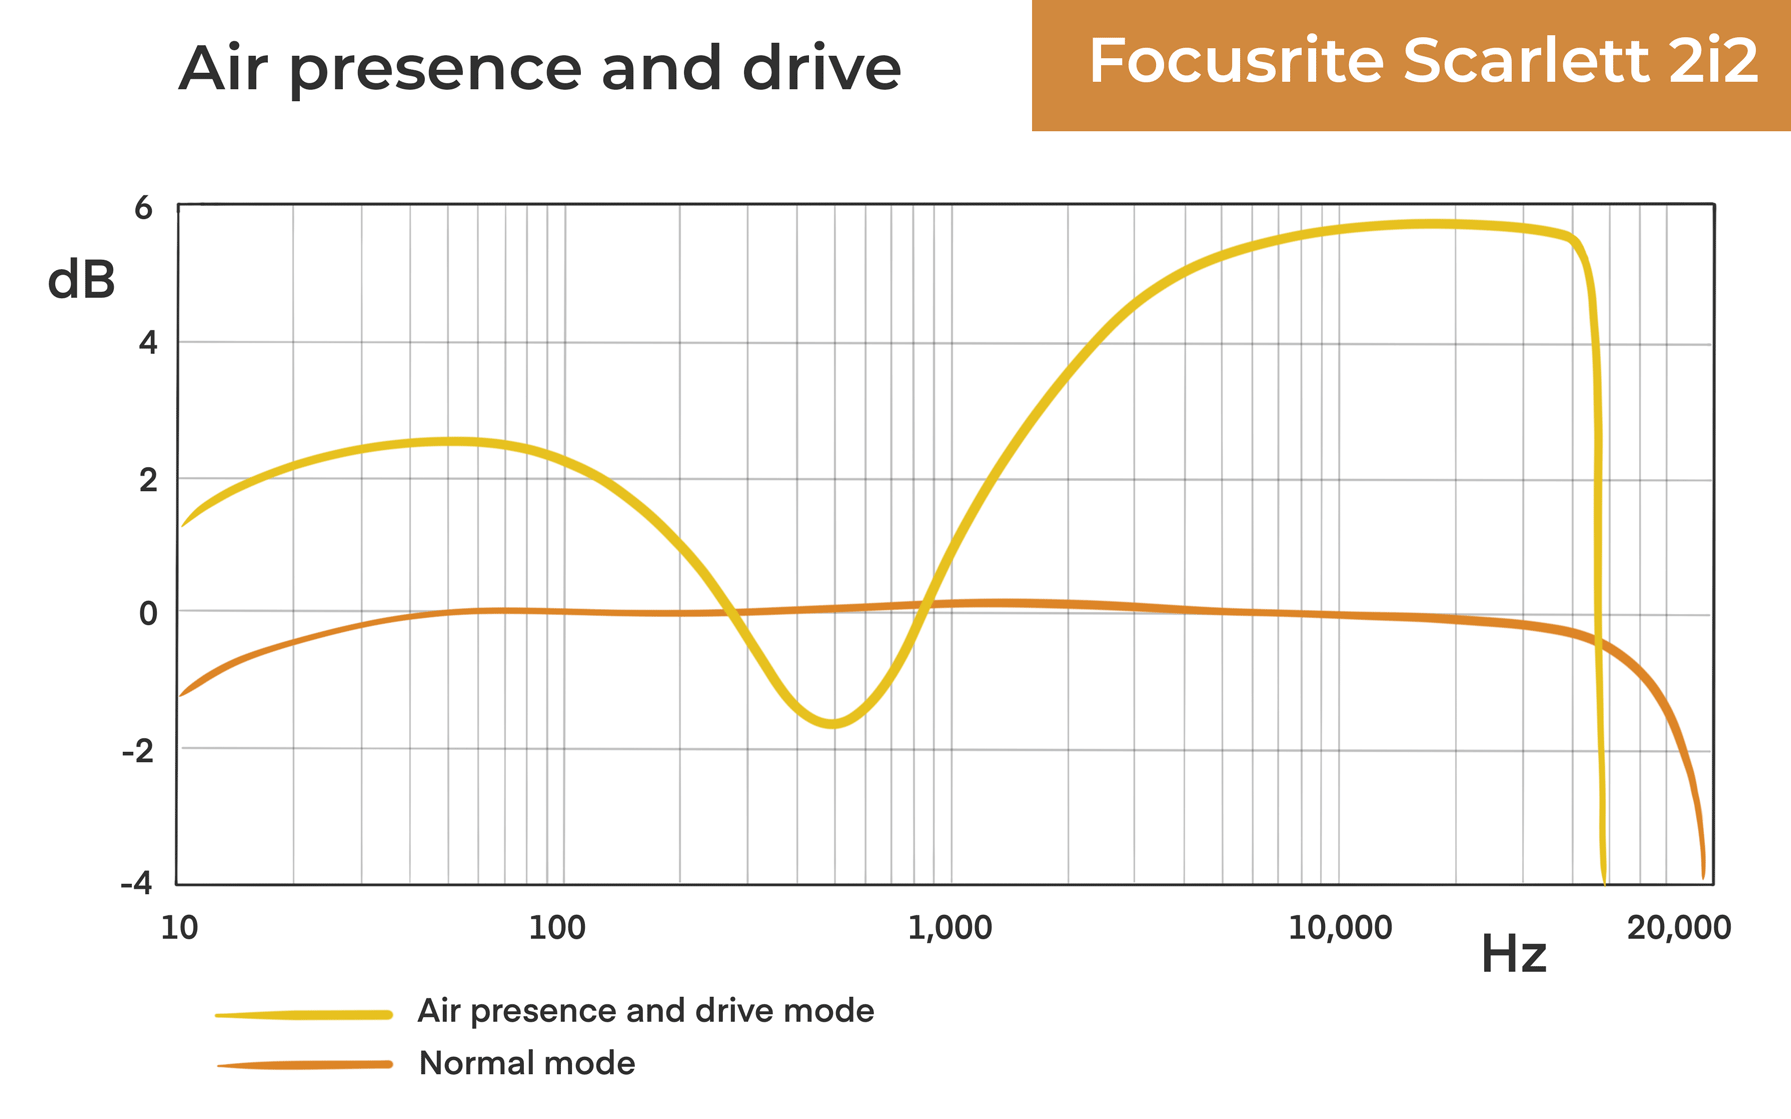
There’s a very rounded boost in the bass reaching at. about 2.5dB above neutral at 50 Hz, before dipping 4 dB (1.5 dB under neutral) at around 44 Hz. From here there’s a a rapid climb, reaching a plateaux of +6 dB, before sharply dropping off at around 13 kHz
This is a scooped effect, and it sounds very natural. It emulates classic analogue equipment with the string bass and enhanced top end. To my ears it sounds like a very subtle distortion pedal, with the harmonic distortion increasing the higher you push the signal. You can use this to exaggerate the body, volume and intensity of vocals or guitars.
Scarlett 2i2 Headphones output
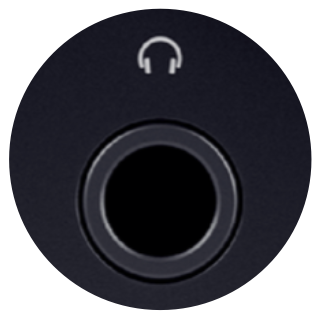
A useful headphones output is situated to the right of the front panel, with a dedicated volume control. It accepts a ¼” TRS jack, suitable for professional headphones, but can be used with a TRS 6.35mm to 3.5mm adaptor if you’re using headphones with an 1/8″ jack. It has a newly designed headphone amp which extends the dynamic range from 104 dB to 112 dB, and an improved output volume which should be more than adequate for most needs.
It’s interesting to see that in the 4th generation Scarlett 2i2, the output impedance has been raised to 50 ohms. This will limit the types of headphones you can use to get a really accurate sound. In general, the lower the output impedance, the better, as it will work well with a wider range of headphones. Because of this I recommend using at least around 80 ohm headphones (or above) if you’re doing very critical listening for mixing or mastering.
I tested with the Sennheiser HD650 300 ohms and Beyerdynamic DT 250s, both which provided excellent results.
Focusrite 2i2 Back panel
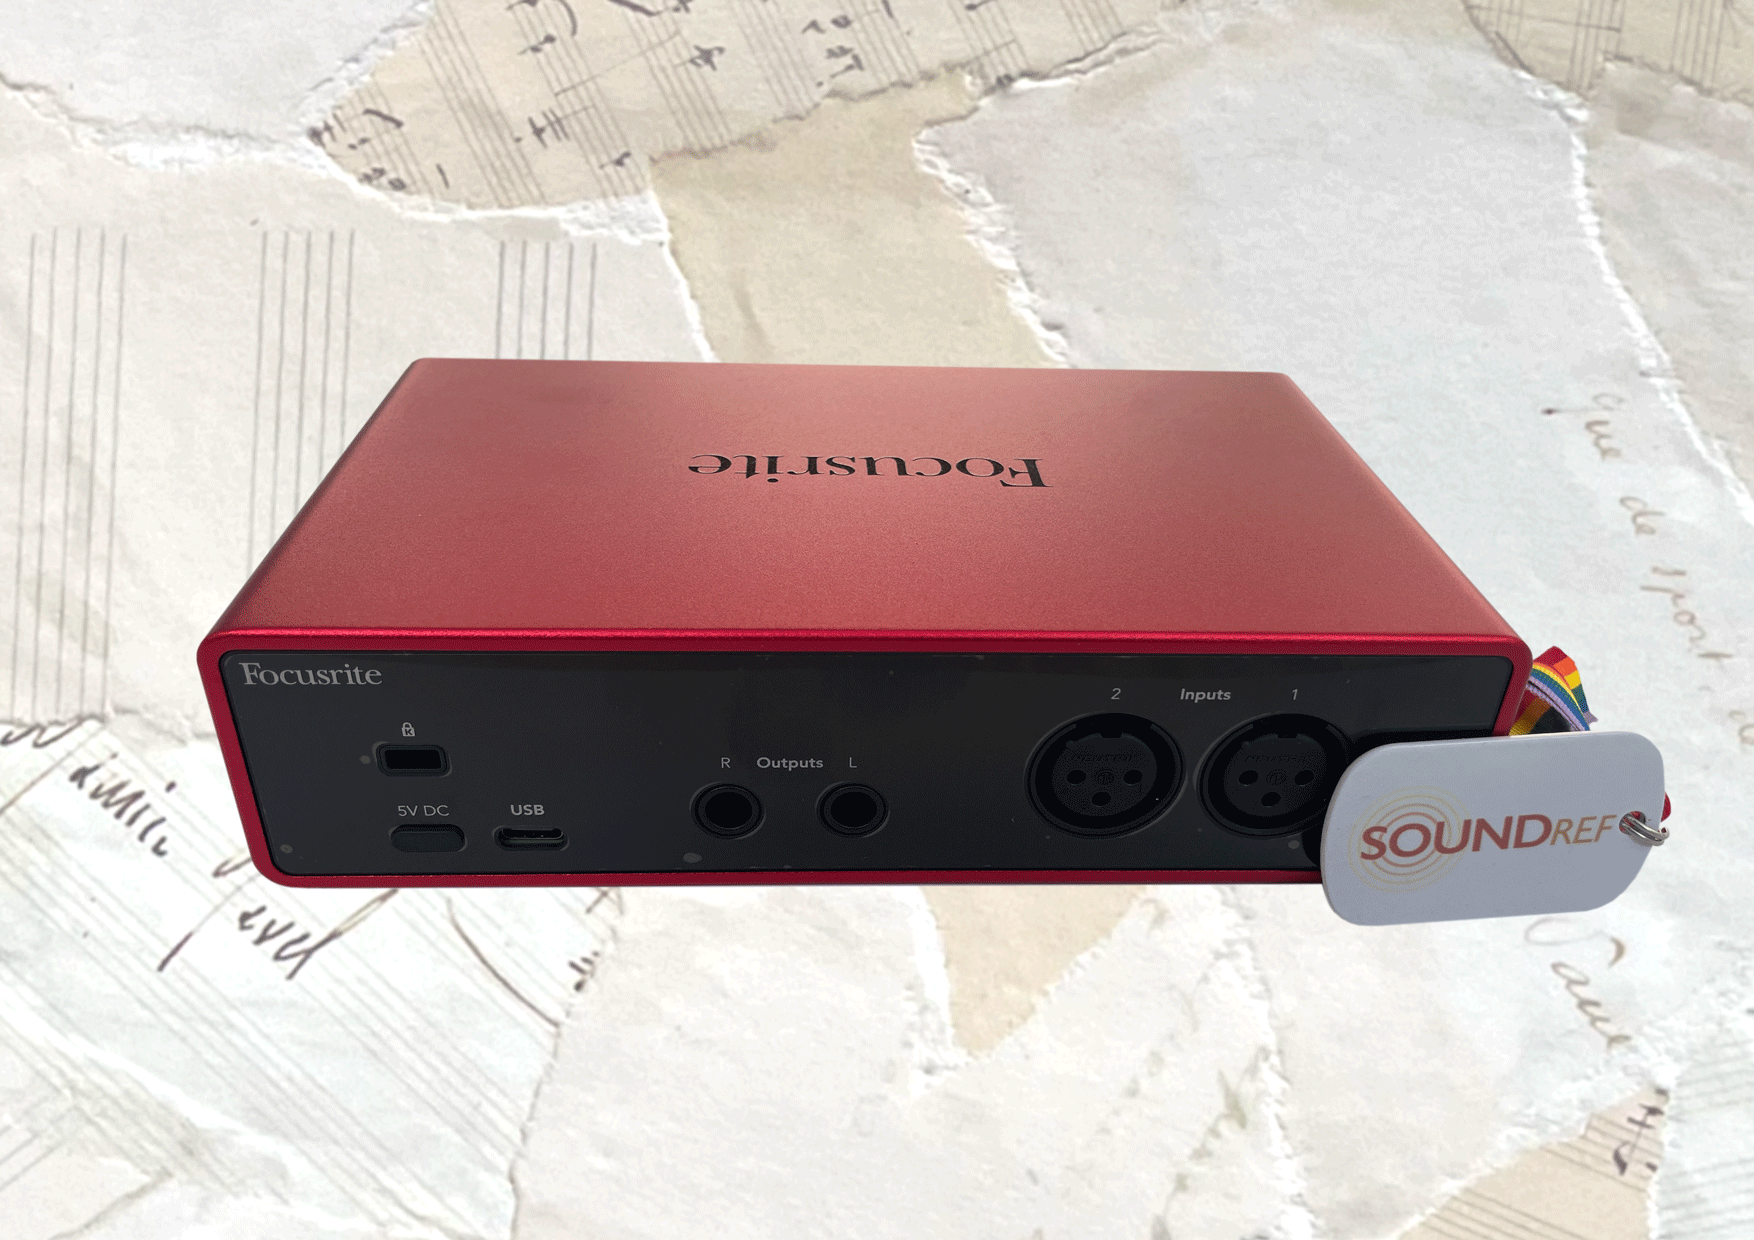
On the back panel of the 2i2 are the 2 XLR inputs for microphones, and two 1/4″ jack sockets for connecting to your studio monitors. They’ll accept either balanced (TRS) or unbalanced (TS) cables, though I suggest you used balanced cables for the best possible signal. The outputs are free from noise, with virtually zero distortion.
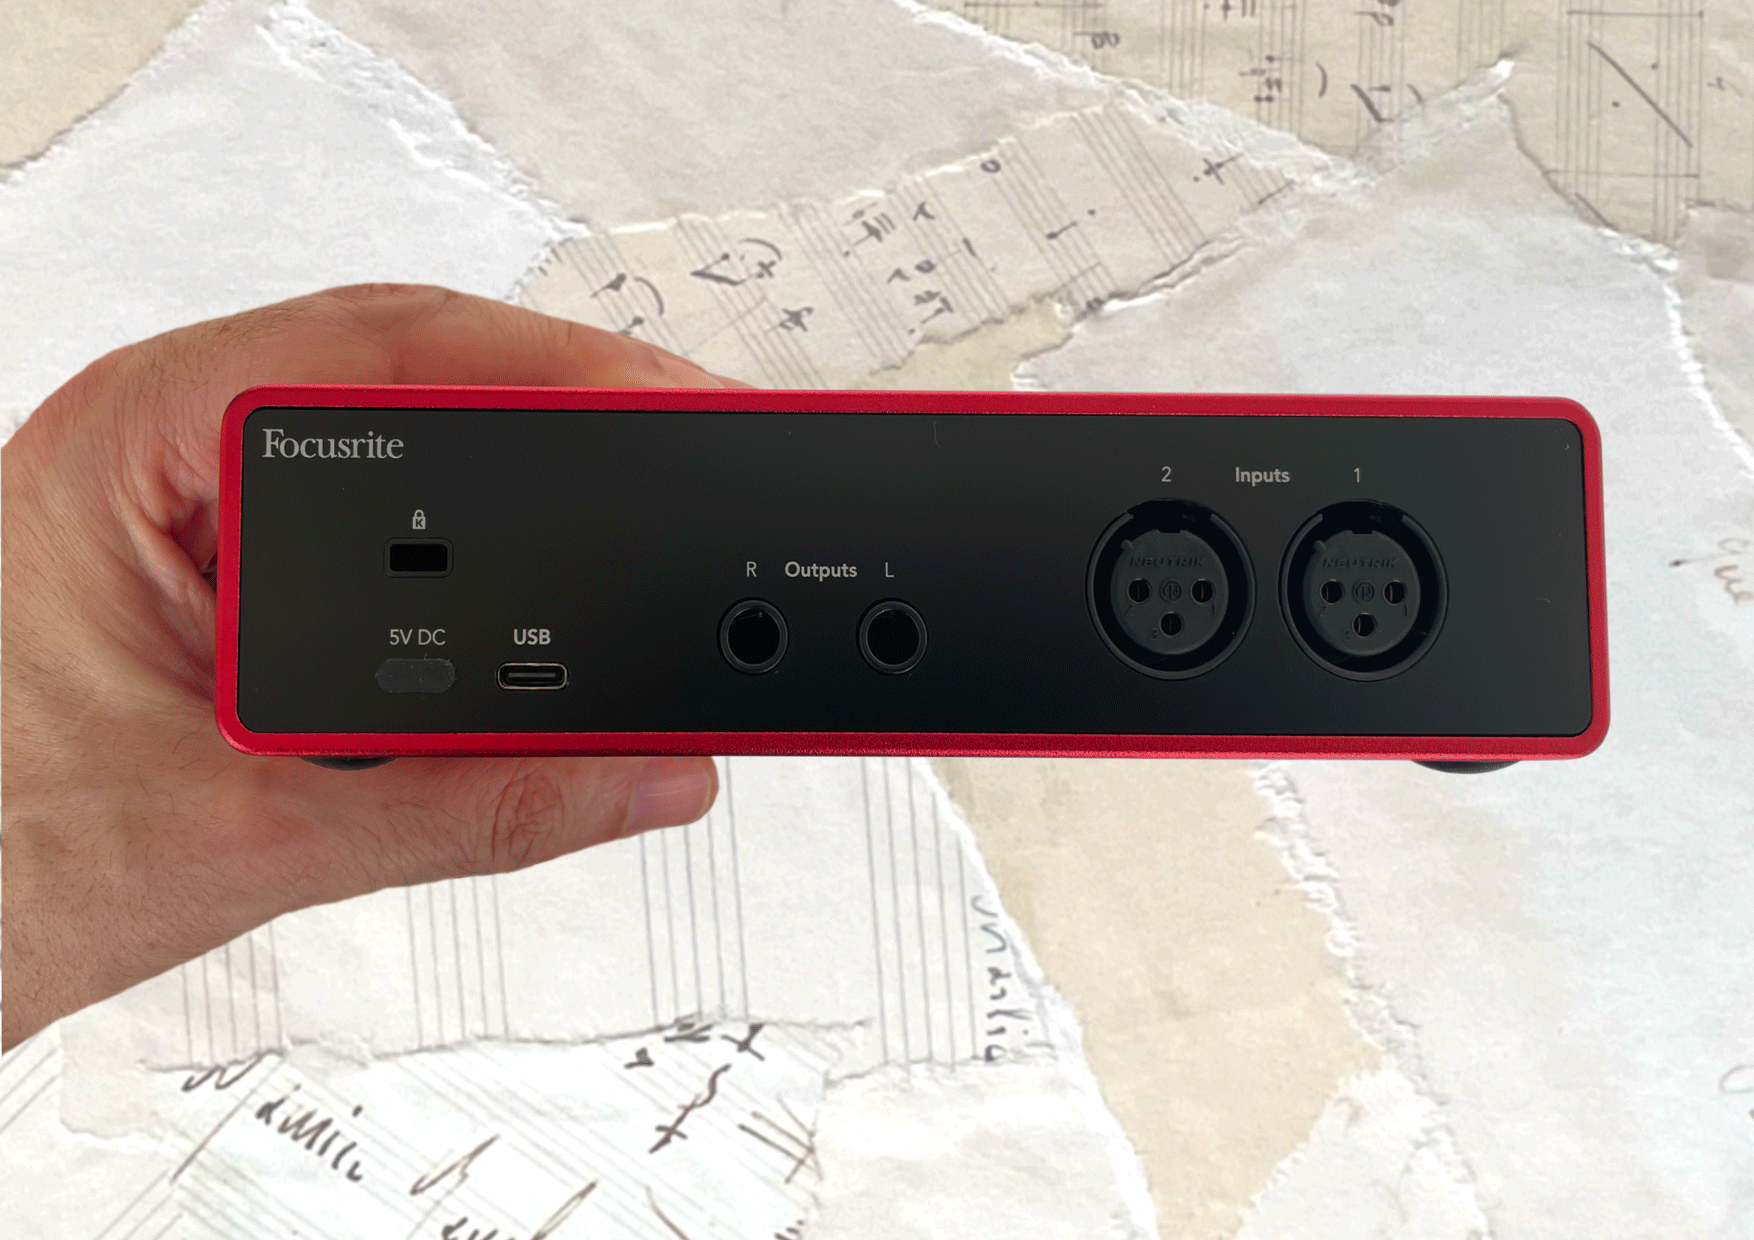
On the left of the back panel is the USB-C socket for connecting to your computer. The same USB socket provides all the power the 2i2 needs in the majority of cases. If for any reason your laptop can’t provide the required 1.5A power, or you’re using a low power device such as in iPhone, there’s an additional USB-C connector next to it for use with a 5V charger.
If you’re playing live, I’d suggest always connecting the interface to direct power, just to minimise any potential glitches caused from a moment of low power.
Note that there’s no on and off power button on the back panel, so the 2i2 interface will stay on as long as your mac is on, even in sleep mode. There’s no problem with this, and if you need to turn off the interface, simply unplug the USB cable.
Also, no midi connections here – if you need midi sockets, look at the Scarlett 4i4 here, or consider the Universal Audio Volt 2, or the Volt 276 (with an added compressor).
Focusrite Scarlett 2i2 Sound quality
The Focusrite Scarlett 2i2 is a very clean sounding interface with a low noise floor and ample input gain range. You can use the 2i2 to record high quality vocals with both condenser mics and dynamic mics without the need for a Fethead of Cloudlifter to raise the input signal.
It will perform well with any instrument you choose to put through it, but I achieved some great results using the Air Presence mode for male and female vocals, and also acoustic guitar. Bass guitar was also exceptional sounding, running through the Air Presence and Harmonic Drive mode.
The enhanced sound quality of the Scarlett’s 2i2 comes down to 2 areas, the pre amps and the analogue to digital convertors, both of which have been improved since the 3rd generation.
Scarlett 2i2 Pre amps
The pre amps chosen for any audio interface will have a big impact on the overall sound quality. They’re used to amplify the low level signal of a microphone, and need to be as transparent as possible, without introducing too much noise or distortion.
I found the pre amps in the 3rd generation 2i2 to be lacking in volume, sometimes struggling to supply enough gain to cleanly amplify a dynamic mic such as the SM58 to an optimal level. The only solution was to sing right into the mic, or use an additional signal booster like a Fethead or Cloudlifter.
This has been addressed with the 4th generation 2i2, which has increased the mic input gain from 56 dB to 69 dB. This is a welcome improvement, opening up the possibility of recording with most studio mics. The Shure SM7B, a notoriously quiet dynamic mic had no problems with gain level, and could easily be pushed to clip without excessively raising the noise floor.
The pre amps in the Scarlett 2i2 are digitally controlled. This is necessary for enabling you to link the gain of both inputs for stereo recordings, and also for the clip safe feature. They have a very low noise floor – not the very best but certainly acceptable for professional work.
The dynamic range has also been slightly extended in the 4th gen 2i2, from 111 dB to 116 dB in the microphone inputs. Dynamic range is the distance between the quietest signal (or noise floor) and loudest signal it can handle. An extended dynamic range leaves more scope for capturing subtle nuances and expressions within the recordings.
Focusrite 2i2 Digital Analogue Convertors
As a signal from a mic enters the audio interface, it converts from an analogue to a digital signal, where it can be processed within the computer. Once processed, and exits the computer to the studio monitors, it’s converted again, this time from digital to analogue.
The quality of the DA and AD convertors is imperative to the quality of sound the audio interface is capable of producing. While the convertors where fine for the price in the 3rd generation 2i2s, the 4th generation units have had a major upgrade.
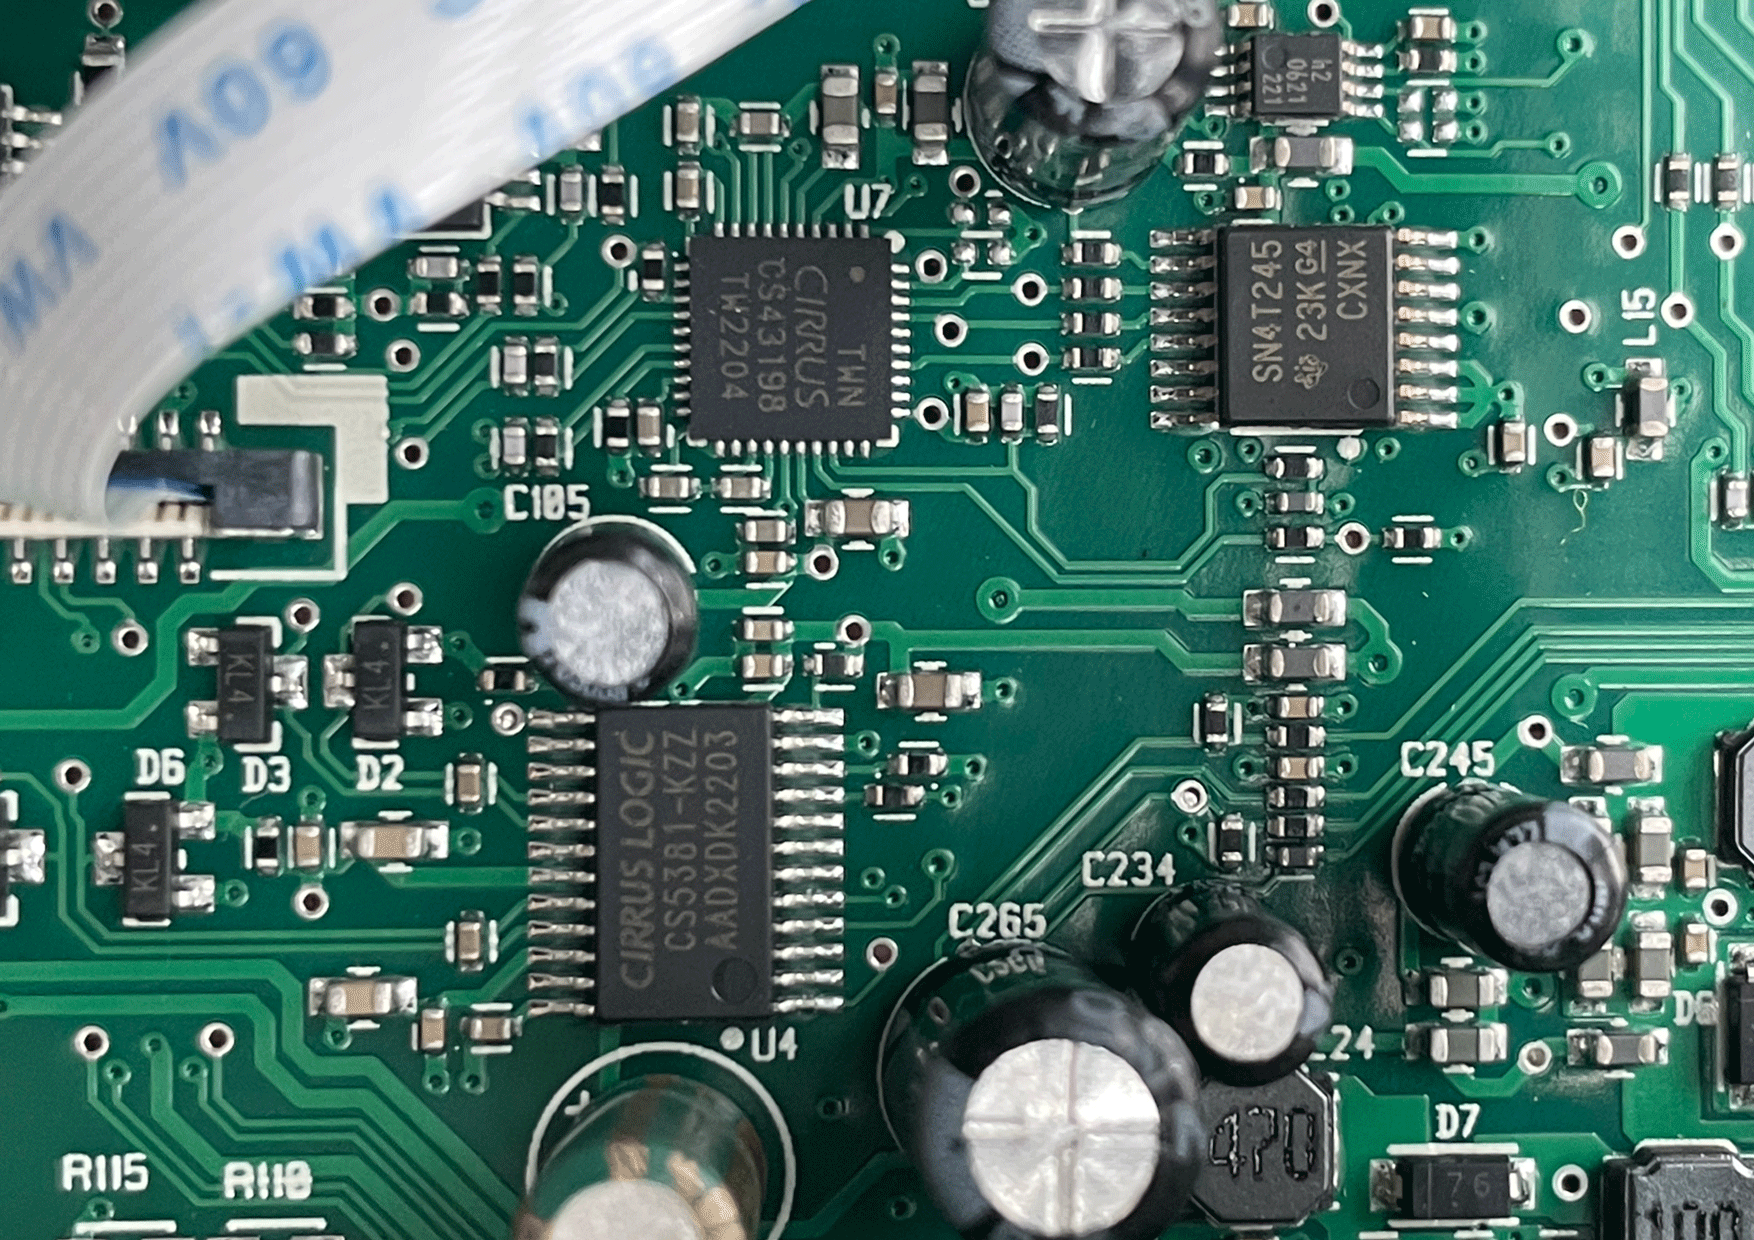
4th generation Focusrute Scarlett 2i2s and 4i4s both now use the same digital analogue ‘rednet’ convertors as Foucsrite’s high end audio equipment. Analogue to digital conversion is handled by the Cirrus Logic CS5381, and digital to analogue Cirrus Logic CS43198, providing 120 dB of dynamic range, compared to 104-108 dB of the 3rd generation convertors.
These top quality convertors make a noticeable difference to the clarity, detail, depth and smoothness of the sound.
Scarlett 2i2 Stand alone mode
The Focusrite Scarlett 2i2 can be used as a standalone unit, without any other hardware. This makes it useful for guitar practice – plug straight into the instrument input and enable Direct Audio to hear an amplified signal in your headphones or speakers. You can enable one of the Air effects to enhance the sound while you’re playing.
Because there’s no power coming from another device, you can plug the 2i2 into the mains via the ‘5V DC’ USB-C port on the back, using an external PSU.
Standalone mode also makes the 2i2 available as an extra set of pre amps which you can link to a larger recording system when needed.
Focusrite Scarlett 2i2 Loopback feature
One very useful feature of the Scarlett 2i2 is the Loopback feature. THe Loopback gives you the ability to record audio from any software or application from your computer.
There’s many uses for this, including recording online conference audio, live streaming voiceovers over audio, or just collecting samples for use in your productions. It’s a very simple process and could potentially save you a lot of time and stress trying to set up various pieces of software and routing options.
Focusrite Control 2 software
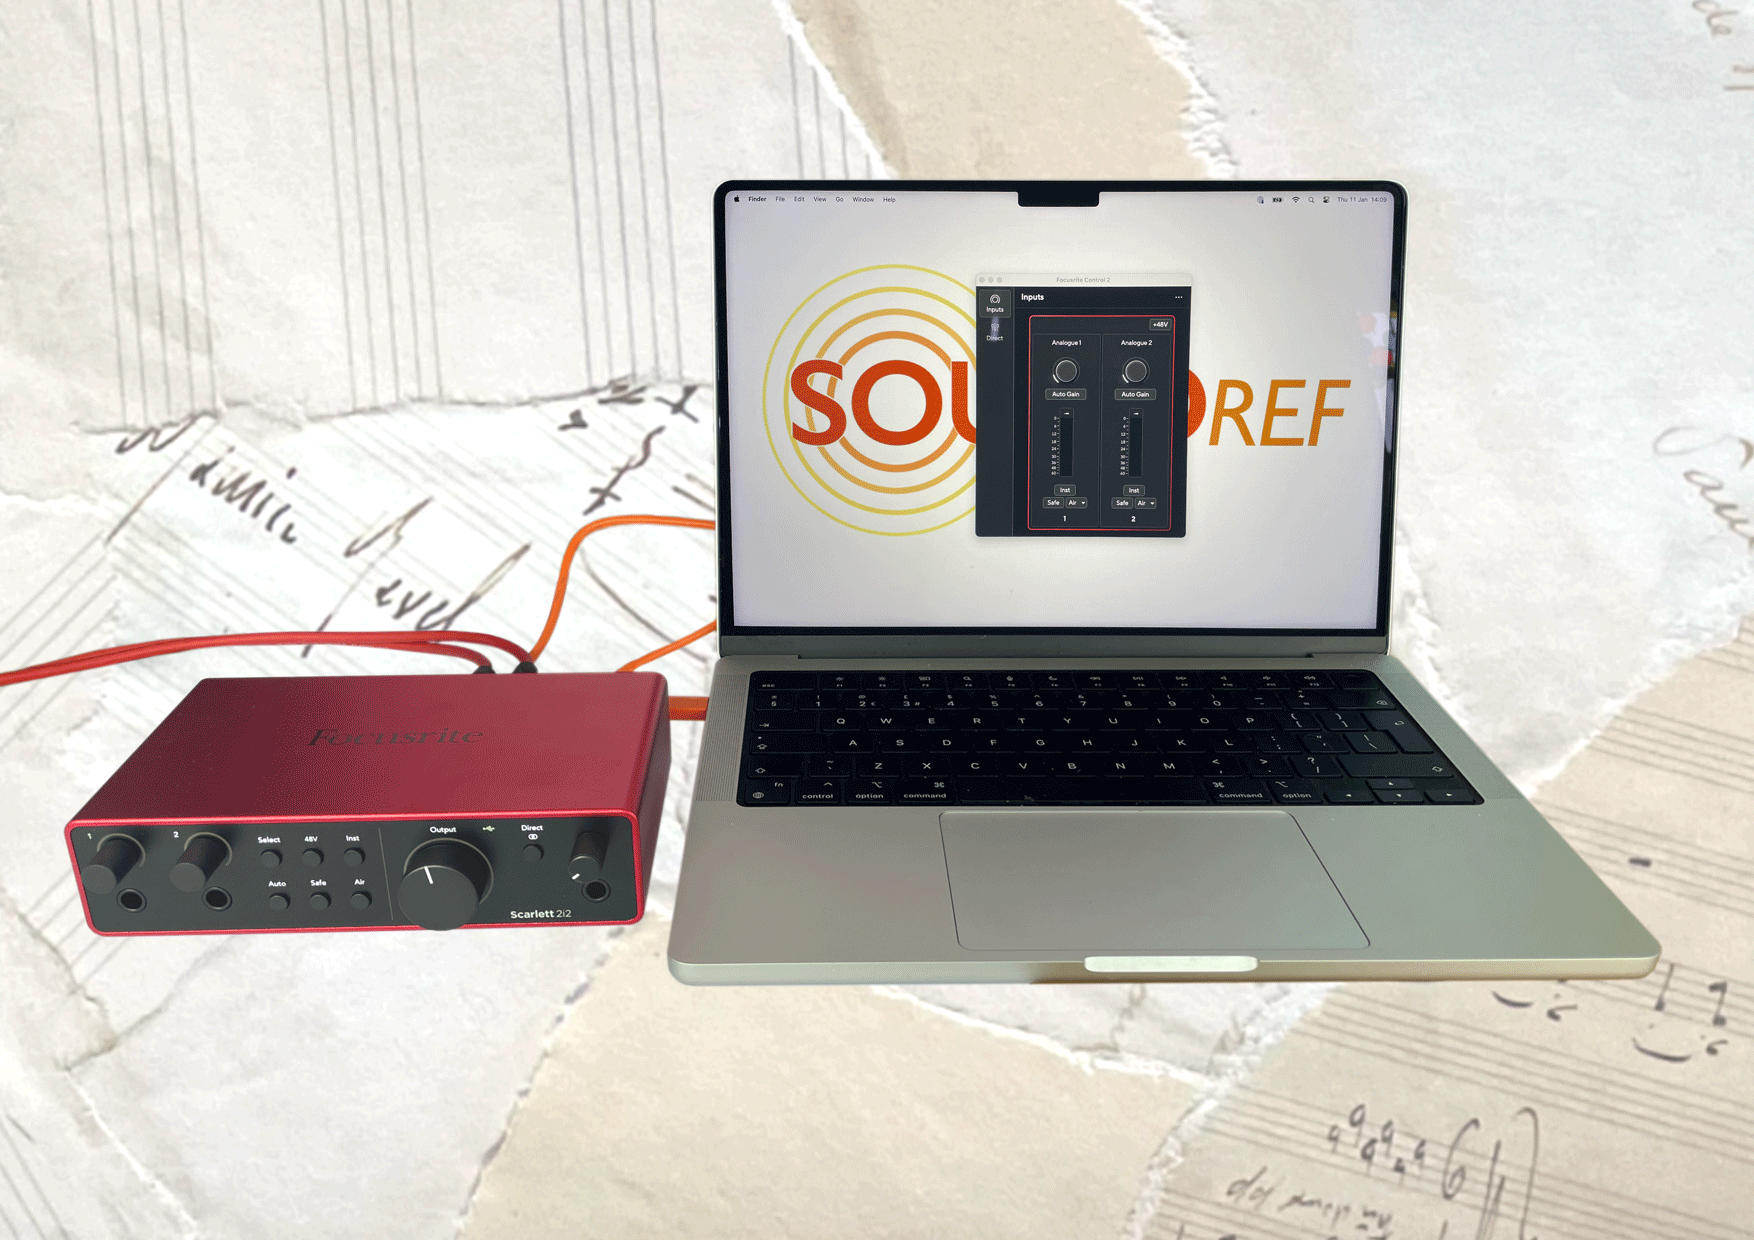
The Focusrite Control 2 software for the 2i2 is simple and easy to use, with some improvements on the 3rd generation 2i2. But there’s still no mixing or routing options, and no ability to create separate mixes for the headphones and the main outputs.
In the settings you can control the sample rate, taking it anywhere between 44.1 kHz and 192 kHz. But I suggest leaving it a 44.1 kHz, as the higher you go, the more space you’ll need to store the files.
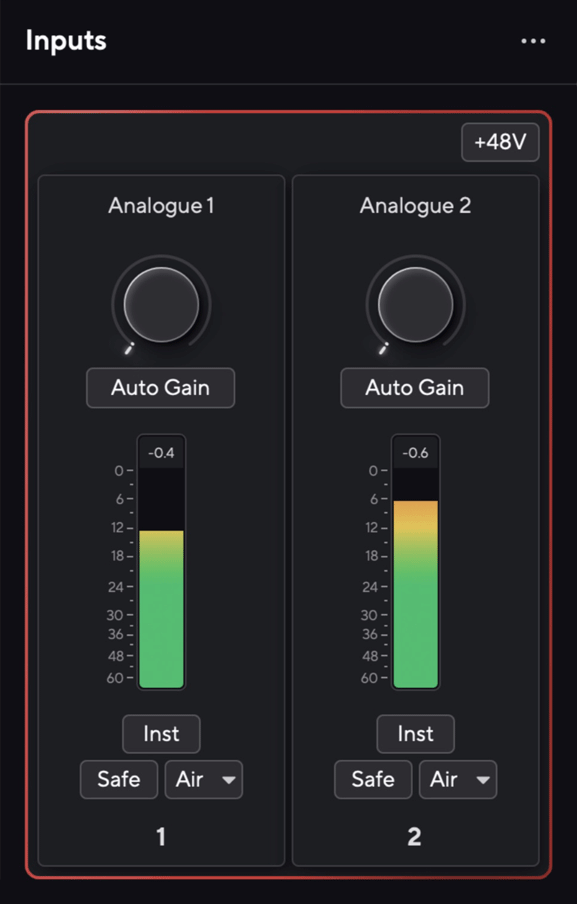
In the Control 2 Software you can set the input gain, but with no numerical readings, it’s hard to quickly set the known optimal gain for a particular microphone. There are traditional style level meters, which are very handy for keeping a check on input levels.
You can also turn on the two air modes from the Control 2 Software, and activate Safe mode, 48v phantom power and toggle between instrument and line modes.
Scarlett 2i2’s Bundled Software
Like many budget audio interfaces, the Scarlett 2i2 comes with a selection of software. They’re limited versions, provided in the hope that you’ll pay more later down the line for the full packages. Nonetheless, they’re more than enough to get you started in music production or podcasting.
The 2i2 ships with both Ableton Live Lite and Pro Tools Artist, both entry level versions of established DAW software packages. There’s also a quite impressive range of pro level plug ins – virtual instruments, equalisers and effects:
- Softube Marshall Silver Jubilee 2555 – Amp Simulator
- Antares Auto-Tune Access – Vocal Tuner
- Audio Addictive Drums 2: Studio Rock – Virtual Drum Library
- Audio Addictive Keys Studio Grand Piano – Virtual Keyboard
- Brainworx Bx_console – Channel Strip
- Focusrite FAST Balancer – AI powered EQ
- Focusrite Red 2 & 3 Plug-in Suite – EQ and Compressor
- LANDR – AI-based mastering tool (2 month subscription)
- Native Instruments MASSIVE – Software Synthesiser
- Relab’s LX480 Essentials – Reverb unit
Focusrite Scarlett 2i2 dimensions and weight
You’ll see from the specs that the 4th generation Scarlett 2i2 is slightly heavier and deeper than the the previous models. At 595 grams, it’s still light and small enough to put in a back pack for location recording, or setting up a remote recording environment.
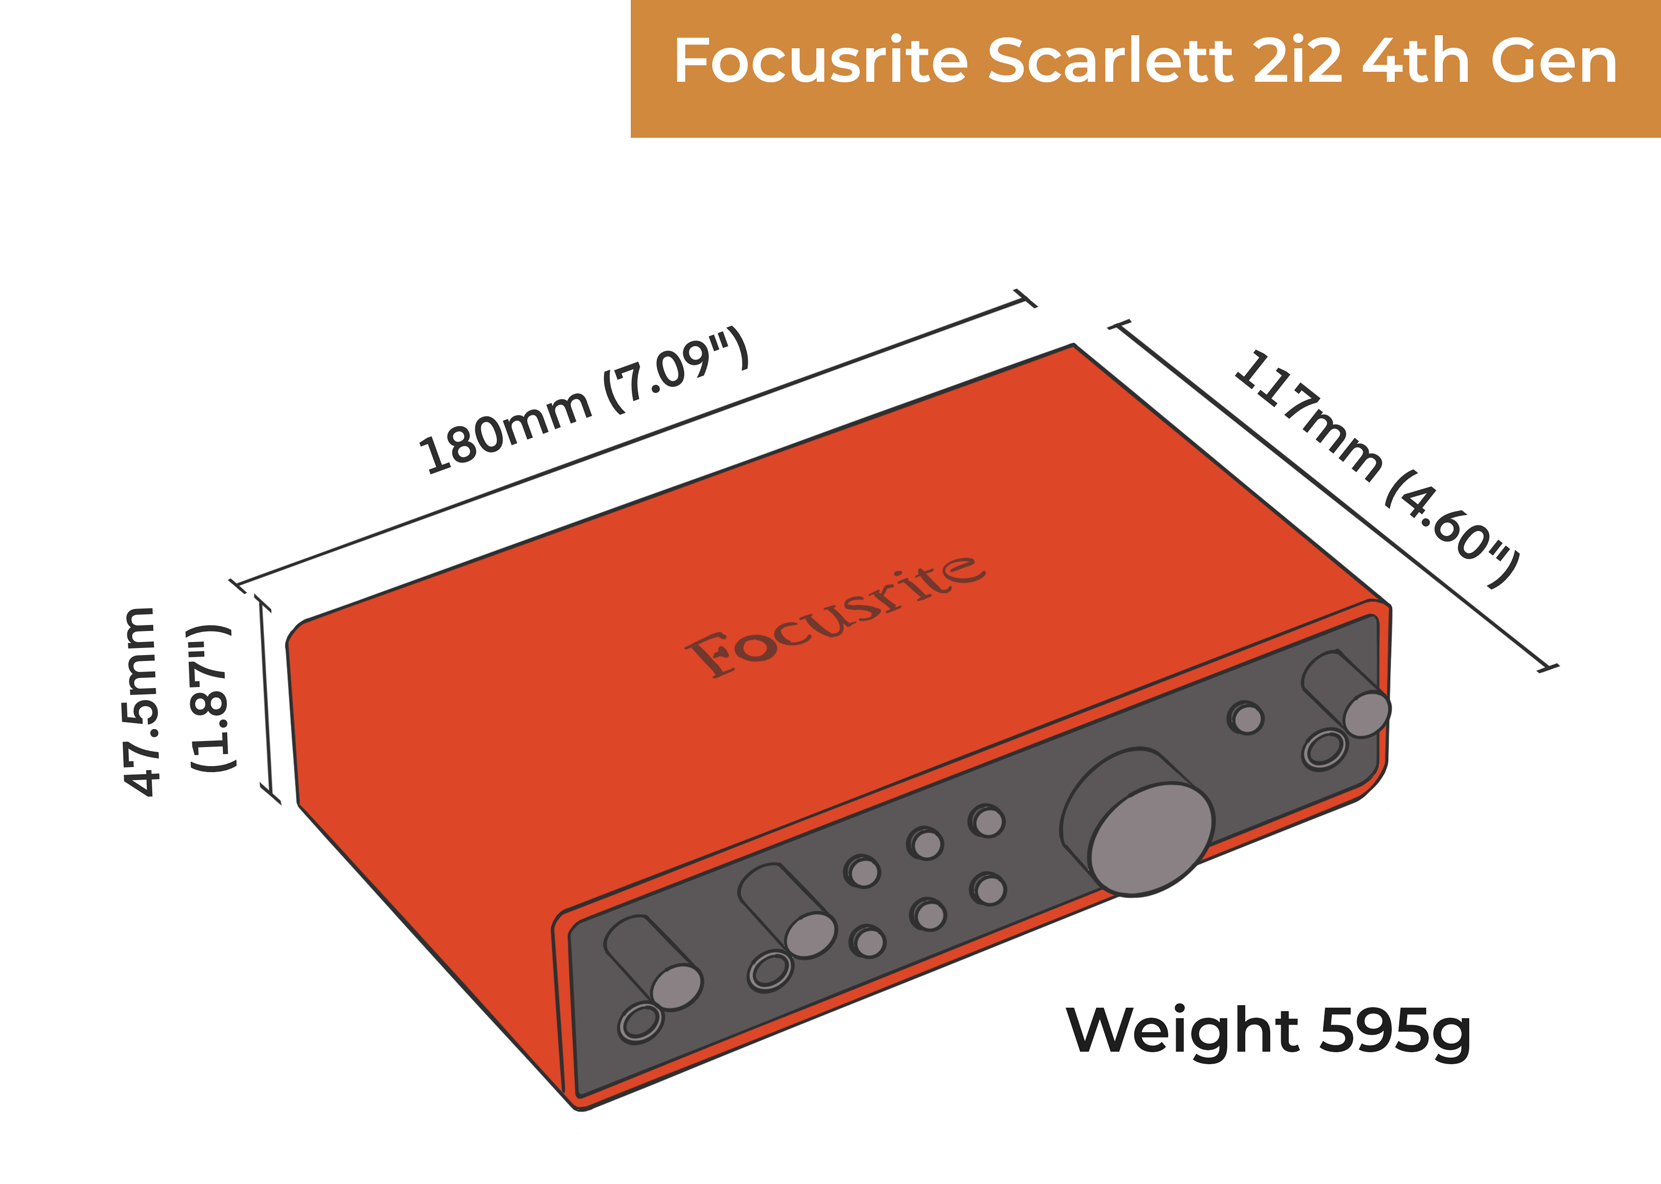
Scarlett 2i2 dimensions – 4th vs 3rd generation
| 4th gen | 3rd gen | |
| Weight | 595g (1.31 lbs) | 470 g (1.04 lb) |
| Height | 47.5mm (1.87″) | 47.5mm (1.87″) |
| Width | 180mm (7.09″) | 175 mm (6.89″) |
| Depth | 117mm (4.60″) | 99 mm (3.89″) |
Other audio interfaces by Focusrite
Focusrite make two similar Scarlett interfaces for users with different input requirements – the Scarlett 4i4 has four simultaneous inputs, while the Solo has just one.
Focusrite also make the higher end Clarett+ range with USB and thunderbolt connectivity. There’s the 2pre, 4pre and 8pre, with Cirrus Logic convertors and digital ADAT inputs to allowing for more analogue inputs if needed.
Scarlett Solo vs 2i2
If you’re on a budget, or looking for something more compact than the 2i2, you could consider the Scarlett Solo. Like the 2i2, it’s a two channel interface, but only has one pre amp. This limits you to recording just one mic and one line (or instrument input) simultaneously.
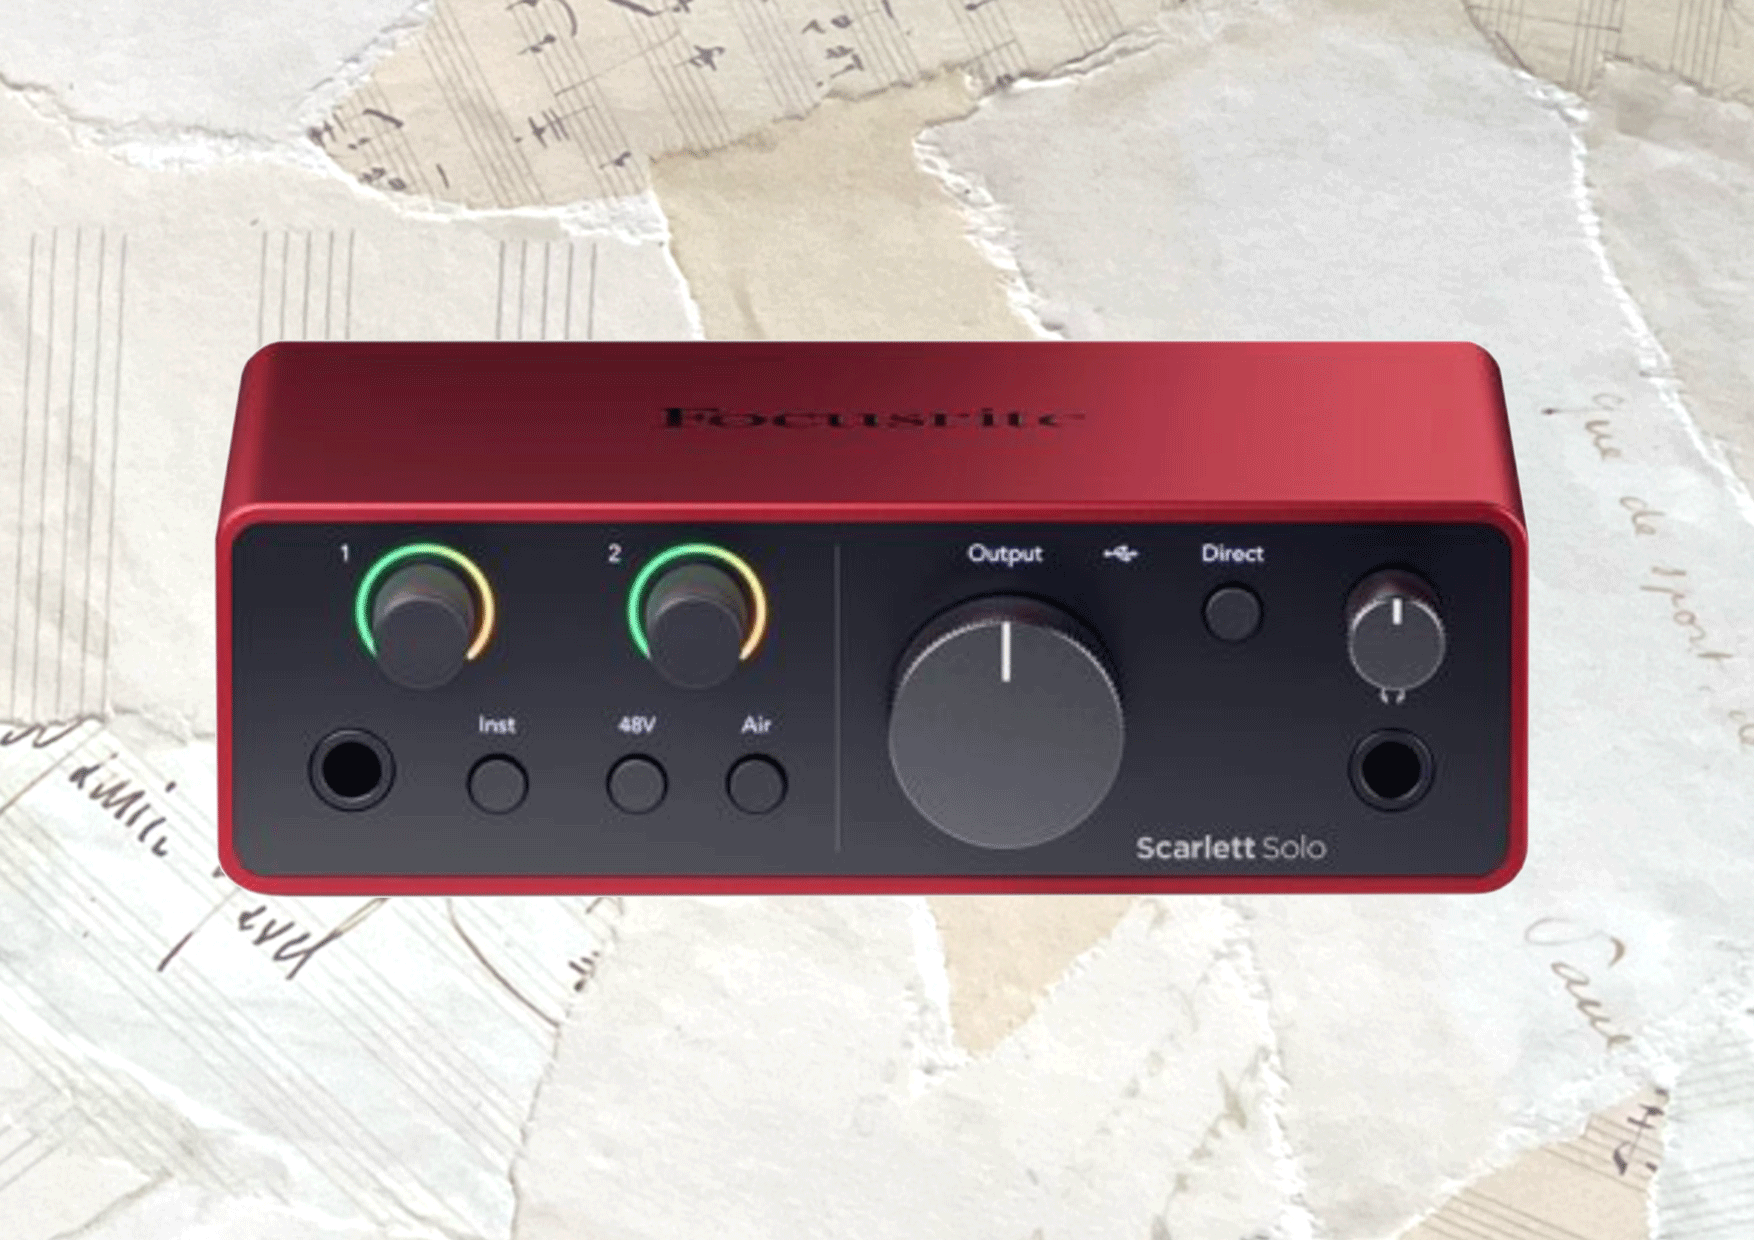
This rules out singer songwriters with an acoustic guitar, which require at leats 2 mics, or stereo recordings. But it could work if you’re singing along with an electric guitar, or doing solo podcasts.
The Scarlett Solo 4th generation does have the new Air modes, but lacks many of the other features of the 2i2, such as Auto Gain and Clip Safe. Unlike the 2i2 and 4i4, the Solo’s pre amps haven’t been updated from the 3rd generation (just 57 dB gain as opposed to 69 dB of the 2i2).
In practice this means you’ll have to turn the gain up higher, so you’ll get more noise than the 2i2, and struggle to power a Shure SM7B. And there’s no dedicated power socket or upgraded RedNet digital analogue convertors.
The rotary knobs on the Solo are fixed position as opposed to the 2i2 knobs which are infinite – they’ll keep turning. There’s a difference with headphone direct monitoring too – the Solo only has the option of hearing each input in each ear, whereas the 2i2 gives you the option of combining both inputs into mono.
Finally, the Focusrite Solo 4th gen doesn’t have an extra external power supply, which is a shame because I imagine potential users of the Solo may want to use it with an iphone or iPad, which won’t provide enough power for it.
Scarlett 4i4 vs 2i2
The Scarlett is similar to the 2i2, but adds 2 more line inputs, and 2 more line outs. This provides the connectivity to record 4 simultaneous sound sources, and power 2 sets of studio monitors.
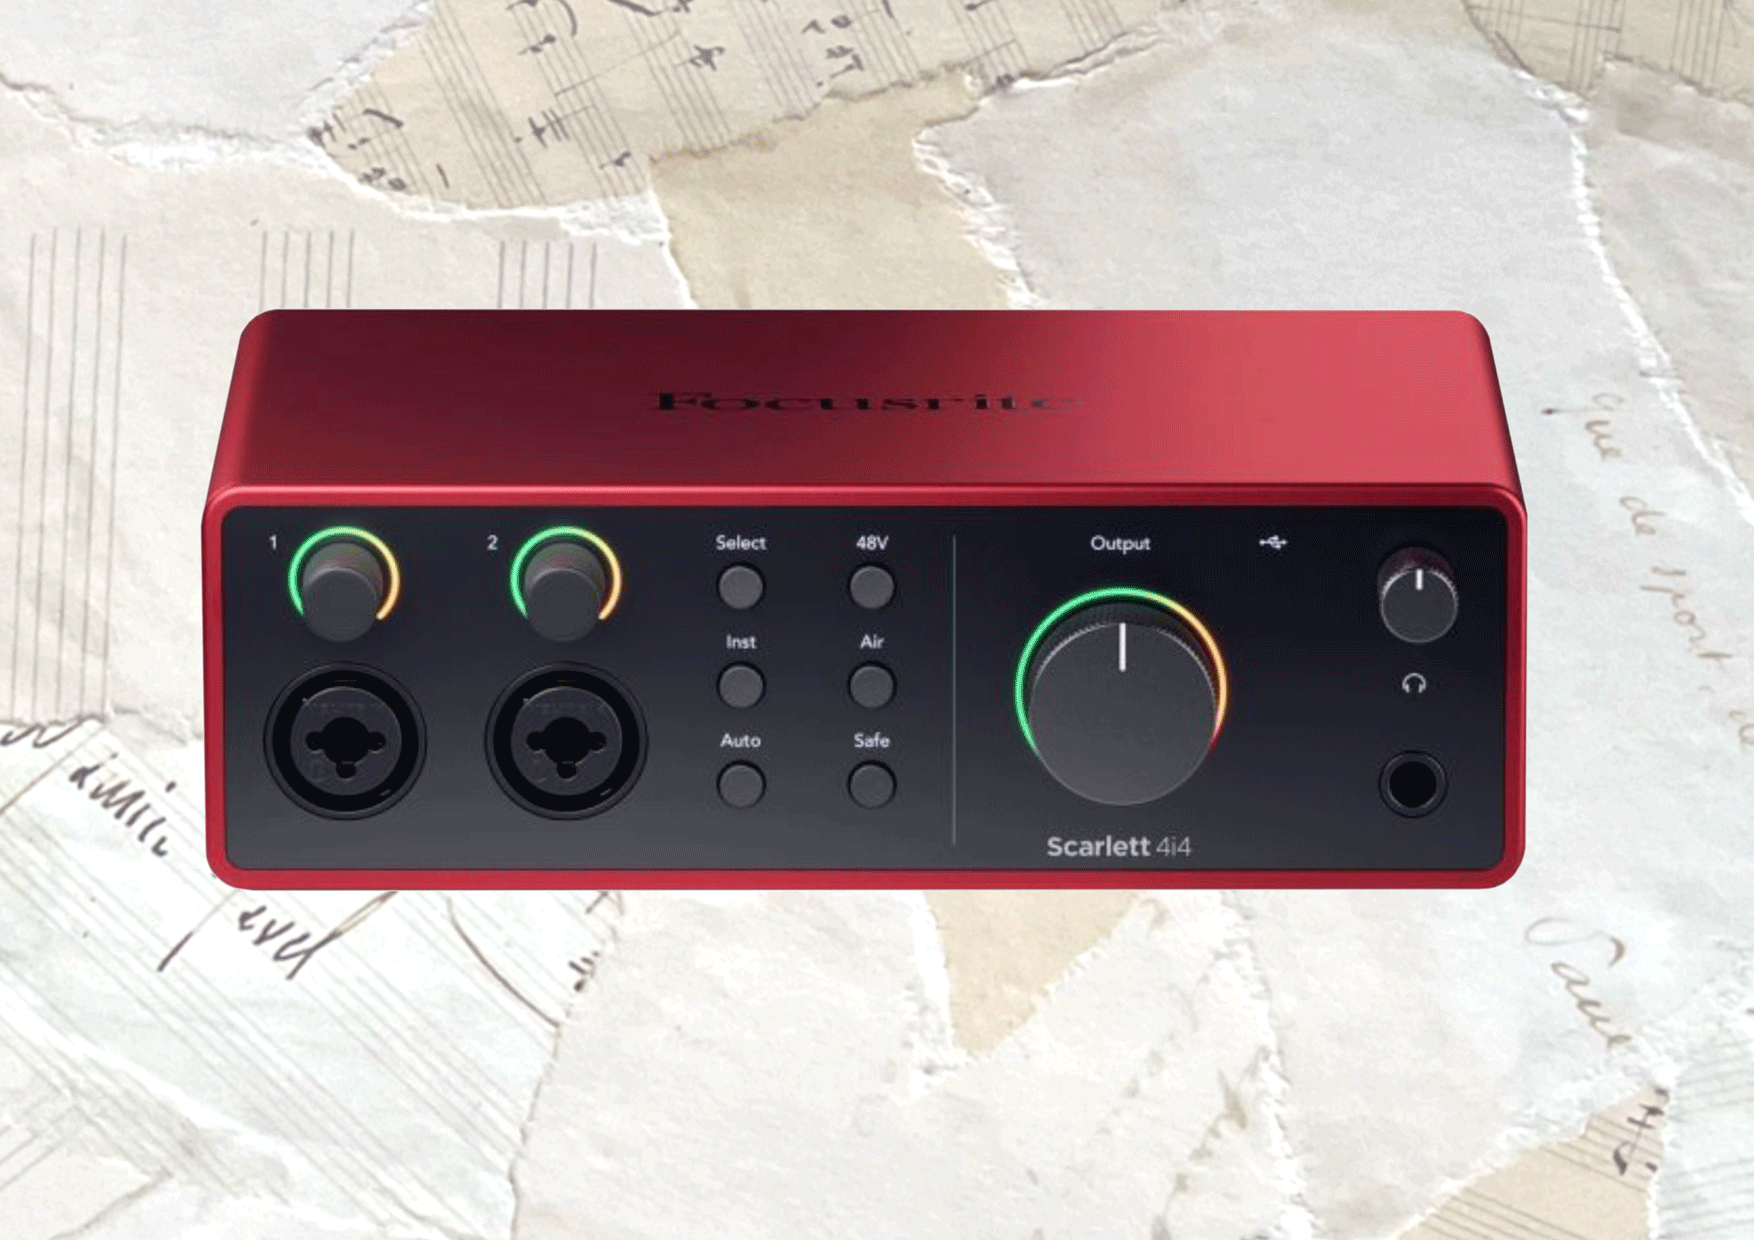
The software is more sophisticated, and provides the options for 3 separate mixes – one for you studio monitors, one for your headphones and one for the loopback feature. That’s why there’s no need for a separate Direct monitoring button on the front panel, found on the 2i2.
There’s also an old-style 5 pin midi socket, so you can connect up a vintage keyboard without the option of USB midi. And there’s an improved headphone amp compared to the 2i2.
5th generation Focusrite Scarlett features
The 4th generation Scarlett 2i2 is a huge improvement over the 3rd gen, but there’s are few features which could be considered for the 5th generation:
- Digital connectivity, to link 2 or more units together
- Separate buttons and indicators for each channel
- Low impedance for the headphone sockets
- Direct monitoring volume control on the front panel
- Separate phantom power option for each input
- On/off button
Verdict
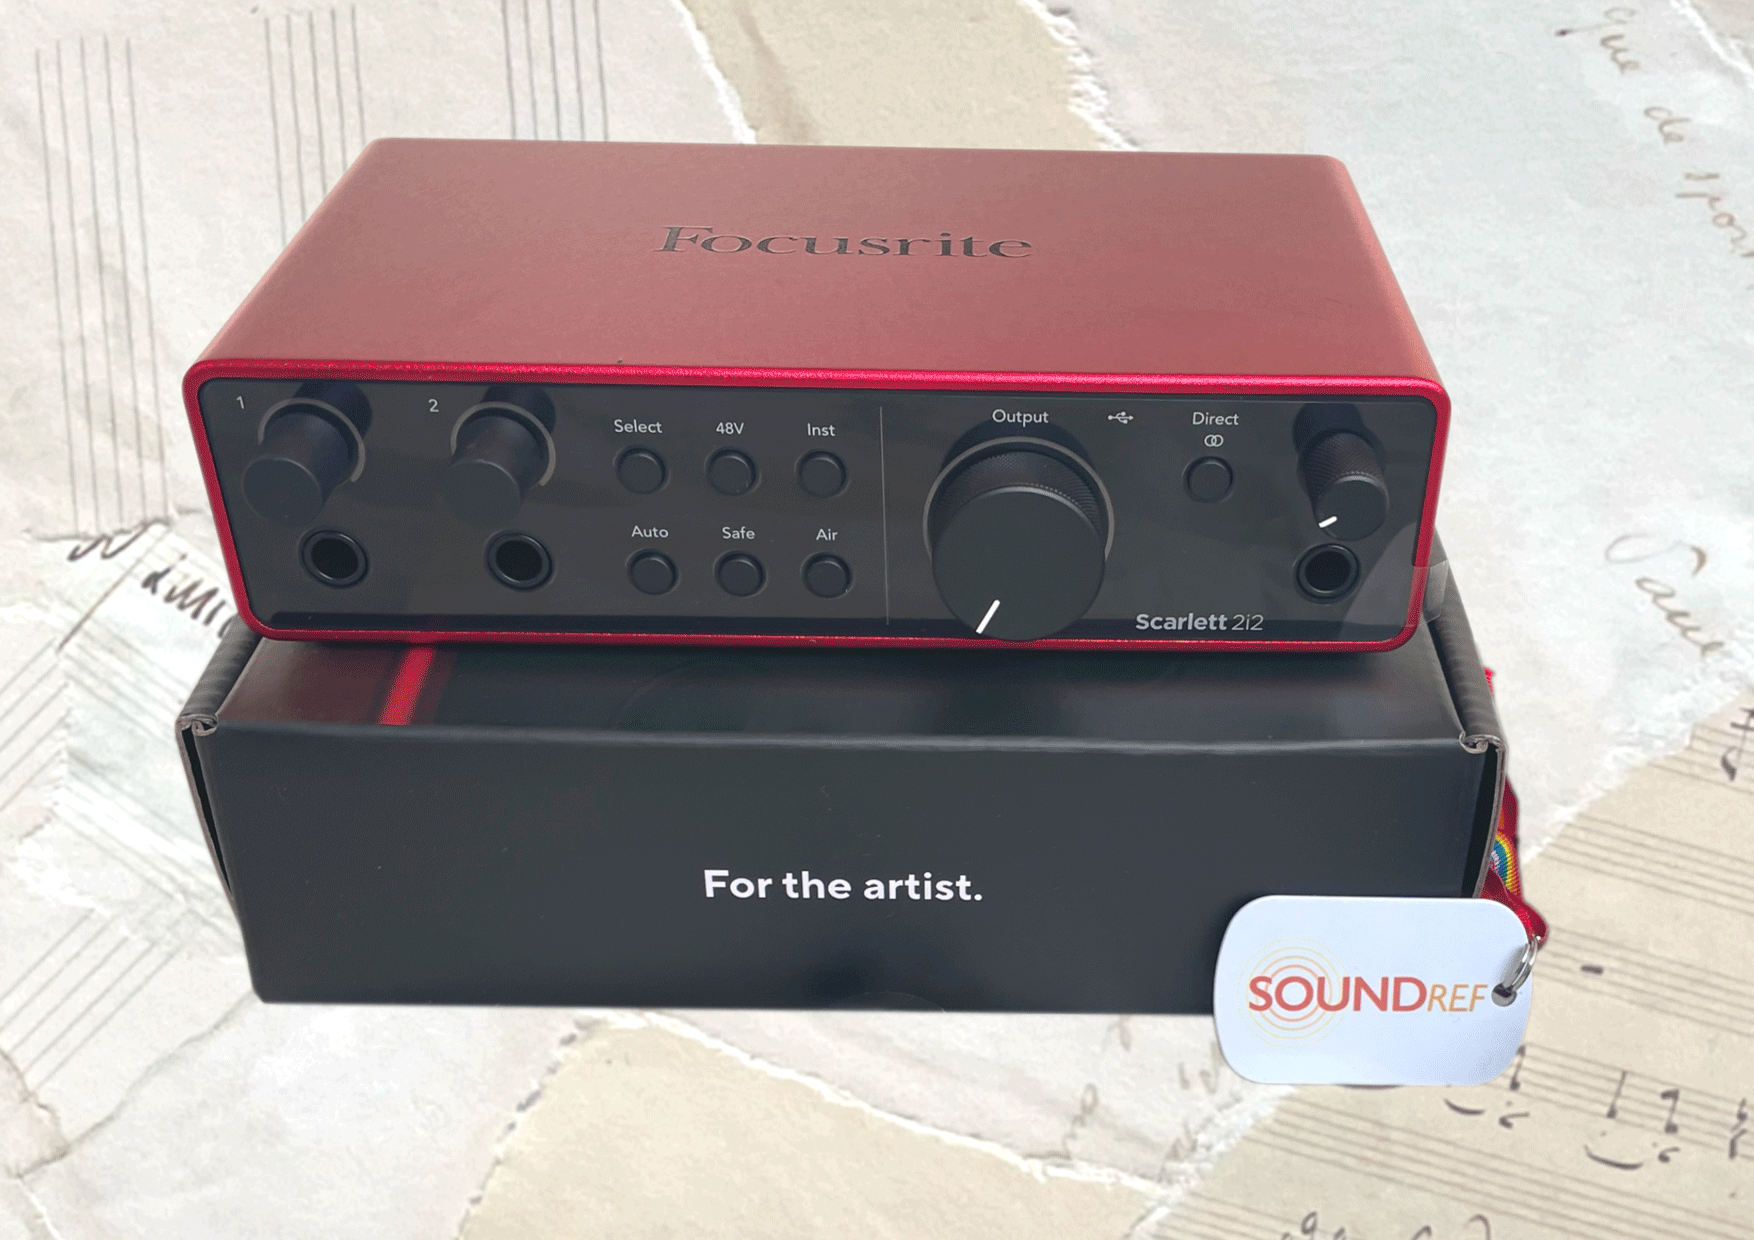
Focusrite definitely have a winning formula with the 4th generation Scarlett 2i2. It’s biggest strength is in combining high quality audio with extreme ease of use, making it perfect for beginners who need to work at a pro level.
With the enhanced mic pre amps with exceptional dynamic range and gain, along with the top quality RedNet digital convertors, the 2i2 brings high end audio to home recording, music producing, podcasting and streaming.
Scarlett Focusrite 2i2 frequently asked questions
Does the Focusrite Scarlett 2i2 have separate phantom power for individual pre amps?
The Scarlett 2i2 only has the option to turn phantom power on for both pre amps at the same time. This is only a limitation if you’re planning to use a condenser mic and a ribbon mic at the same time.
Should I upgrade from Scarlett generation 3 to generation 4?
Consider upgrading to Scarlett generation 4 if you need the higher sound quality of the new pre amps and AD/DA convertors.
What headphones should I use for the Focusrite Scarlett 2i2?
You can use a wide range of headphones with the 2i2, but for the most accurate sound, use high impedance headphones.
What are the alternative 2 channel audio interfaces to consider for your home studio?
