The Definitive MOTU UltraLite Mk5 Review
Superb audio quality and versatility

Reviewed by: Daren Banarsë
Review date: April 2024
Current price: Around $650

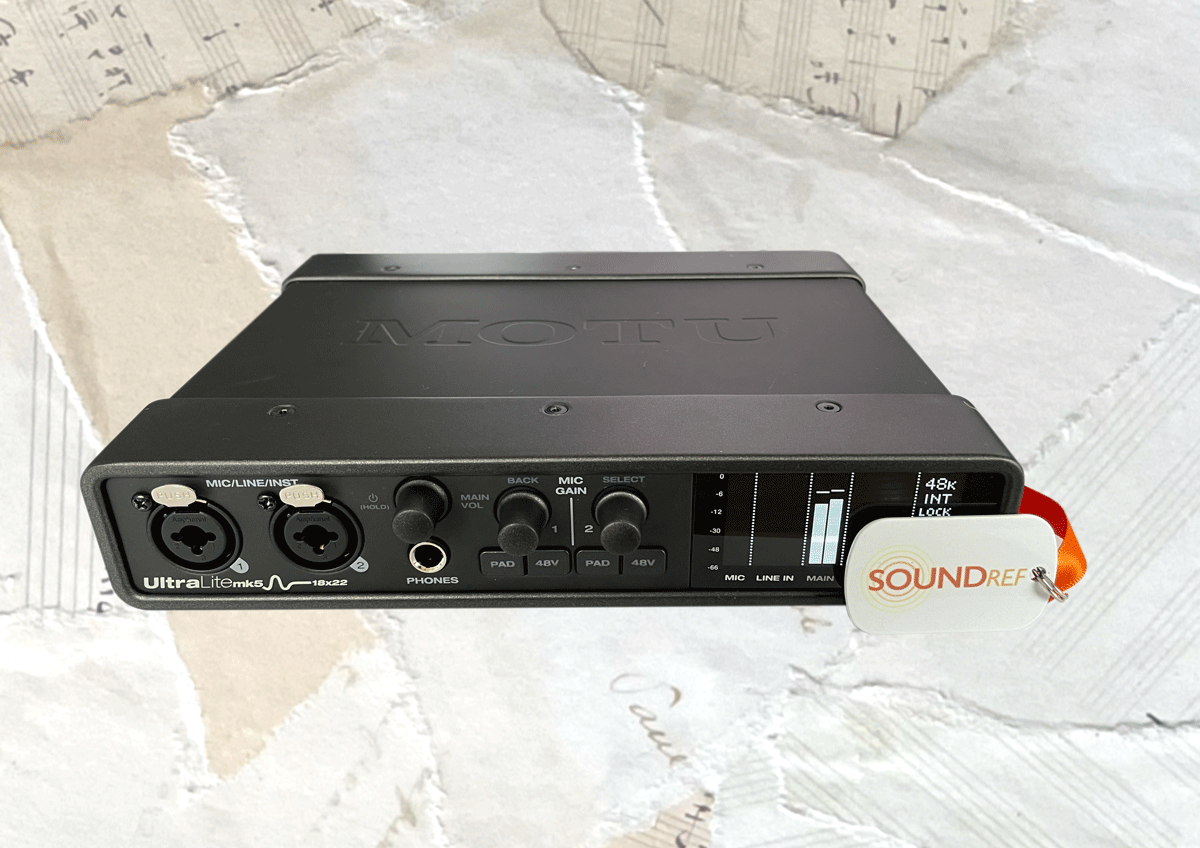
MOTU UltraLite Mk5 Review
| Pros: | Cons: |
| Huge range of inputs and outputs Digital options for expansion Versatile software with effects and loopback Excellent sound quality | Needs external power supply |
MOTU UltraLite Mk5 USB Audio interface
The MOTU UltraLite Mk5 is an eight input USB audio interface, with 2 XLR jacks for microphones and six 1/4″ jack line inputs. With a total of 10 line level outputs, plus extra digital inputs and outputs, it’s a versatile interface with extremely good audio quality.
What is it?
The manufacturer of the Mk5 is MOTU (Mark of the Unicorn) – a US based company, which entered the music industry back in the 1985 with their Digital Performer DAW software for the Mac. It was widely used at the time, before they began branching out into other popular software and hardware solutions.
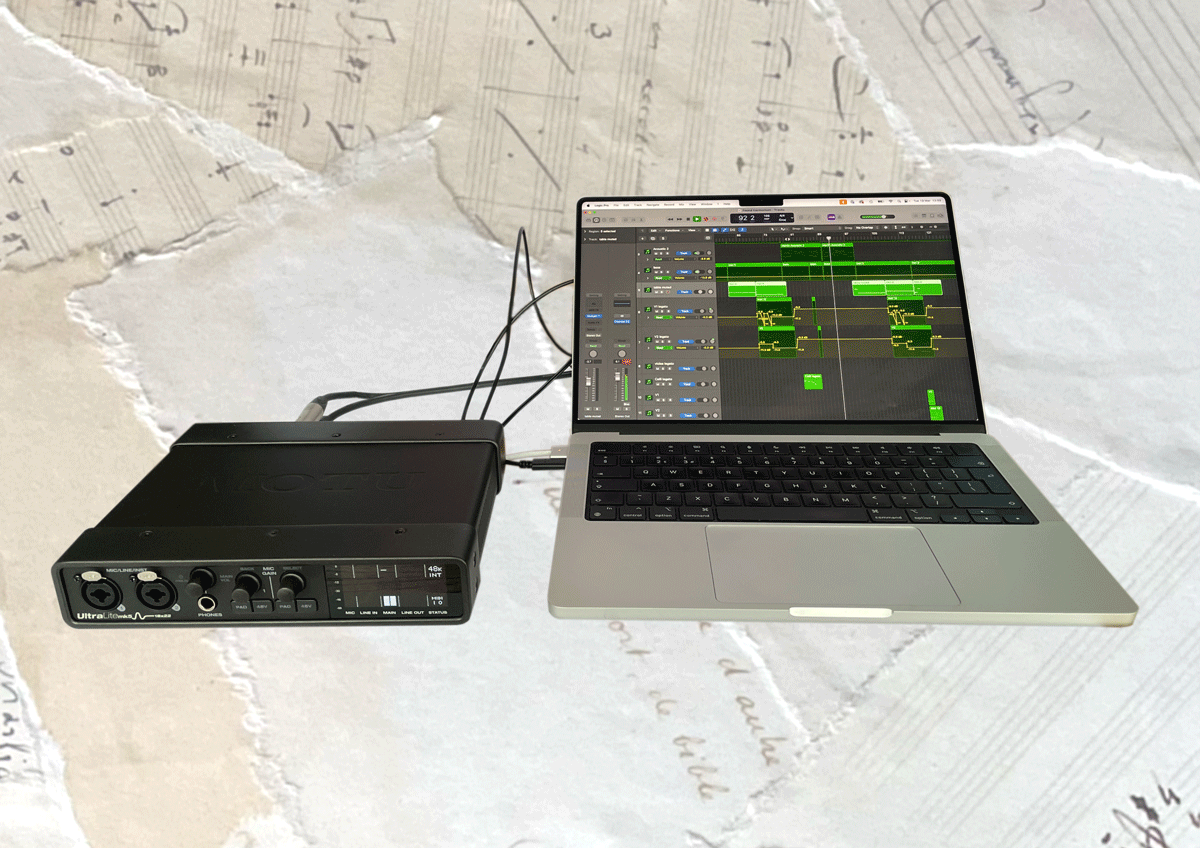
MOTU’s first breakthrough audio interface was the rack-mounted, firewire MOTU 828, which came out around 2000. It’s still going strong today with as an 8 channel USB interface.
Since the success of the 828, MOTU have been launching a wide range of midi interfaces, for all levels of of music production. The first MOTU Ultra-lite Firewire interface was released in the early 2000s, followed by the Mk3, which added onboard DSP processing.
The latest Ultralite Mk5 model reviewed here, also has DSP processing, and a new, easier to use version of the Cuemix 5 software.
The Ultralite Mk5 is ‘class compliant’, so it works straight away with Mac and other IOS devices, such as iPads and iPhones. But if you want to use the Cuemix software, or you’re running Windows 10 or later, you’ll have to download and install a driver.
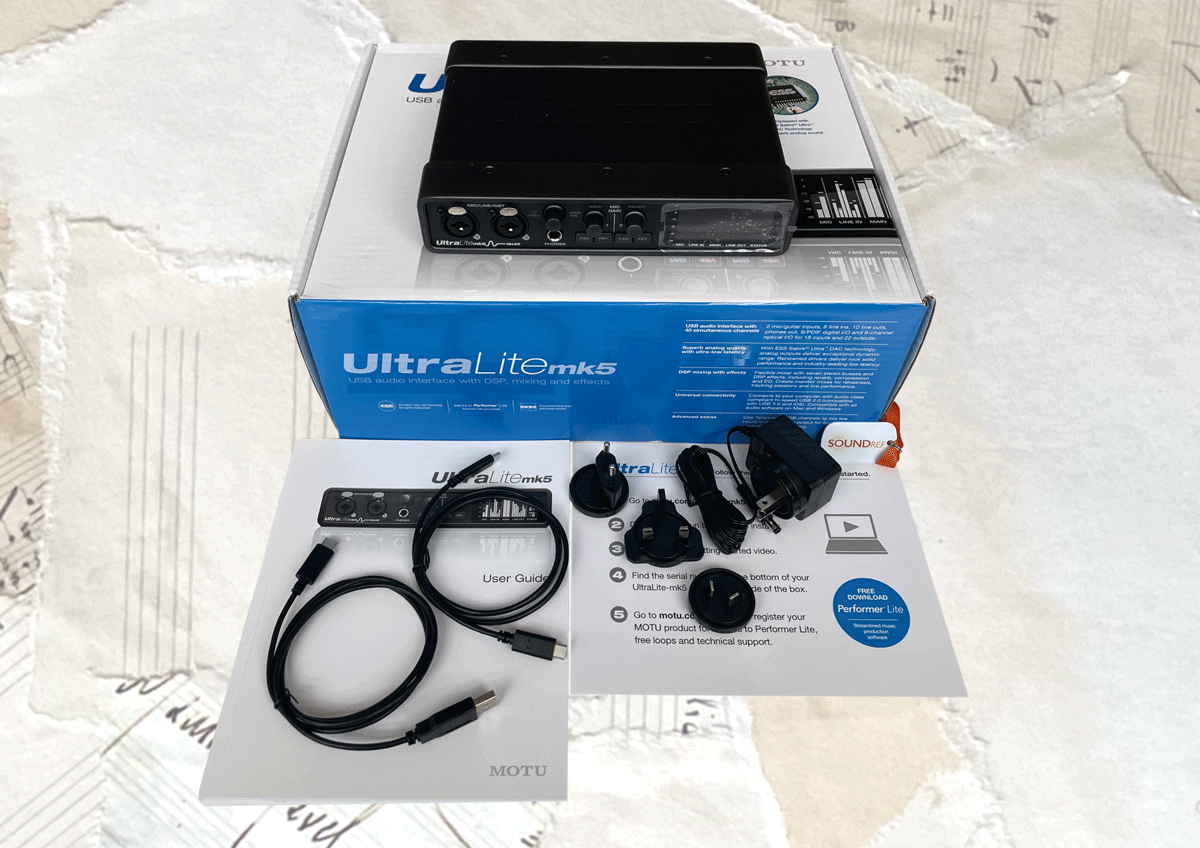
In the box
- UltraLite-mk5 audio interface
- 1 metre USB-C-to-C cable
- 1 metre USB-C-to-A cable
- DC power adapter, with a range of plug options
- Paper manual
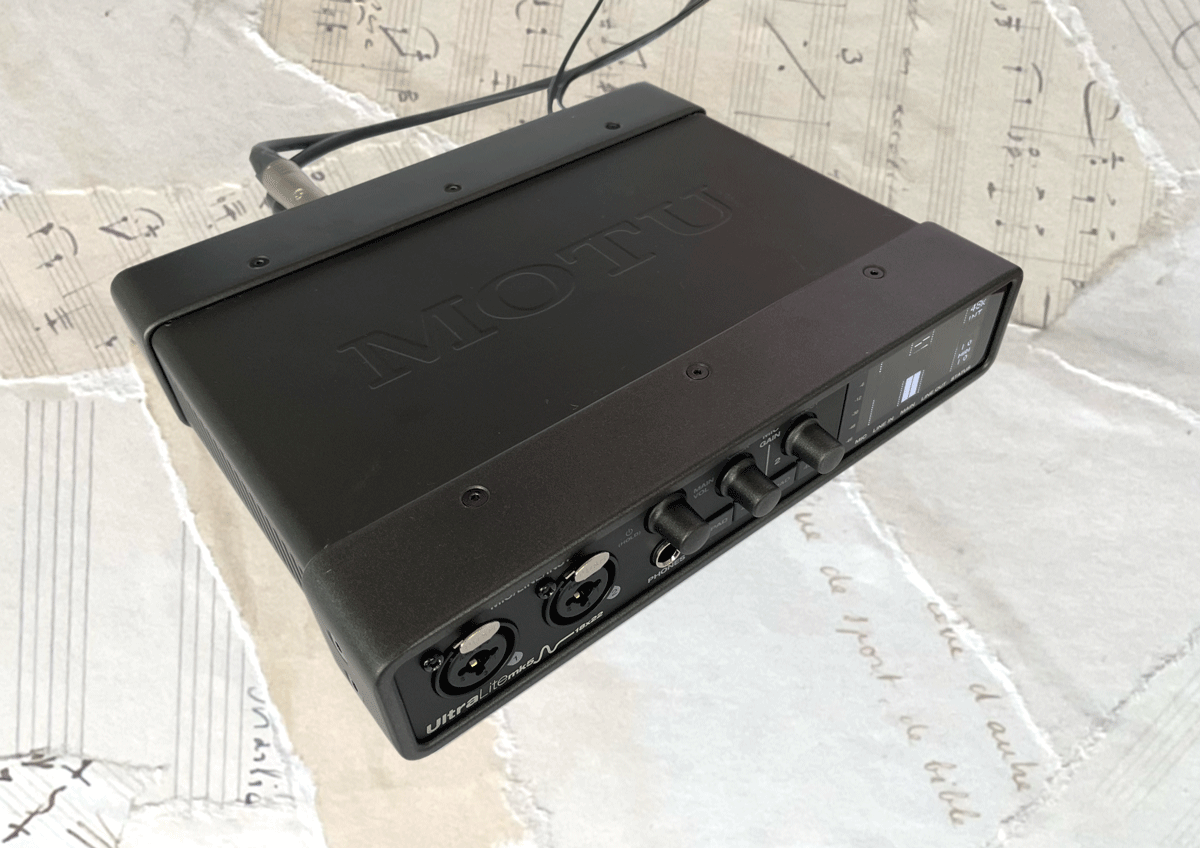
Design and Build Quality
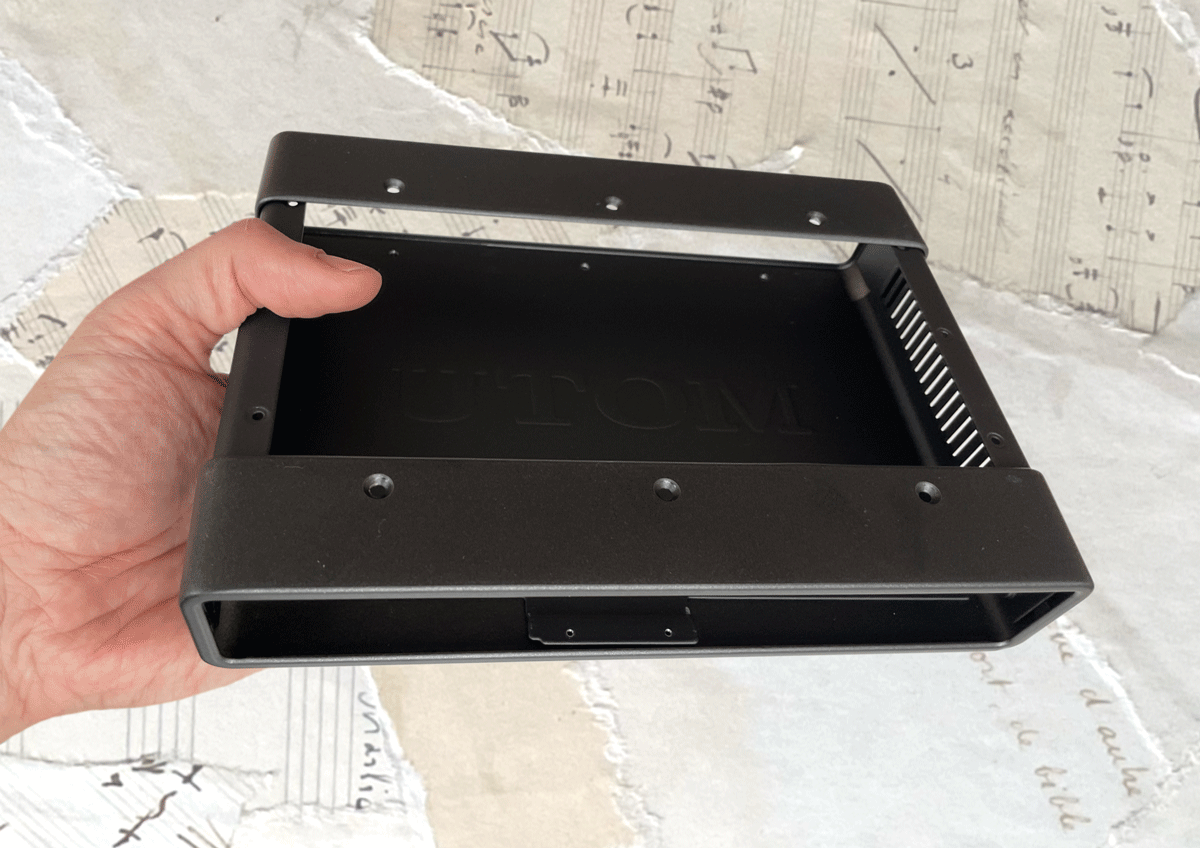
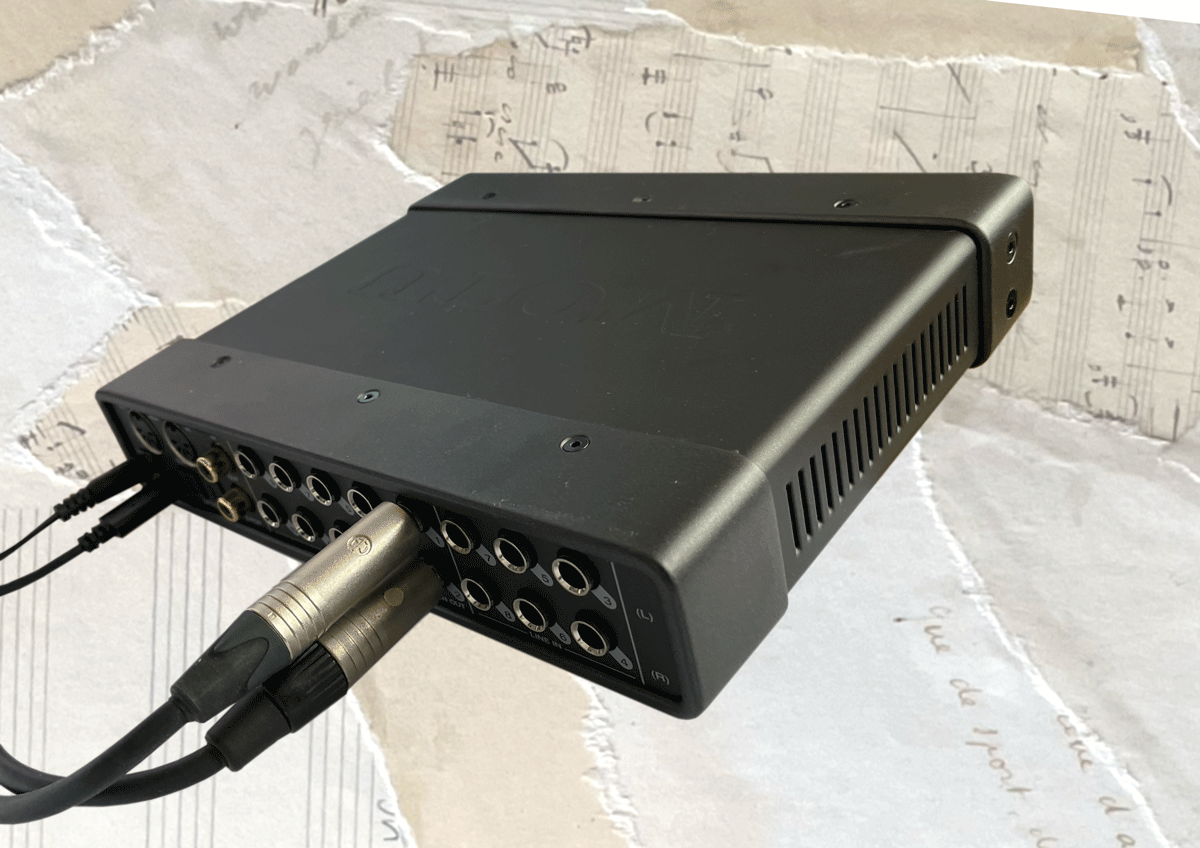
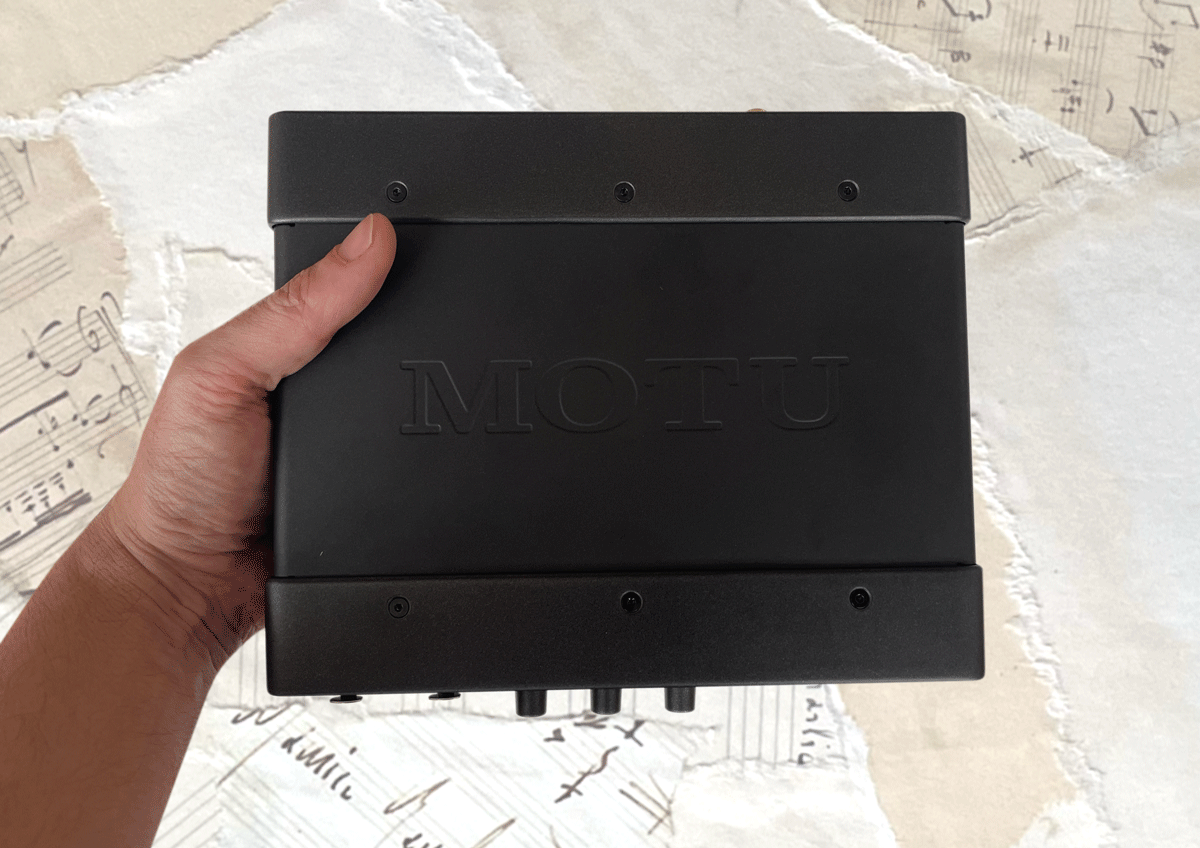
The MOTU UltraLite Mk5 is constructed from 4 metal sections. There’s a main body which screws onto the plate which houses the circuit board. This is further bolstered by 2 rib-like reinforcing sections each slotting on, and screwed onto either side of the unit.
It’s a completely new look compared to the earlier UltraLite versions, and looks more aesthetically pleasing. It’s still rock solid, easily strong enough enough for live use as well as the studio.
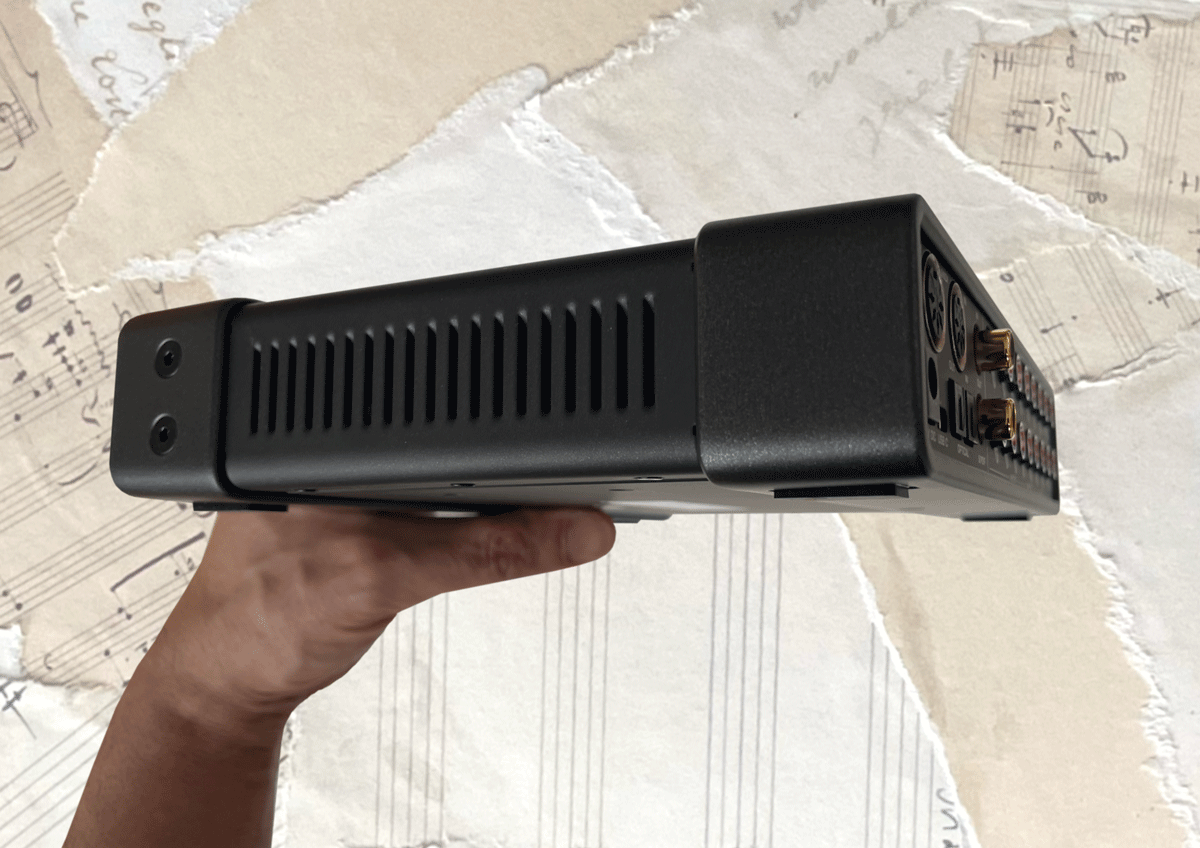
There’s ventilation slots on either side of the case to help keep it from overheating. There’s 6 more on each side than it’s predecessors, totalling 17 – especially important considering the lack of heatsinks inside.
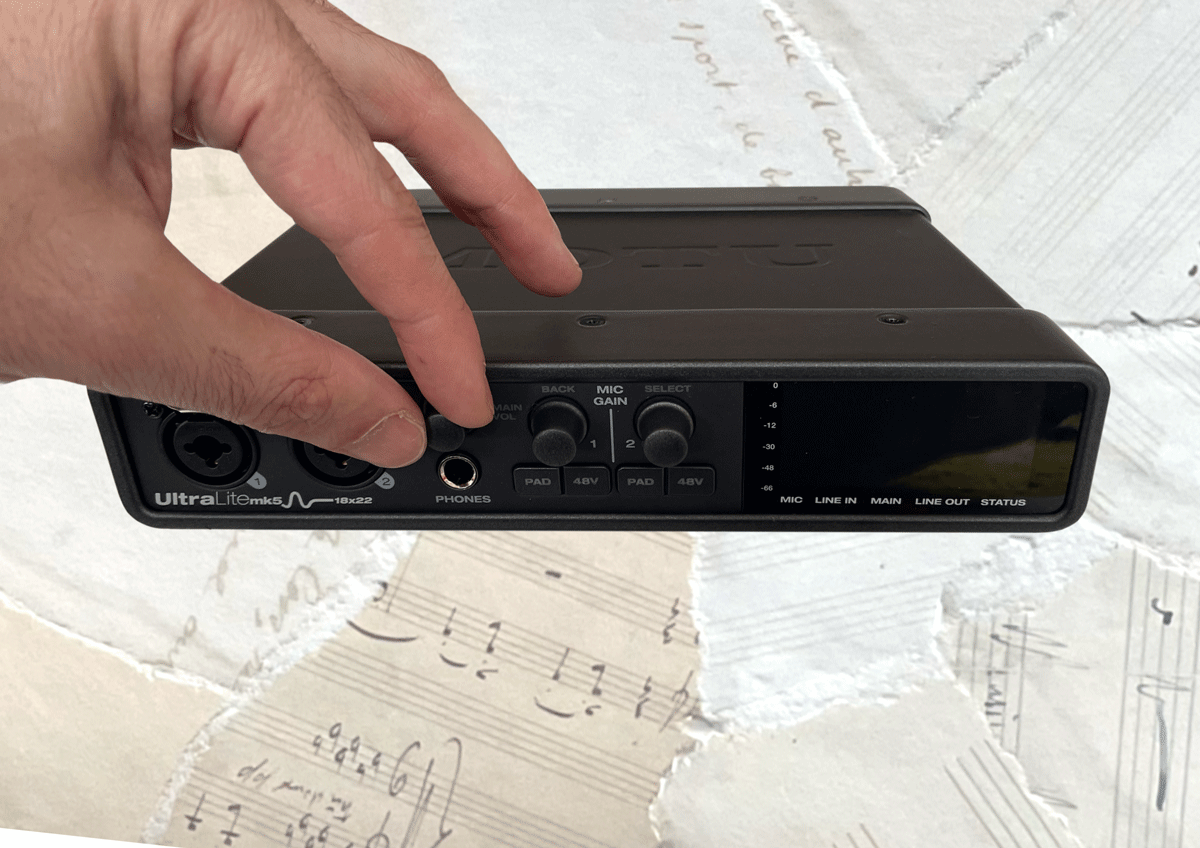
The weakest point would be the front panel, which has plastic knobs, though they feel solid, with very little play. The black OLED screen with white display does flex if you push it, and is the weakest area of the unit. If you’re taking the MK5 out of the studio, you’ll have to make sure this area is protected.
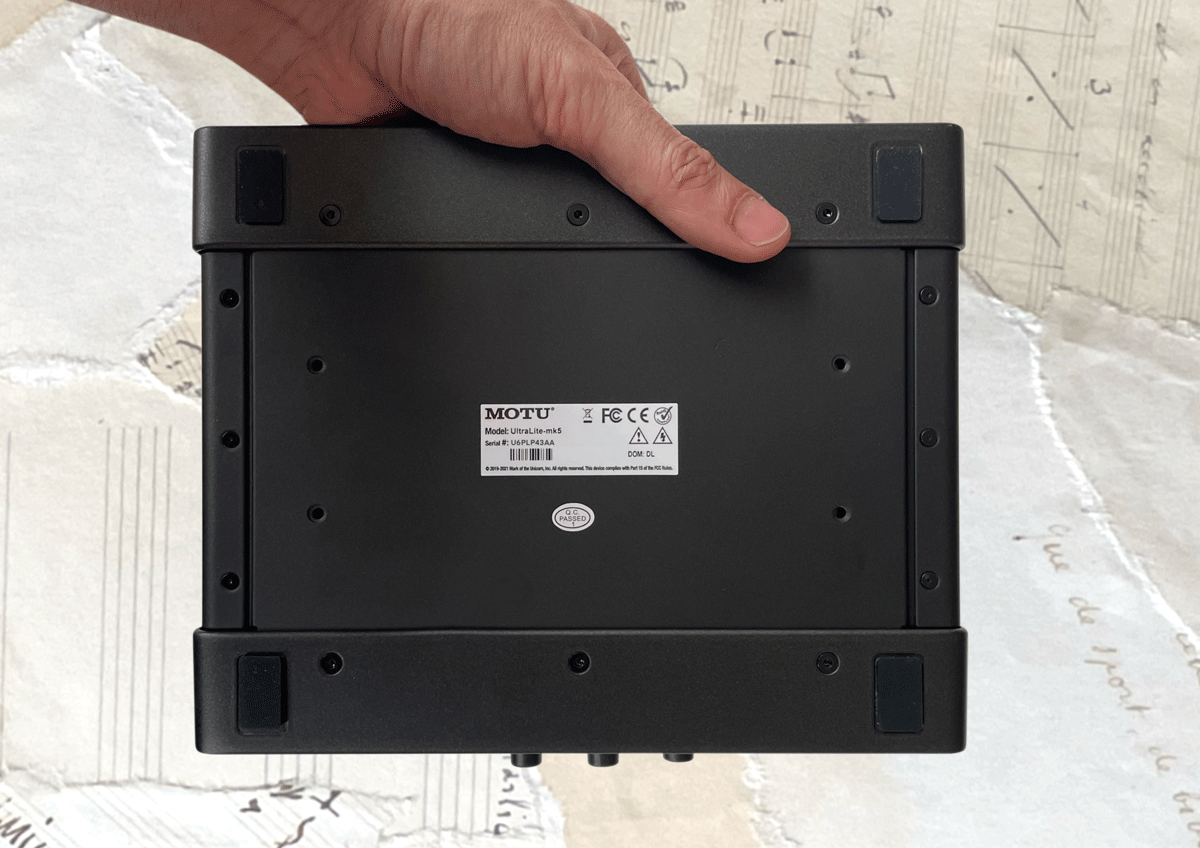
On the base are 4 stick-on heavy duty rubber rectangular pads. These feel nice and thick, a step up from some of the miniature lightweight pads on other desk top interfaces.
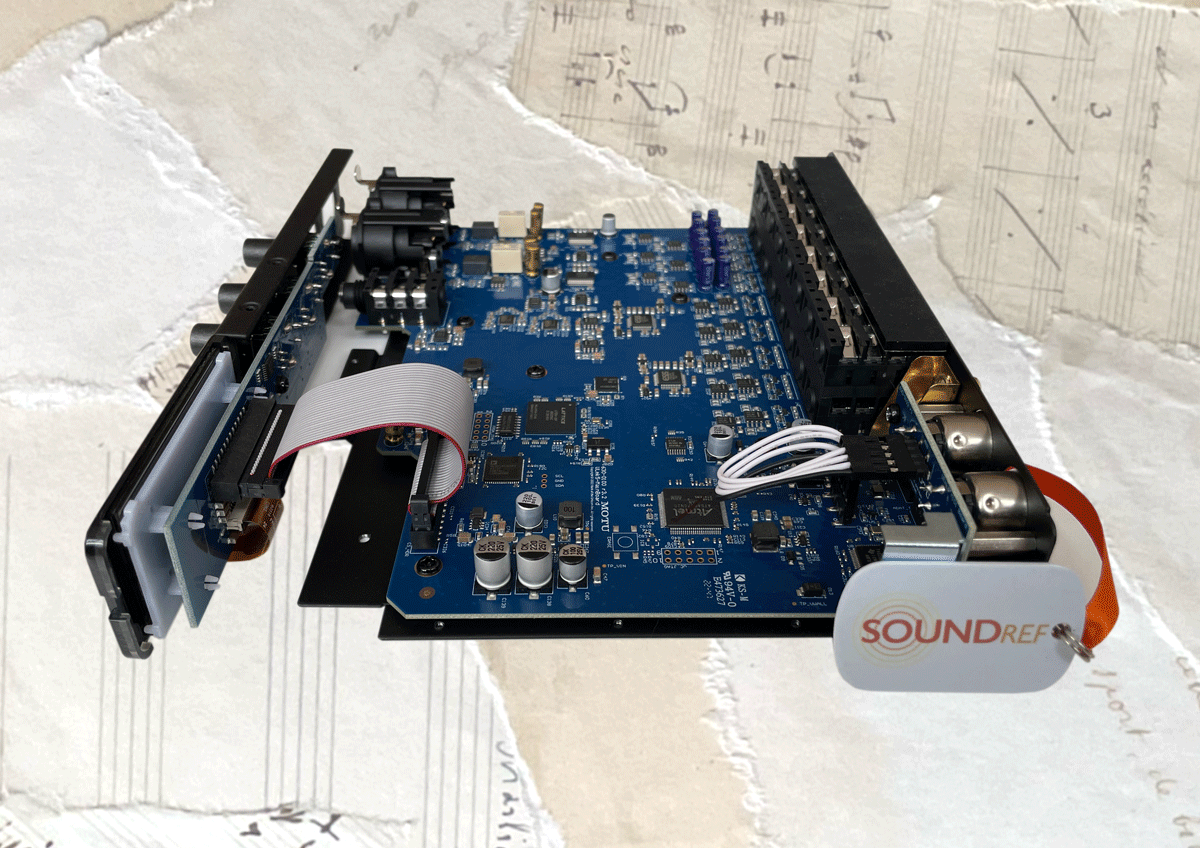
To get to the circuit board, involves removing the front and end panels, then separating the metal based circuitboard from the rest of the chassis. Here you’ll see the high quality digital and analogue ESS convertors, and top quality preamps – more details about these later.
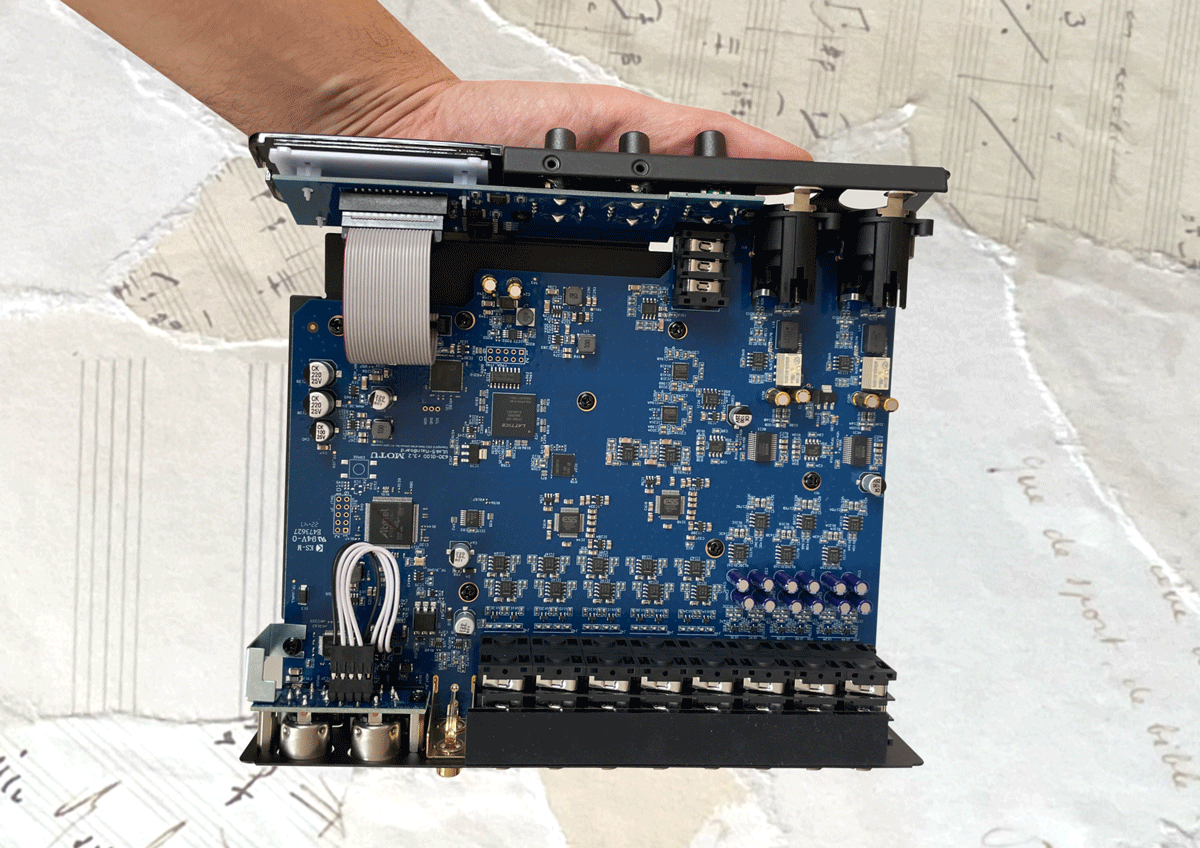
My overall impression of the build quality and design was very good – The Ultralite combines high strength and protection with some very high quality components. The outer shell is made of steel, which is much stronger than aluminium used on many other lower priced interfaces. It does add to the weight a little, but worth the upgrade in protection.
MOTU Ultralite Mk5 – an improvement on the Mk4?
The previous interface, MOTU Mk4 arrived in 2016, as a USB 2.0 audio interface with power supply. It was a highly regarded audio interface, just as rugged as it’s predecessors, with an aluminium body.
It had twice the processing power of the Mk3, and more complex software mixer, with a great deal of routing flexibility. Some would say too complex! The Mk5 aimed to simplify the Cuemix 5 software, and after some updates reached the versatility of the Mk4, but via a much more intuitive route.
The DAC’s in the first Ultralite Mk4s were AKMs, as in previous models, and the ADC’s were Cirrus Logic CS5368s, but they were later upgraded to higher quality ESS chips.
I would consider the main improvement on the UltraLite Mk5 to be the new look, stronger steel case, easy to read, black and white OLED screen (as opposed to the blue screen), and an upgrade in audio quality:
- DAC dynamic range has been improved by 2dB, to 125 dB
- Line input dynamic range increased by 10 dB to 120 dB
- Headphones dynamic range extended to 118dB, from 112dB
Connecting the MOTU UltraLite Mk5
You’ll see from the diagram below that the UltraLite Mk5’s unique selling point is the enormous range of inputs and outputs. It’s a great option for the audio engineer who has to cater for a lot of different recording scenarios. I’ve given examples of some of the devices you can connect to the outputs, but there’s many more configurations you could use depending on your needs.
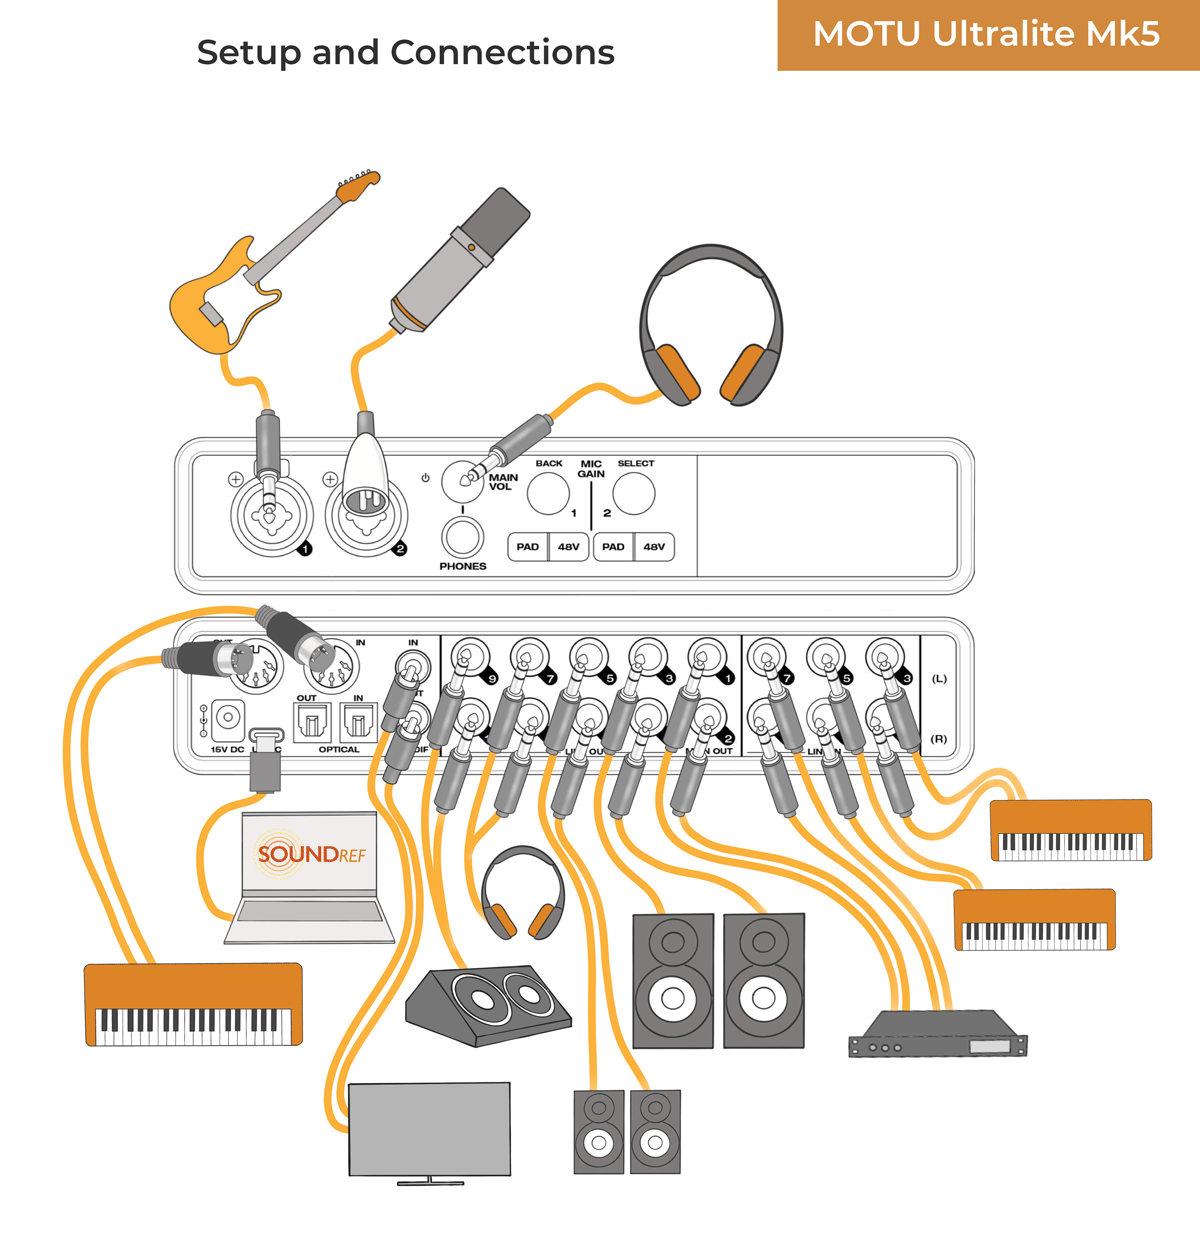
You can configure the outputs within the Cuemix 5 software, which is actually quite simple compared to the Mk4. Here I’ve shown the SPDIF outputs connected to a home theatre setup, though it could be used for a digital to analogue convertor or anything else with an SPDIF connector (RCA coax or optical TOSLink).
I haven’t shown anything connected to the digital ADAT connections, but you can use this to add more preamps or additional 8 inputs and outputs (limited to 48 kHz). They can also be configured to support stereo TOSLink if you’re looking for more inputs.
For illustration of the output flexibility, I’ve included a stage monitor, an extra pair of headphones, an extra pair of studio monitors, the primary studio monitors and an audio processing device, such as a hardware delay, reverb, equaliser or compressor.
It could equally be used to power multiple sets of stage floor monitors, or a surround speaker system if you wanted to use it for live performance. I’d be tempted to have several sets of studio monitors set up around the house, so I could stroll through and hear my mixes on various setups and environments, to see if there was something I’d missed.
Remember you don’t have to use all of these outputs and inputs if you don’t need them, but there’ll always be a time when the flexibility they offer could come in really handy.
Use balanced cables (TRS) wherever possible to connect devices to you Mk5 interface, as they’re all balanced connectors. Balanced cables are a bit more expensive, and have 2 rings rather than one ring. They’ll pick up less magnetic or electrical interference. This can show up as a constant hum, buzzing, or even radio signals.
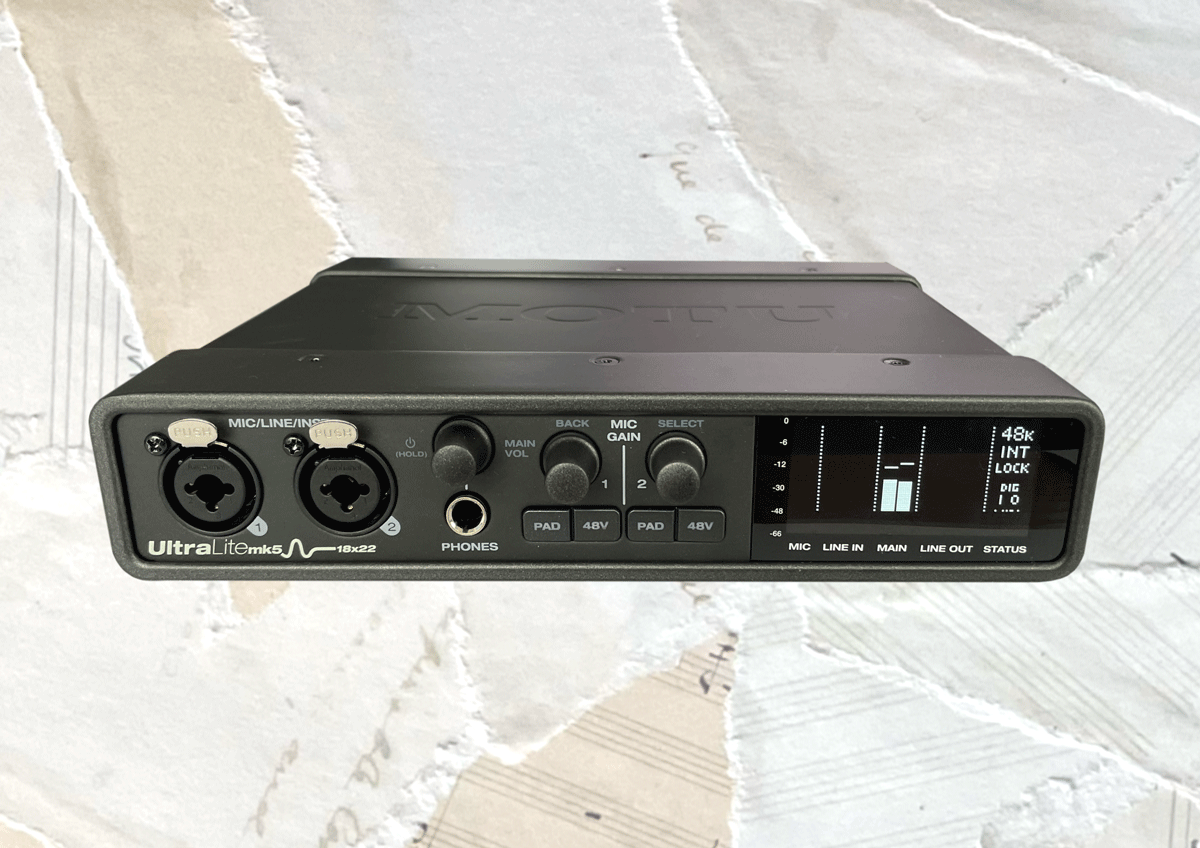
Front panel of the MOTU UltraLite Mk5
XLR TRS Combo inputs
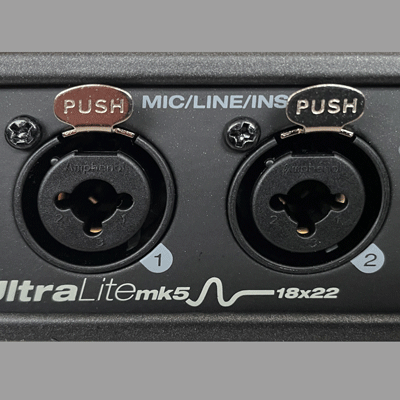
On the front panel are the two XLR TRS combo jacks for plugging in microphones and instruments, such as guitars. You can also connect a line level source here, but make sure to press the -20 dB pad switch if you’re connecting a line level XLR cable.
Combo input controls
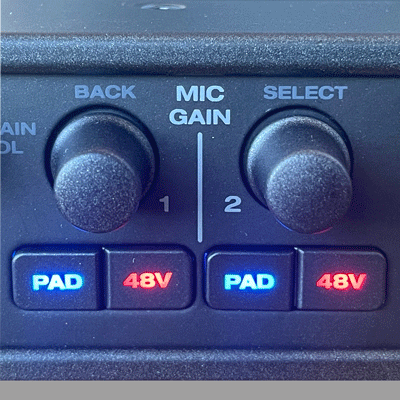
Each combo jack has a separate phantom power and pad switch, which reduces the audio signal by 20 dB. They also have their own gain knobs which control the gain in 1dB steps, from 0 to an impressive 74 dB.
The gain knobs are also used to access the main menu by pressing them, and following the directions on the screen.
Headphone controls
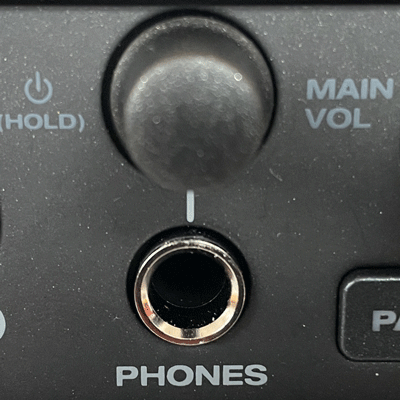
A dedicated 1/4″ headphone jack is easily accessible, with a volume control dial above it. Pressing this volume rotary encoder also changes its function, toggling between main volume output and headphone volume.
Th encoder moves in 1dB steps, and I did find it taking a long time (multiple rolls of the knob) to make large changes in gain. Its not a deal breaker, and probably something I’d just get used to after a while.
The frequency response of the headphone output was very flat, with a low output impedance. This should minimise variations in the frequency response across a range of headphone types of different impedance.
I tested the Mk5 with 3 different headphones:
Sennheiser HD650: These are 300 ohm open back headphones which I use for critical listening. I found my sweet spot with the Mk5 headphone volume set at -10dB, which was comfortably loud. The sound was beautiful – detailed and clear with no distortion. I also tried going to full volume (0dB) and found no degradation in the signal. The volume was a little too loud for my ears, but might suit some listeners.
Beyerdynamic DT250: These are 80 ohm closed back headphones which I normally use for tracking. I found that around -16dB to -18dB was loud enough for me, and the sound was clear and detailed. Going above -10dB certainly provided a lot of volume, but there was noticeable distortion.
Sennheiser 686i earphones: These are non professional 30 ohm earphones. The sound was a bit thin and tinny, and reasonably loud, with the volume at -30dB. Certainly not bad, but not suitable for critical mixing or mastering. The sound began distorting at -20dB, and turned into a mess at -10dB, where it was far too loud for anyones ears.
OLED Display
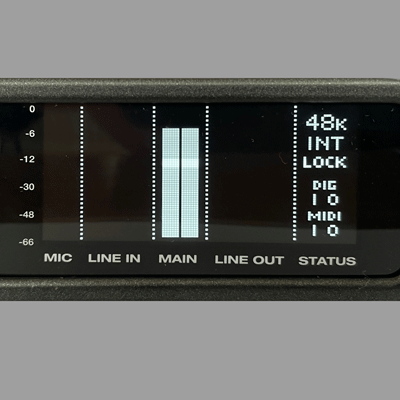
On the right of front panel is a black and white OLED display, which is useful to see the levels of all inputs and outputs. The level meters are bright, clear and easy to see, and certainly possible to set accurate gain levels with the dBfs level markers.
The right side displays the current sample rate and other digital information.
But it would’ve been nice to see green, orange and red warning colours, which make it so clear when the signal’s close to clipping. Interesting that full colour metering is found on the cheaper MOTU M2.
On off switch

On off switches are relatively rare on interfaces in the Mk5 Ultralite’s budget range. On first glance you’d be forgiven for thinking it wasn’t an option. But if you press and hold the volume knob for three seconds, it will turn the interface on or off.
This is a welcome feature, and stops you having to physically unplug the power supply cable to turn it off.
Direct monitoring on the Ultralite Mk5
Note, that there’s no ‘Direct Monitoring’ button on the Mk5 front panel Direct monitoring is a common feature on audio interfaces, including MOTU’s cheaper M2, M4, and M6. It allows you to hear your input signal, such as a microphone, directly, without any latency or delay, as it doesn’t pass through the circuitry of your computer.
You can of course create this through the external software – Cuemix, by adjusting the amount of each input you want to hear on the headphones output mix. It would be nice to have the physical controls though.
Back panel of the MOTU UltraLite Mk5
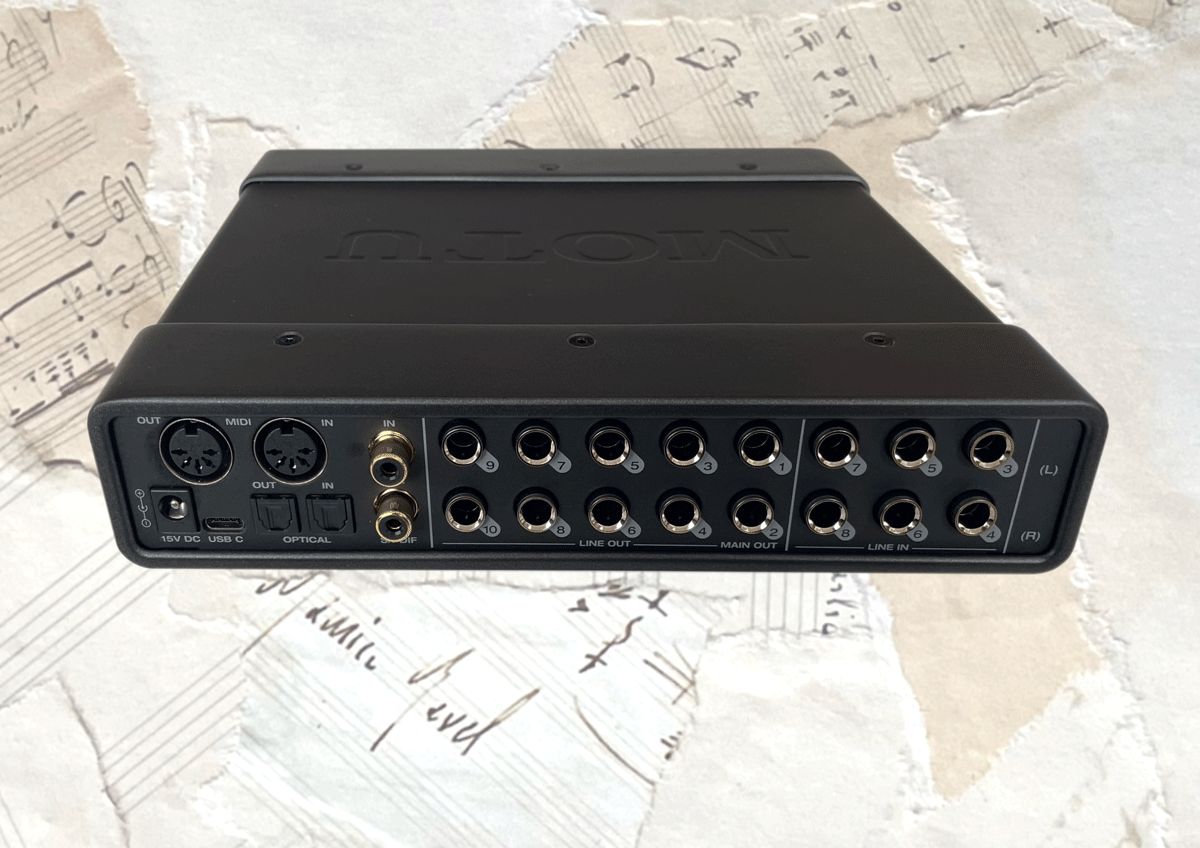
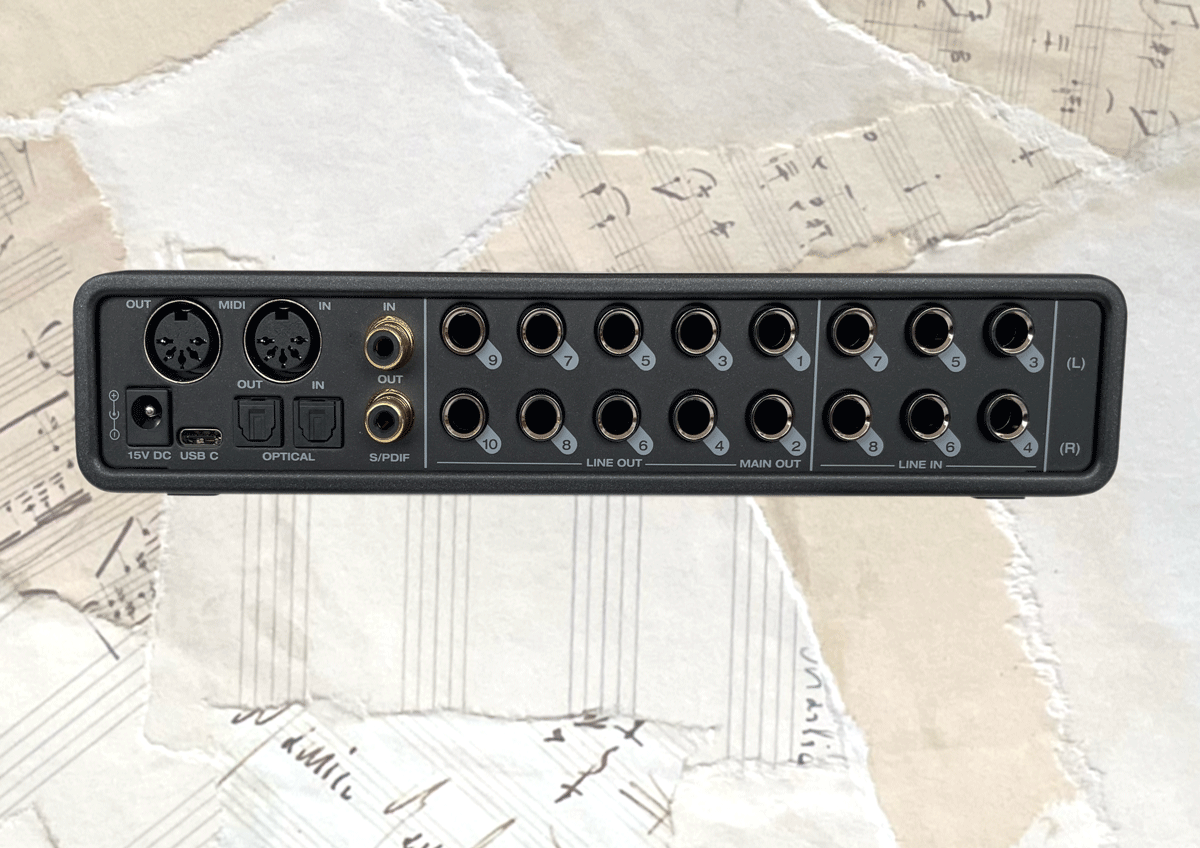
The back panel reveals the remarkable extent of the UltraLite Mk5’s versatility and flexibility, with digital connections, MIDI in and out, 10 balanced outputs and 10 balanced inputs.
Power socket
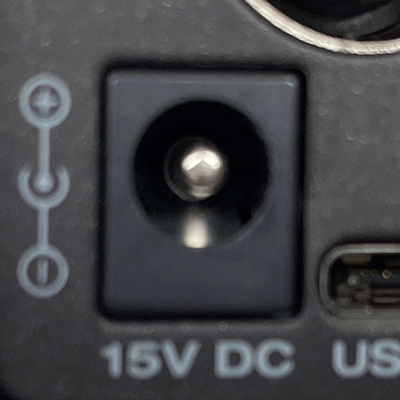
On the back panel is the DC power connector – the UltraLite Mk5 doesn’t draw power from the USB-C connection like most other small audio interfaces, as it needs more power than that which would b available through the USB-C socket).
Plugging it in would give me a sense of stability too, knowing that there were no features competing for power while performing live. The power supply comes with a range of adaptors for various countries, which easily and firmly slot into place
USB-C connection
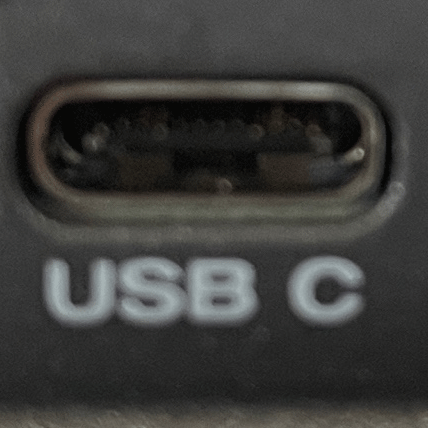
Th USB socket has a reassuringly firm clickable connection socket, enabling it to connect to a USB2.0 or later device. Being ‘class compliant’, it works straight away with IOS devices. If you’re planning to use your Mk5 with equuipment which has a lightning port, you’ll need an Apple Lightning to USB3 Camera Adapter.
MIDI connections
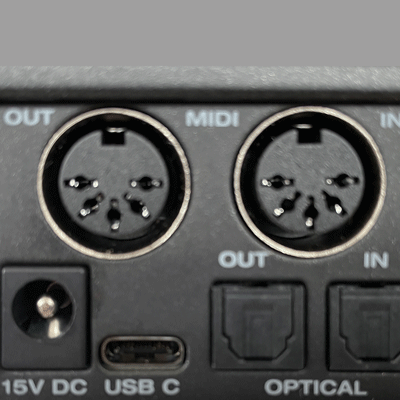
Next to these are two traditional 5 pin midi connectors (in and out). While you can handle MIDI duties through USB, the addition of these two traditional sockets enable you to
S/PDIF and RCA connections
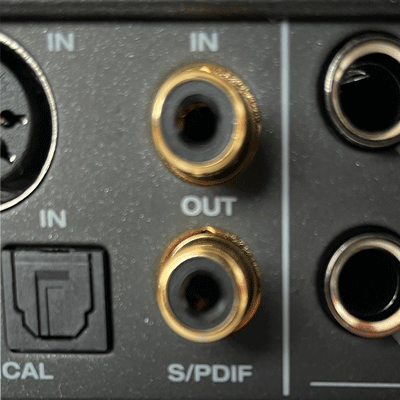
On the rear of the UltraLite-mk5, there’s a pair of RCA style S/PDIF jacks, which provide stereo, 24-bit digital input and output. They can be used in two different ways – as RCA ‘coax’, or optical TOSLink’
ADAT and optical connections

There are also 2 ADAT optical lightpipe sockets, which provide up to 8 channels of
24-bit digital inputs and outputs. This allows you to connect to other digital external gear, such as processors or digital mixers. These ADAT sockets can also be configured as stereo TOSLink (optical S/PDIF) connectors if needd.
It’s worth noting that this is reduced to just 4 channels if you increase your sample rate to 88.2 or 96 kHz, and at 176.4 or 192 kHz, neither S/PDIF or the optical channels will be available.
Outputs on the Mk5
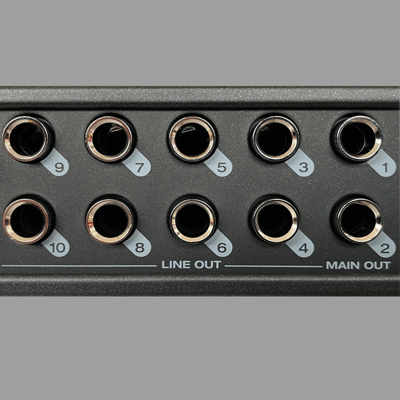
Further along the back panel are 10 balanced line out TRS 1/4″ sockets. You’ll use 2 of these for your main outputs to the studio monitors, leaving a further 4 stereo outputs to play with – you can use these for a second or third pair of studio monitors, stage monitors a headphone amp, or to send signals out to audio processors.
It’s this amount of outputs which really makes the Ultralite Mk5 stand out from other audio interfaces – I think it would work well for producers and home recordists who need the versatility. And also sound artists and live performers who might need surround sound, stage monitoring, or headphone distribution. The last pair are specifically for your main powered monitors.
As well as being balanced, all of these outputs are DC coupled, so they
can be used for CV control on devices such as Eurorack.
Line inputs on the Mk5
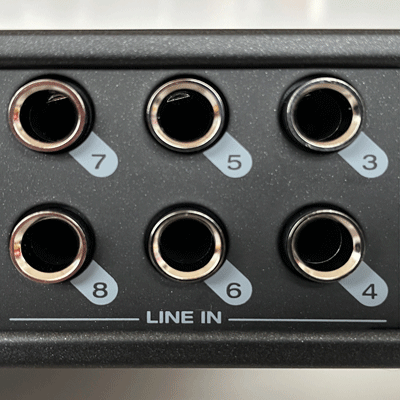
To the right of the line outputs are 3 pairs of balanced line inputs. You can use these for line level sources, including keyboards and MP3 players. There are two groups of line level signals: -10dBV for
- -10 dBV for consumer equipment such as DVD and MP3 players
- +4 dBu for pro level equipment, including mixing desks and signal processors.
You can adjust the input level through the CueMix 5 software, where you can also enable the ‘Phase Invert switch’.

MOTU UltraLite Mk5 Sound quality
The sound quality of the MOTU MK5 Ultralite was extremely high quality – it seems to combine clarity and transparency with a subtly cohesive warmth.
As is the standard in audio interfaces, it’s 48 bit, with a sample rate of up to 192kHz. Despite having so many features, and such a compact form factor, it seems it has all been achieved with no compromise in sound quality.
The mic input frequency response is very flat within the audible range, and it seemed unaffected by changes in gain. I couldn’t hear any distortion at all. The Ultralite Mk5 really does have an exceptionally clean sound.
The line level inputs on the front panel weren’t quite as flat as those on the back, with a very slight roll off in the bass. This isn’t something to be concerned about – it’s barely perceptible. The inputs on the back where extremely flat.
The line level outputs also had a very flat frequency response with no distortion. And the round trip latency at various settings was pretty good, but it will of course depend on your project – the sample rate you’re using as well as the buffer size.
Dynamic range of the UltraLite Mk5
Dynamic range is an important figure for revealing how much headroom you have while recording without the risk of adding noise. I found the mic inputs to be a slightly higher than the stated 115 dB, which I was of course pleased to find. It was the same with the line level inputs on the front. Interestingly, the line level inputs on the back had a higher dynamic range than the front, just below the stated 120 dB.
So, in short, use the line level inputs on the back panel, before you run out and then add to the front. Though in reality, all the inputs are fantastic quality.
Th dynamic range of the outputs are a very impressive 124 dB, with the output level falling just a little short of the stated +21 dBu, but still excellent, with no perceptible distortion.
MOTU UltraLite Mk5 Pre amps
Preamps are an important component of any audio interface. They need to boost the volume of the audio signal without introducing extra noise and distortion.
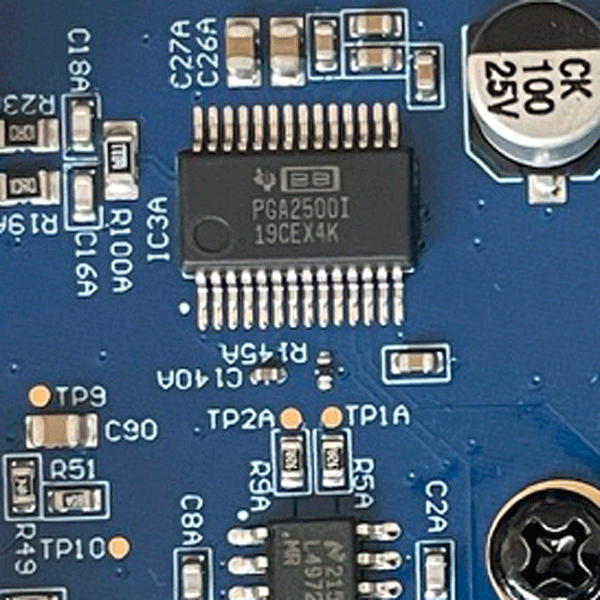
On both inputs and outputs I spotted a number of OP1678s from Texas instruments. The Mk5 has a digitally controlled microphone preamplifier, the Texas instruments PGA2500, which is from their renowned Burr-Brown range.
The preamps are extrmely quiet, and any distortion is imperceptible – lower than the noise floor. With around 75 dB of gain, there’s no need for a Cloudlifter or Fethead to raise the signal. In short, the MOTU Ultralite Mk5 delivers excellent sound quality in both the inputs and outputs.
MOTU UltraLite Mk5 Digital Analogue Convertors
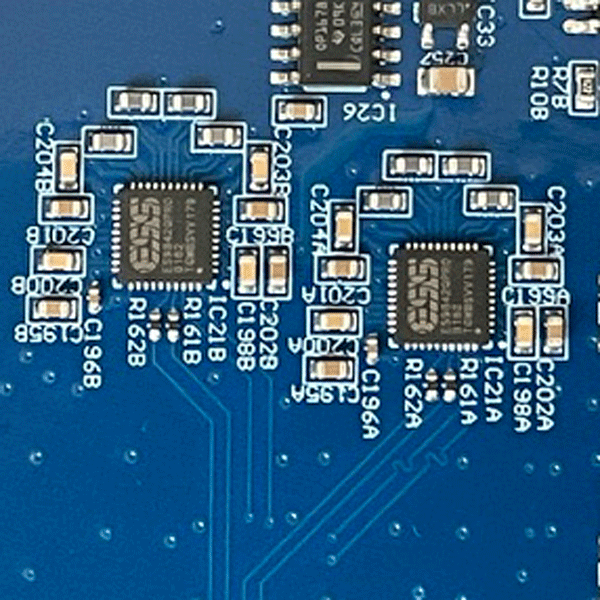
As a signal from a mic enters the audio interface, it converts from an analogue to a digital signal, where it can be processed within the computer. Once processed, and exits the computer to the studio monitors, it’s converted again, this time from digital to analogue.
The quality of the DA and AD convertors is imperative to the quality of sound the audio interface is capable of producing. The Mk5 features the renowned ES9026PRO Digital Audio convertors, which MOTU claim to provide a massive 125 dB of dynamic range. Although it doesn’t quite reach that figure in testing, it still does achieve a huge dynamic range.
The Analogue to Digital convertors are no less impressive, incorporating the ES9842 PROs.
MOTU UltraLite Cuemix 5 software
You’ll have to use the Cuemix 5 software to access most of the mk5 controls – it works on windows, Mac and IOS devices. There’s so many features, here including some incredible routing flexibility – you can create individual mixes to specified line outputs, set up loopback and much more.
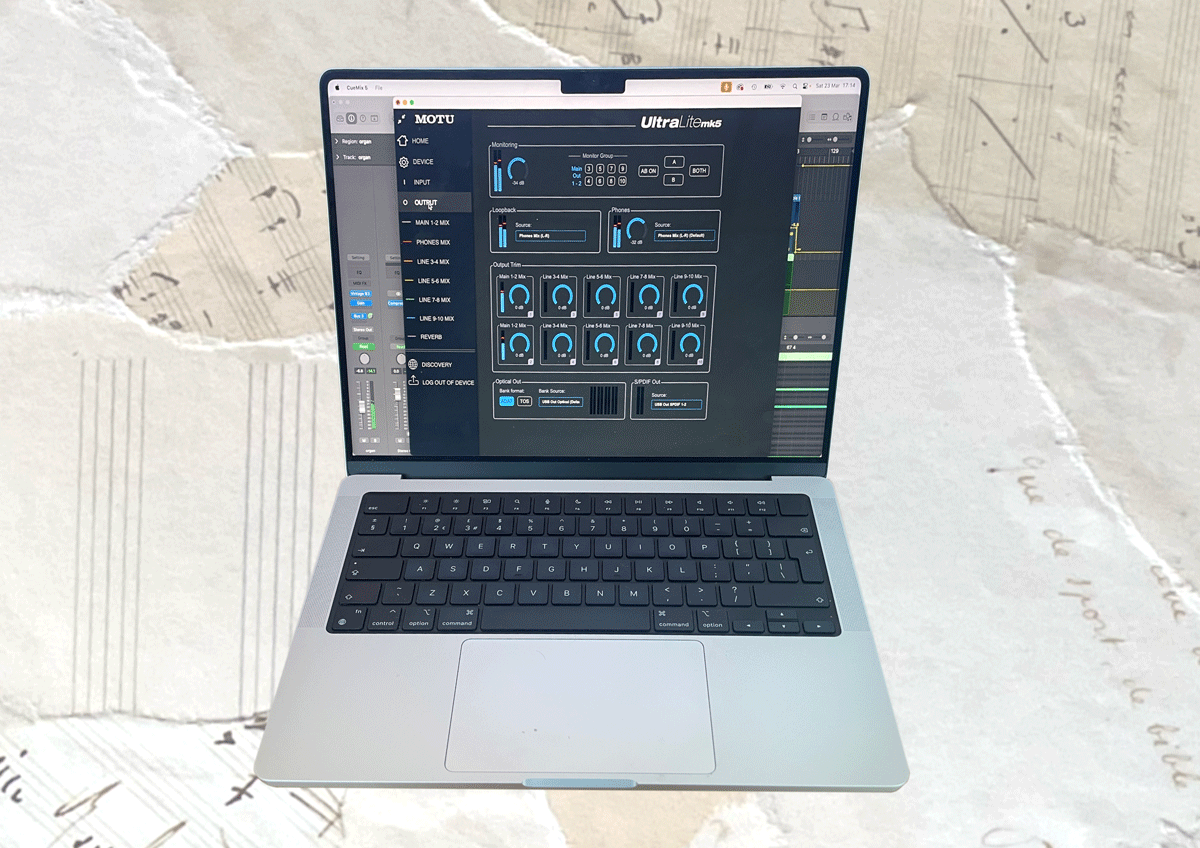
There’s an effects section, consisting of useable parametric EQ, compression, gate and reverb. They’re virtually real time effects, as latency is so low on these. The general round trip latency on the Ultralite is pretty good too, but of course dependent on the sample rate and buffer size you’re working with.
I have to say, the effects section is a bit limited when you compare it to the old Ultralite Mk3, which had 7 bands on individual channels, as well as the output. The compressor and gate are also a bit limited compared to standard software processors.
MOTU UltraLite Mk5 Loopback feature
The loopback feature is appearing on a lot of budget audio interfaces now. It makes it easy to record the audio from your PC along with your microphone. An obvious use for loopback would be if you were live streaming or podcasting.
This used to be a very complicated process, but can now be achieved with the Cuemix 5 software quite simply. By default, the loop back channels are found under ‘USB in’, channels 9-10, which is just after the 8 analogue channels. Here you’ll find the audio output of your computer which you can mix with live inputs.
The MOTU UltraLite Mk5 in Stand alone mode
As well using your Mk5 as a standard audio interface with your computer DAW, you can also use it as a powerful stand alone mixer with built in (although limited) effects:
- 4-band parametric EQ
- compression
- reverb
You’ll have to use the supplied Cuemix 5 software for this, and connect it to a tablet, laptop or any IOS device via USB.
MOTU UltraLite Mk5 Bundled Software – Performer Lite
Many audio interfaces come bundled with a range of software plug-ins, and limited-feature DAW packages. MOTU have their own highly regarded DAW, Digital Performer.
Included with the Mk5 is Performer Lite, which has many of the features included in the full version, including effects, virtual instruments and multi-track recording and sequencing. It’s a good way to try the software out. But there’s no real advantage to matching a MOTU interface with a MOTU DAW. I’ve made a list of all the most popular DAWs here – see which one of them suits your music and workflow.
MOTU Ultralite Mk5 dimensions and weight
Because of all the extra functionality, the UltraLite Mk5 is slightly bigger and certainly heavier than many of the 2 preamp audio interfaces I’ve reviewed here.
It’s more than heavy enough to sit stably on your desk while plugging and unplugging cables, and easy to fit into a backpack along with cables and a mic or two.
It’s actually exactly half a 19″ rack size, and there are ear sets to make up the extra space in your rack unit, and also a metal connecting plate, so you can join two Mk5’s together within the same rack.
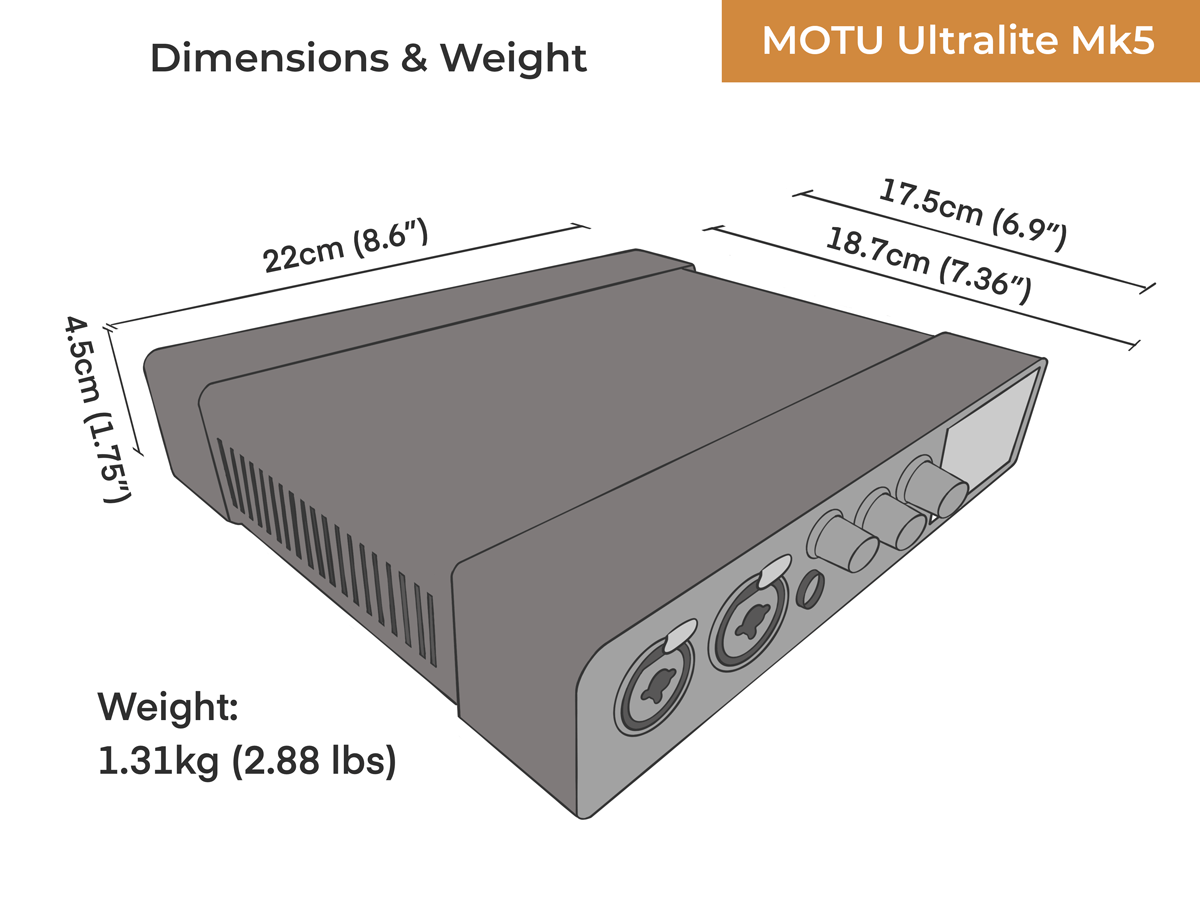
If you were to compare it with the Mk3, you’ll see from the table below that it’s a very similar size, but nearly twice the weight.
MOTU UltraLite dimensions – Mk5 vs Mk3
| Mk5 (reviewed here) | UltraLite Mk3 | |
| Weight | 1.31kg (12.88 lbs) | 700g (1.55 lbs) |
| Height | 4.5 cm (1.75″) | 4.5 cm (1.75″) |
| Width | 22cm (8.6″) | 24.1cm (9.5″) |
| Depth (enclosure) | 17.5cm (6.9″) | 17.8cm (7″) |
| Full depth | 18.7cm (7.36″) | 19.5cm (7.68″) |
MOTU Ultralite Mk5 vs MOTU M2 and M4
Motu’s M series, such as the M2 (reviewed here) and M4 were their first foray into the home recording market. If you have no need for the extra inputs and outputs on offer from the Mk5, or the Cuemix software, consider the M2 for 2 preamps, or the M4 with an extra 2 line inputs and more outputs.
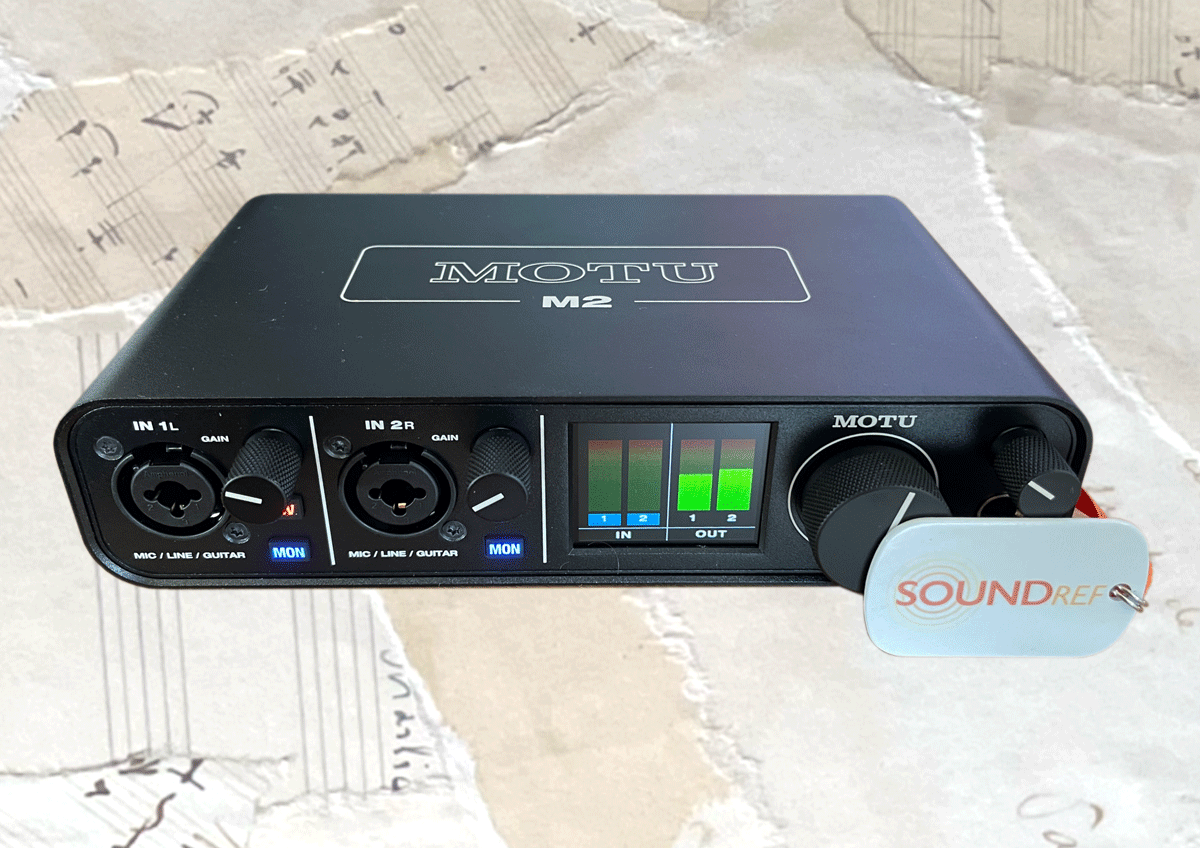
There’s also the M6 which has 4 separate pre amps for recording instruments and microphones. None of the M series have potentially confusing software to deal with, and would be more suited to beginners, who still need good quality sound.
Verdict
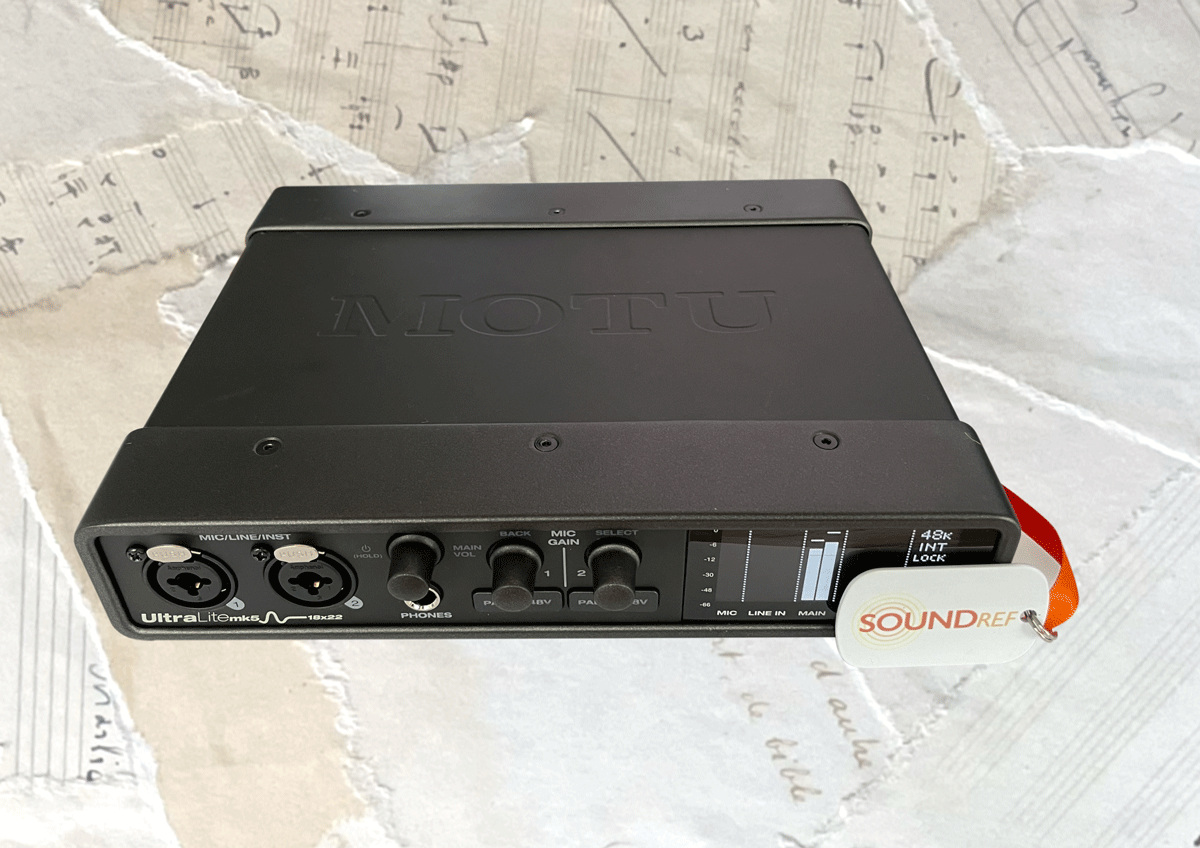
I find it hard to criticise anything on the Ultralite mk5 – MOTU have provided a huge amount of inputs and outputs, with software which enables some very complex routing should you need it.
It’s also a hugely versatile interface – as well as using it as a standard audio interface with DAW, you could put it to use in surround sound for art installations, mixing on stage, distributing headphone or stage monitor signals, or testing your mixes on 5 pairs of studio monitors!
And all of this while maintaining truly excellent, transparent sound quality and very quiet preamps with a huge amount of gain and dynamic range. If you don’t mind the external power supply, The MOTU Ultralite Mk5 is a high quality and endlessly versatile audio interface for studio and live use.
MOTU UltraLite Mk5 frequently asked questions
Does the MOTU Ultralite Mk5 have separate phantom power for individual pre amps?
The MOTU Ultralite Mk5 is unique in that it does have the option to turn phantom power on for individual pre amps. This enables you to use a condenser mic and a ribbon mic at the same time.
Does the Ultralite Mk5 have an on/off switch?
The Mk5 doesn’t have a dedicated power switch, but can be turned on or off by pressing the volume control knob for a few seconds.
Can you factory reset an Ultralite Mk5?
Yes you can perform a full factory reset on the Mk5 by pressing the ‘Select’ knob to enter the main menu, and navigating to reset
Click here for other recommended 2 channel audio interfaces for your home studio
